Hydroponic gardening is the perfect solution if you want to continue growing herbs and veggies throughout the winter. As an added benefit, the entire contraption is soil-free. Instead, you'll grow plants directly in water, similar to propagation. You will also add a nutrient solution, which acts as fertilizer, to help the plants grow and thrive.
It's easy to DIY your own hydroponic garden as long as you've got the right tools under your belt. Plus, it's a great way to up-cycle items you likely already have at home. Below, you'll discover everything you'll need followed by step-by-step directions so you can create a hydroponic system suited to your space and needs.
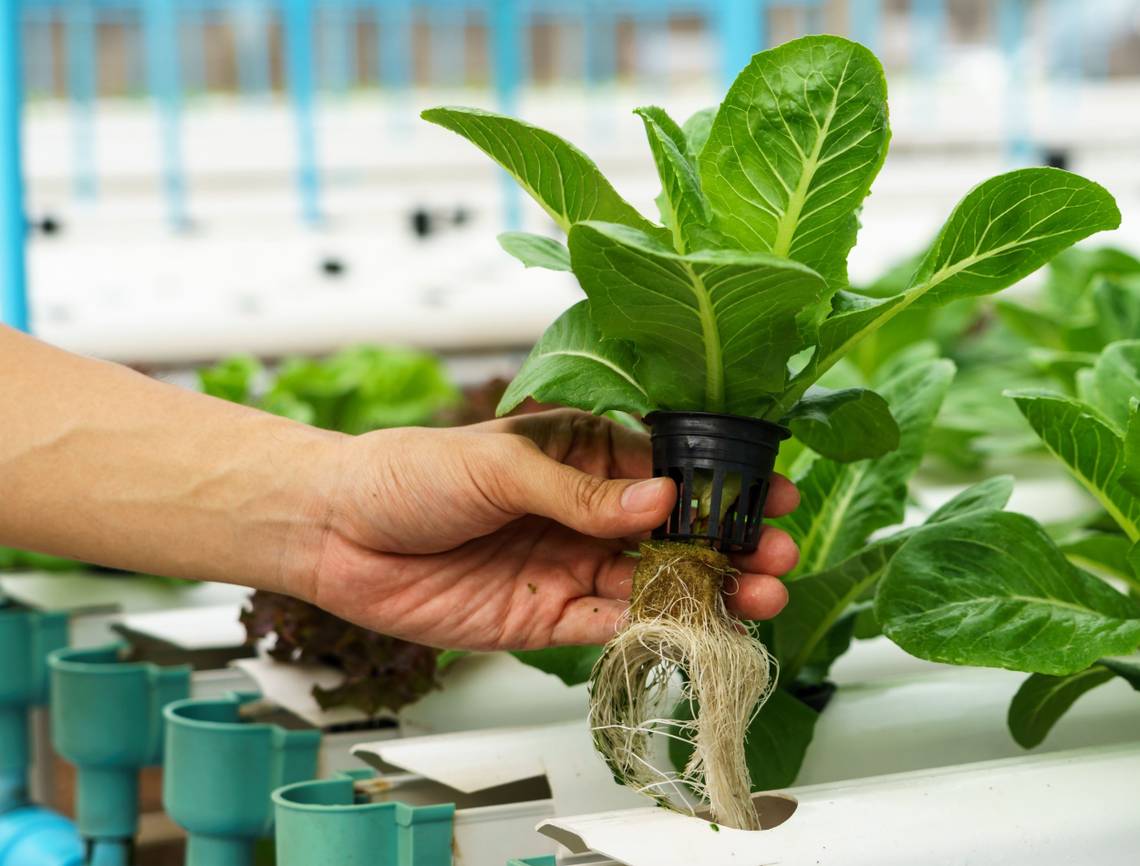
Tools You'll Need

Image credits: 41330 via Pixabay
Before you can get started on a hydroponic garden, there are a few tools you'll need, alongside plants for the garden! Find the essentials listed below.
- PPE (safety goggles and protective gloves)
- Large opaque container – a 5 gallon bucket or plastic storage bin will do
- Bucket lid or large sheet of polystyrene
- Drill
- Set of drill bits
- Measuring tape
- Net pots
- Air pump with air stone
- Hole saw with arbor
- Grow lights
- Nutrient solution (fertilizer)
- Water
- Wood and screws for a frame (optional)
Building a Hydroponic Garden

Image credits: Pragyan Bezbaruah via Pexels
Below, you'll find the step-by-step directions for building your own hydroponics garden!
Step 1: Select and Prep a Container
To begin creating your hydroponic garden, you'll need to select a container that is suitable for your needs. If you just want to grow a few herbs, you won't need a very large container. If you'd like to grow a tomato plant or lettuce, you'll need a larger and wider container. An opaque container will stop light from reaching the water and effectively prevents algae growth.
With PPE on, drill a small hole into the side of the container, near the bottom. You can then slide the tube for the air pump through and place the air stone inside the container; this device will pump oxygen into the water for needed circulation. Ensure the air pump is outside the container.
Step 2: Prepare the Lid/Polystyrene
With your container prepped, it's time to create the lid or flotation device for the plants. Whether you are using polystyrene or a lid, you will need to drill holes for the net pots using a hole saw with an arbor. This 'lid' will hold your plants while their roots dangle in the water. Net pots have holes for plants to grow their roots through but the plant must be slightly larger than the holes to ensure they don't fall through.
If you are using a larger container, you can drill multiple holes. Use a measuring tape to properly space the holes depending on how large the roots will grow.
Step 3: Final Touches
With the container and lid ready, you can fill the container with water. You can then attach the lid or flotation device. The water should be high enough that the plants are suspended above the water, on top of the lid or polystyrene, while the roots hang into the container and absorb nutrient rich water.
Now, add the nutrient solution, which you can purchase online or at a garden center, and test the pH of the water. In general, plants grow best in a pH of 5.4 to 7. Adjust the amount of fertilizer you add to reach the desired pH, placing the net pots in the holes and adding the plants. Remember, you will need to start seeds separately and transplant the seedlings once they develop roots.
As a final touch, add some form of lighting, whether you place the setup near a well-lit window or add a grow light. Also, you can build a stand or frame for the bucket. This is completely optional, but it's a nice way to make the contraption more aesthetically pleasing.
Step 5: Care Tips
Once the system is in place, be sure to maintain the pH level by testing and fertilizing the water. Also, top off the water regularly to ensure that half of the roots are submerged. While the water should touch the bottom of the plants when they are initially planted, the water level will naturally drop as your thirsty plants drink. When you do fill it up ensure the roots are not fully submerged - it's best for the plant's health. Remember to add more nutrients as you add more water.
While short season crops such as lettuce won't require fresh water, you may want to change the water out for longer season crops like tomatoes. This is because the water is prone to algae and bacterial growth. You can reuse the fertilized water by emptying it into your garden. Then, clean the container with soap and water and refill with fresh water and nutrients, ensuring half of the plant's roots are submerged.
While the plants will be protected from soil-borne pests and diseases, you may still encounter fungal diseases and indoor pests such as thrips, aphids, and whiteflies. So, it's important to follow proper sanitation methods. Ensure you clean out the container when you change the water, isolate new plants before adding them to the garden, commonly inspect the plants, and start over if you notice an infestation or disease.
Advantages of Hydroponic Gardening

Image credits: sippakorn via Pixabay
Now that you know how to make your own hydroponic garden, you may be curious about why you should! Find the list of benefits to this form of gardening below.
- Ideal for growing herbs and vegetables indoors during cool periods.
- Affordable and easy to DIY with accessible materials.
- There is no need for soil prep or choosing the right type of soil for optimal plant growth.
- You don't need to worry about soil diseases or weeds.
- There is no surface watering or stress about overwatering.
- The setup requires very minimal maintenance.
Get (Hydroponic) Gardening!
While you can purchase a pre-made hydroponic system, it's simple and affordable, not to mention eco-friendly, to build your own. Plus, it's a convenient and low-maintenance way to develop your own home garden! With the necessary tools in mind and plenty of knowledge on how-to build your own hydroponic garden, you're all set.
Do you have any tips for hydroponic gardening? Share in the comments below!