As the crisp breeze of autumn finally starts to roll through your neighborhood you probably have the same idea as everyone else, break out the fall decor! It's almost time to throw up your Halloween decorations and start swapping out those summer centerpieces for pumpkins.
No matter how you mark the change of the seasons, remember your garden needs a good sprucing up too. If you want to see your gorgeous perennials make an appearance again next year, it's important you know how to care for them in the fall.
In this article you'll learn necessary housekeeping steps to make your perennials last the fall season. A little TLC now can make a huge difference when it comes to those spring blooms.
What You Need

Image credit: Dirk Ott via Shutterstock
Before you start your fall preparations, make sure you have all the tools:
- Paper bags for bulb storage
- Tray for drying bulbs
- Sharp garden shears
- Fertilizer suited for your soil type
- Organic mulch
How To Care For Perennials In The Fall
Step one: Assess the Situation

Image credits: Capri23auto via Pixabay
Before you do anything, you need to take a moment to assess the state of your garden. What types of perennial plants are you working with, which flowers thrived this gardening season, and which could have done better. It's a great time to move your plants to a different area in your garden for more or less sunlight, and different soil quality. You may also need to move plants if you have noticed that the local wildlife, like deer, are feasting on them.
Remember, every plant is different and have unique needs so don’t forget to take note of which plants are planted together in different areas. The plant combinations that you choose can both help and hinder your plant’s growth. Where possible, choose complementary plants that will help one another not only survive but thrive in your garden space. Besides, everyone could use a companion.
Step Two: Weed the Garden Thoroughly

Image credits: Avalon_Studio via Canva
To get a better idea of the state of your garden, take the time to remove any weeds or unwanted plants. This means carefully removing the entire plant, including the root system. This will help prevent weeds from returning and taking over your garden during the winter. Which plants are considered unwanted will come down to personal preference. While some plants are truly weeds, you may have also noticed that some perennial flowers that you enjoyed in the previous season no longer match your vision for your garden space. If this is so, you can move these plants into a container or to a different section of your garden.
Step Three: Dig Up and Store Bulbs

Image credit: Sarycheva Olesia via Shutterstock
If you work with perennials that grow from bulbs, they will need to be dug back up again and stored during the winter months. If left in the ground, especially in colder climates, they most likely won’t survive. Carefully cut back all live and dead foliage after you notice it starting to yellow. Dig up the bulb while taking care not to damage the bulb or the stem that extends beneath the soil surface, known as the tuber.
Lay the bulbs on a tray to dry them for 24 hours to prevent fungal growth. They can then be stored in a cool, dry location such as a basement, shed, garage or cellar. The ideal temperature for most bulbs is between 60- and 65-degrees Fahrenheit. You can store the bulbs in nets or paper bags to make identification easy when planting your garden beds next spring.
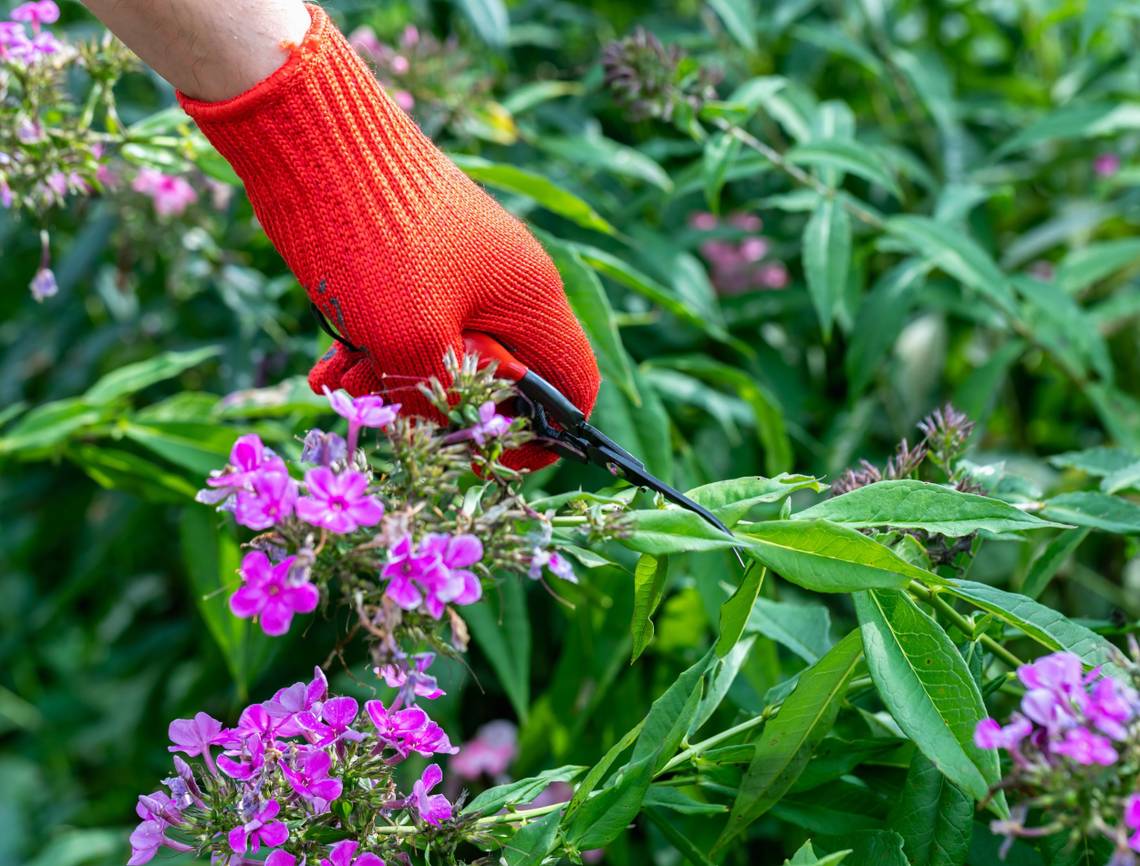
Step Four: Cut Back and Divide Perennials Where Necessary

Image credit: VH-studio via Shutterstock
Many perennials are known for their ability to grow and spread, sometimes on a large scale. The best way to control this is to divide your perennials during the fall. By doing this during the cooler weather, you are allowing the root systems of your perennials to re-establish themselves before the heat of summer arrives.
Many perennial flowers that remain in the garden during the cold weather should be cut back to help them harden off and survive even a harsh winter. These plants should be cut down to the basal growth, or approximately 6 to 8 inches above soil level.
Some perennials that you should cut back during the fall months include:
- Hostas
- Phlox
- Daylily
- Peony
- Yarrow
- Bee Balm
- Bearded Iris
- Lilies
- Blanket Flower (Gaillardia)
- Salvia
Meanwhile, the following perennials should be left up through the winter. It could be for several reasons, including adding protection to the plant itself or providing local wildlife with much-needed sustenance when food is harder to come by. It includes annual wildflowers like cosmos, sunflowers, garden mums and zinnias, coneflowers, black-eyed Susan, butterfly weed, ferns, and ornamental grasses. The exception would be the removal of any diseased or dead foliage that could impact the overall health of the plant.
Step Five: Cut Back on Watering

Image credit: JillWellington via Pixabay
In drier climates with a lack of snow and precipitation, you will need to water your perennial garden once a month to keep your plants healthy. In all other areas, you should start to cut back on the amount of water you give your plants during the fall. It will help to prepare the plants in your garden for the colder months ahead.
Step Six: Fertilize Your Gardens

Image credit: New Africa via Shutterstock
In addition to preparing your plants to survive the winter colds by helping them adjust to the change in moisture, you can also increase your chances of a thriving garden bed by providing your plants with the nutrition that they require. For the best results, work layers of compost into your garden, reaching down approximately 4 to 6 inches below soil level. It will allow the nutrients to reach your plants while avoiding any unnecessary run-off.
Step Seven: Mulch the Area

Image credit: KaliAntye via Shutterstock
While not all plants will require mulch, it can provide an important barrier both to insulate your perennial flowers from bad weather and restrict access for animals where necessary. By using an organic mulch, you are not only creating a protective layer, but you are also offering a form of compost as the materials decompose over time. It includes materials such as bark chips, shredded leaves, straw, and pine needles.
If you live in an area that has frequent cycles of freezing and thawing, such as those found in USDA Hardiness Zones 7 or 8, you may believe that the warmer temperatures will prevent the need for mulch. However, the constantly changing temperatures will often lead to frost heaving, a condition in which the soil swells upwards. It can expose your plant’s roots to the elements, which put the whole plant at risk. A layer of protective mulch will help to mitigate the problem.
Another situation where you may want to consider adding a layer of mulch is when dealing with tender or sensitive plants. These could be plant varieties known for their struggle with the cooler temperatures or those that have just been planted and couldn’t yet develop a root system that extends far enough down to make use of the insulation provided by the ground.
Springs Around The Corner
The winter months aren’t always the most fun for gardeners, but with a little bit of work and preparation, you can enjoy your perennial garden when it blooms once again. If you are a newer gardener, be patient and have fun with the process.
Reading about how to care for perennials and carrying out the process are two different things. Be open to learning from experience and each year will get easier as you better understand the needs of your garden specifically.
Have any fall prep tips or tricks? Share them in the comments below!