Soil tests refer to one, or more varieties of soil analysis, which are conducted for several reasons. Some tests determine soil composition, acidity, pH level, and nutrient content. Most notably, a soil test can make out the fertility of the soil, which can project its expected growth potential. Garden soil tests are generally inexpensive but can teach you a lot about the soil you are working with. Additionally, you can test your garden soil with appliances you have lying at home, which makes the efficiency twofold. Learn more about DIY tests you can conduct on your soil.
The Importance of Testing Your Soil
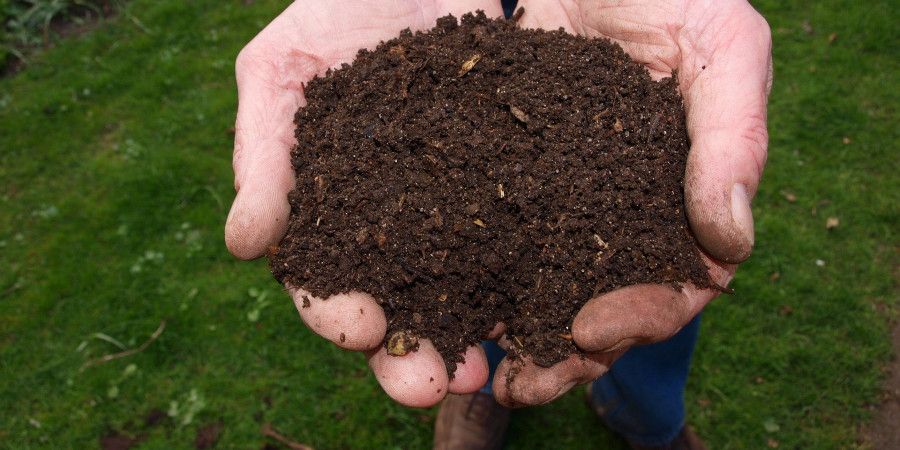
Image credits: jokevanderleij8 via Pixabay
1. To Improve Soil Fertility
Nearly 60% of crop yields depend on soil fertility. That's why testing it regularly can determine whether you need to improve it or not. Soil fertility is usually determined by chemical and biological properties, however, these aren't readily observable. Properties such as color, texture, and structure are more perceptible and once tested can determine the type and quantity of fertilizer needed to improve the soil’s quality.
2. To Develop a Proper Soil Fertility Management Strategy
Once you’ve tested your soil you can devise a strategy to maximize the efficiency of nutrients and water use as part of improving your soil's health.
3. To Minimise Expenditure on Fertilisers
With information revealed through testing, you will know the type and quantity of fertilizer your soil needs, this saves you time and money.
4. To Prevent Over Fertilisation and Soil Degradation
Applying fertilizer without knowing what nutrients your soil is deficient in can lead to over-fertilization which can harm the environment and cause soil degradation. Unbalanced soil management results in soil erosion and soil restoration is a lengthy and costly process.
5 DIY Soil Tests You Can Conduct With Household Items
1. Percolation
Soil percolation shows how quickly water moves through soil and is measured in minutes per inch. If the percolation rate is low, then there is too much water in the soil, which means there is a lack of oxygen. These conditions encourage the growth of pathogens and hinder a plant's ability to uptake water. Some culinary herbs, for example, need effective drainage, otherwise, they will die from over-dampened roots.
Find out your soil's drainage with this simple test:
- Step 1: Dig a hole about 6 inches (15cm) wide and one foot (30cm) deep.
- Step 2: Fill the hole with water and let it drain completely
- Step 3: Thereafter, fill it up with water again
- Step 4: Time how long it takes for the water to drain
If the water takes more than four hours to drain, your soil’s drainage is poor. You can improve soil percolation by adding compost to help break tight soil particles and provide nutrients to plants.
2. pH Tests
Healthy soil has a pH level between 5.5 and 7.5. If the pH level rises, nutrients like phosphorus and iron decrease and nutrients like molybdenum build up to toxic levels, which can be poisonous to plants in large quantities. Conversely, if the pH level is too low, the soil is acidic and deficient in multiple nutrients, including magnesium, calcium, and molybdenum. Soil pH is important because it plays a significant role in plant growth, affecting soil bacteria, structure, toxic elements, and nutrient availability. Here are two methods you can test soil pH with:
a) The Pantry Soil pH Test
You will need:
- Vinegar with an acidity of at least 5% (apple cider, white vinegar, or balsamic)
- Baking soda
- Distilled Water
Step 1: Dig 4 to 5 holes, each 6 inches (15cm) deep, and take one or two scoops of soil from each hole and toss them into a large container. The depth of holes is important because you’d want to test the soil your plant's roots will stay in. Be sure to mix the soil with the same utensil you used to dig it out.
Step 2: Divide your soil sample between two containers; stainless steel or glass are preferable materials but a plastic container should fare well. Aim for at least half a cup of soil in each container.
Now you will be conducting two separate tests to determine the pH of your soil.
Step 3: In the first container, add ½ cup of vinegar to the soil. If it starts to fizz, then your soil is alkaline and its pH lies between 7 and 8. If it doesn’t react, then your soil is acidic.
Step 4: In the second container, pour enough distilled water over your soil to make a slurry, thereafter add ½ cup of baking soda. If it bubbles, your soil is acidic and has a pH level between 5 and 6. If no reaction occurs, then your soil has a neutral pH, which is a green light for cultivating plants.
b) Cabbage pH Test
You will need:
- Distilled water
- Red cabbage
- 2- 3 spoonfuls of soil from your garden
Step 1: Fill a saucepan with 2 cups of distilled water. It's important that you use distilled water, as tap water contains chemicals and minerals that may taint your test results.
Step 2: Add a cup of chopped red cabbage to the saucepan and let it soak. No other cabbage will work with the test because red cabbage contains anthocyanin, which is a type of natural pigment that will act as a reagent when exposed to the chemicals in your soil.
Step 3: Boil the cabbage in the distilled water for 10 minutes on medium-high heat. The water will take on a deep violet color and become a color-changing test solution. It's best to not let the cabbage simmer for too long, as the deeper the color, the harder it will be to decipher the pH.
Step 4: Strain the liquid from the cabbage into a large container and allow the water to cool until it's warm.
Step 5: Take your spoonfuls of soil and sprinkle them into your cabbage solution and wait for it to change color. This should take a few minutes.
- If the water turns pink, then your soil is acidic and its pH lies between 5 and 6.
- If it turns green or turquoise, your soil is alkaline and its pH lies between 7 and 8
3. Squeeze Test
The squeeze test is a simple way to determine your soil’s structure. Soil structure sheds light on the contents of soil, these contents can be classified by the size, shape, and strength of their bonds:
- Sandy soil is characterized by its high proportion of sand and little clay. This soil is light, warm, dry, and usually acidic. It has quick drainage and is the easiest to work with.
- Loamy soil has an even mixture of different sizes of sand, silt, and clay. It’s easily crumbled when dry and has a smooth yet gritty feel. Loamy soils generally contain more nutrients and moisture and have better drainage and infiltration of water and air.
- Clay soil is a heavy type of soil that remains wet and cold in winter and dry in summer. It is composed of 25% clay and these clay particles hold large amounts of water, causing them to dry slower but also crack in hot weather.
To determine your soil type, you will need a handful of moist soil. Give the soil a firm squeeze, then open your hand.
- If it holds its shape but crumbles after you poke it, you have loam soil
- If it holds its shape even after poking it, you have clay soil
- If it falls apart, you have sandy soil
Now that you know what soil you have, you can either work on improving it or grow plants attuned to its type.
4. The Peanut Butter Jar Test
This test can reveal the composition of your soil with the desirable composition being; 20% clay, 40% silt, and 40% sand. It should take an hour to set up but it takes a full day to conclude the results.
You will need:
- An empty jar like a peanut butter jar or mason jar with its lid
- A ruler
Step 1: Dig a hole that is 6 inches deep and collect enough soil to fill your jar between ⅓ and ½ way full.
Step 2: Fill the jar to its neck with water, then set it aside to let the soil soak it up.
Step 3: Put a lid on the jar, then shake it vigorously for 3 minutes.
Step 4: Thereafter, place the jar on a firm surface and set a timer for a minute.
Step 5: Once the time is up take your ruler and measure the amount of sediment that has collected at the bottom, which is the sandy soil.
Step 6: Wait another 4 minutes and measure the sediment again; this layer will represent the silt in your soil
Step 7: Wait 24 hours to take your third measurement. This will be the clay in your soil.
The end result should be a composition of 20% clay, 40% silt, and 40% sand. If the percentages are significantly off, you are now aware of what you can fix in your soil to achieve a healthy balance.
5. Worm Test
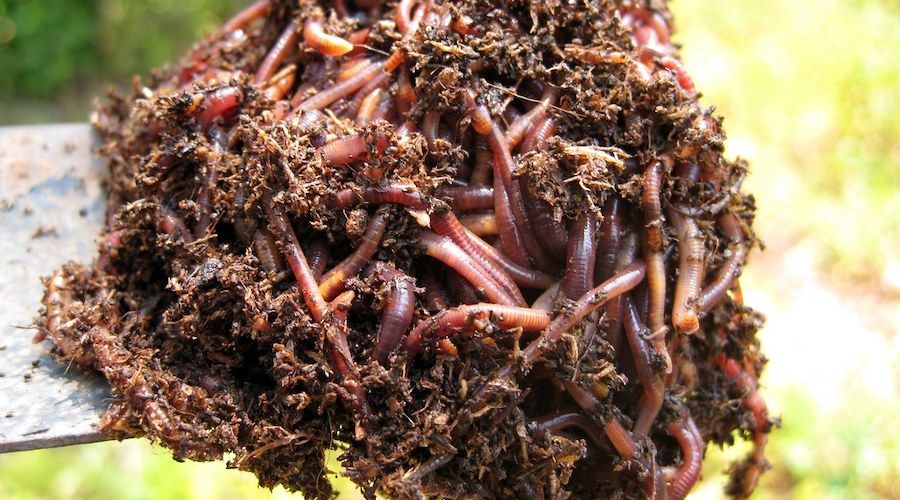
Image credits: amitp via Creative Commons
Worms are an indication of healthy soil. They increase soil aeration, infiltration, nutrient cycling, and plant growth. Along with fungi, they are one of the major decomposers of organic matter which makes nutrients readily available to plants. It isn’t really a concern to have too many worms in your soil. However, there is an ideal range that you can test for.
For the worm test, you will need warm soil that is slightly moist.
Step 1: Dig a hole that is one foot deep and one foot across and place the soil on a piece of cardboard or tarp
Step 2: Sift through the soil with your hands and count the worms as you place them back into the hole.
If you count between five and ten worms, your soil is healthy. If you don’t count as much, you can incorporate earthworms into your soil, just dig in some organic matter before adding them.
In Summary
Soil testing is a simple evaluation for the betterment of your soil. Plants are bound to thrive in healthy soil and you can only maintain this by knowing what state your soil is in. Luckily, the tools you need to find out this knowledge are within reach.


