Do you want to grow potatoes in containers, but don’t know where to start? Growing your own potatoes adds a lot of flavor and fun to any lifestyle. Imagine picking your own home-grown potatoes to ready for a hearty breakfast! And if you have limited outdoor space or live in an apartment, it doesn't mean you can’t grow potatoes with ease. All you need is one strategically placed container.
Here are nine tips to get your potato harvest on track without taking away too much time from your other activities. So read on for some great advice on growing delicious homegrown spuds!
Get The Right Pot

Image credits: Oleg Kopyov via Shutterstock
When planting potatoes, size matters. So, choose the right type of pot for growing potatoes.
You'll need a pot that can hold at least 5 to 15 gallons of soil to give your spuds enough room to thrive and grow big. The larger the container, the more potatoes you will yield in the end!
If you're using fiber grow bags, they are designed to allow excess water to drain away naturally. If you opt for a different type of pot, make sure it has multiple drainage holes to help keep your potato plants healthy and happy.
To add some extra drainage to your soil, add some large rocks to the bottom of your pot. Avoid using gravel, as it will be hard to remove when you’re ready to reuse the soil.
Understand Your Soil

Image credits: Teona Swift via Pexels
To ensure a successful harvest of healthy potatoes, it's important to understand the ideal soil for growing potatoes.
Potatoes prefer well-drained, sandy soil with a somewhat acidic pH level between 6.0 and 6.5. Poorly drained soil can lead to diseased potatoes, so provide plenty of drainage. Adding manure or compost to your potato patch also helps add micronutrients and organic matter that will further improve the quality of your soil.
How to Plant Your Seeds or Tubers

Image credits: Emma Brewster via Canva
If you’re using a 15-gallon pot, add about 4 inches of soil into the bottom of the pot and place around eight seed potato pieces on top. Cover them with another 2 inches of soil so that only the topmost leaves are showing. As they grow, continue to add an inch or 2 of mix every few weeks. This will allow more potatoes to form in the soil below.
If you’re growing with tubers, and you have whole potatoes that are 1 to 1¼ inches in diameter, you're all set! Otherwise, cut larger potatoes into 1¼-inch chunks with at least one “eye” per piece (two or three eyes are even better). Let the pieces sit on a tray at room temperature for a few days until the cut surface has dried out and formed a protective layer before planting.
Choose Your Potato

Image credits: mindwhisperings via openverse
Are you looking to make the perfect mashed potatoes, crispy French fries, or creamy potato salad? Choosing the right type of potato is essential for achieving those delicious results.
Dry-fleshed or mealy potatoes, such as russets, are best suited for mashing, baking, and frying. They will not be sticky when mashed, and they will readily absorb sauces like gravy and butter. However, they may fall apart when boiled.
Waxy potatoes have moist flesh and tend to hold together better when cooked, making them ideal for recipes like curries and soups. Leftover boiled waxy potatoes can even be pan-fried without them falling apart. When mashed, waxy potatoes may become sticky. To ensure the best outcome for your potato-based dishes, choose the right type of potato for the job!
Also, while you can use any organic potato for seed potatoes, Certified Disease-Free potatoes are your best bet. You can find these at most gardening centers. Never treat seed potatoes with sprout inhibitors, as this could affect their ability to produce a successful crop.
Pick the Right Time

Image credits: Monika Gniot via Shutterstock
When the time comes to plant your potatoes, do so at the right time of year. The best time for planting seed potatoes in containers is mid-April or later, once all risk of frost has passed. That way, your potatoes will have plenty of time and space to mature in their container.
Water Well

Image source[Photographer/Brand] via [Platform]:Watering your plants is an essential part of that maintenance. When you water your potatoes, soak the soil thoroughly. If it's been a dry week, give your plants approximately one inch of water, once or twice a week. This will ensure you wet the soil down to at least 10 inches for sandy soils and 6 inches for clay soils.
You can check the dampness of the soil by using a trowel to take some samples. If it's only wet 1 to 2 inches down, keep the water running until you have achieved the desired depth.
Give Them Sun

Image credits: Kathryn Roach via Shutterstock
Sun is essential for spuds to thrive! Find the perfect spot in your garden or outdoor area that gets six to eight hours of direct sunlight. This will ensure that your potatoes get all the nutrients they need to grow healthy and strong.
Also, as your potato plants sprout and start to grow, gradually add soil up to the top leaves. This provides more nutrients and guarantees optimal growth.
Check for Bugs and Diseases

Image credits: Chad Hutchinson via Shutterstock
Potato scab, early blight, late blight, and verticillium wilt are all common potato diseases that can result in crop failure if not managed properly. To confirm a successful crop of potatoes, it is vital to know how to identify and manage these diseases.
Potato scab is one of the most common soil-borne potato diseases. It causes dark spots on the skin of the potato tubers. Late and early blight are fungal illnesses that cause leaf spots on potatoes. Finally, Verticillium wilt can cause wilting and yellowing.
Colorado potato beetles are one of the most common pests, appearing in the spring after overwintering in the soil. They lay clusters of orange eggs on the underside of leaves, so regularly inspect your plants for any signs of them.
Cutworms are another pest that you may encounter while growing potatoes, as they chew off stems at the soil line.
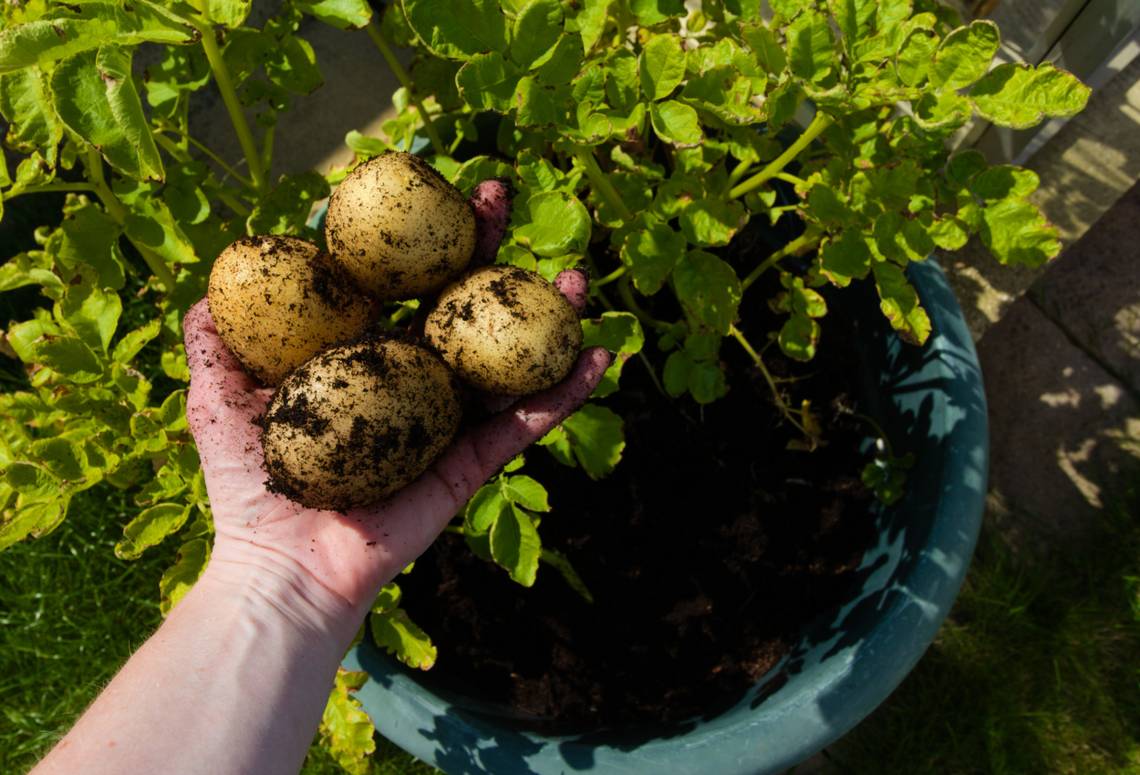
Harvest The Potatoes of Your Labor

Image credits: marefoto via Canva
Harvesting potatoes is an exciting part of gardening. After weeks of waiting, you can finally dig into the soil and collect your delicious tubers!
When the leaves begin to turn yellow, it's time to harvest the mature tubers from the ground. This takes anywhere from seven to 12 weeks.
To harvest potatoes, pick a dry and warm day to start digging. Use a spading fork to carefully loosen the soil around each plant and gently overturn the entire hill. Inspect for any damaged tubers and sort them out as you go. New potatoes will have formed above the seed piece, so dig down about a foot before harvesting them.
In Summary
All your hard work will pay off when you see the abundance of potatoes you’ve harvested. Roasting them in rosemary and garlic is a delicious way to enjoy them as a side dish. Baking with butter and herbs is another simple, yet tasty, option.
Be sure to share these tips on how to harvest your own bumper crop of potatoes. Leave a comment below and let everyone know how your potato harvesting went!