Retaining walls are useful features that can help prevent landslides (in extreme cases) and general slumping of the earth where a back cut has been made. If you need a substantial retaining wall (more than 4 feet high or 25 feet long) to keep your home and family safe, I recommend getting professionals to do the job right.
However, if you need a small retaining wall in your garden or yard, you can make all your retaining wall ideas come to life with just a little bit of know-how and elbow grease. It means those cheap, DIY retaining wall ideas could become reality soon.
The blocks used for retaining walls are pretty solid, so you want to get it right the first time so that you don’t have to move those behemoths more than necessary.
The good news is that you’ve started in the right place. Because in the post below, I will give you a step-by-step guide on how to build a retaining wall.
Materials Needed

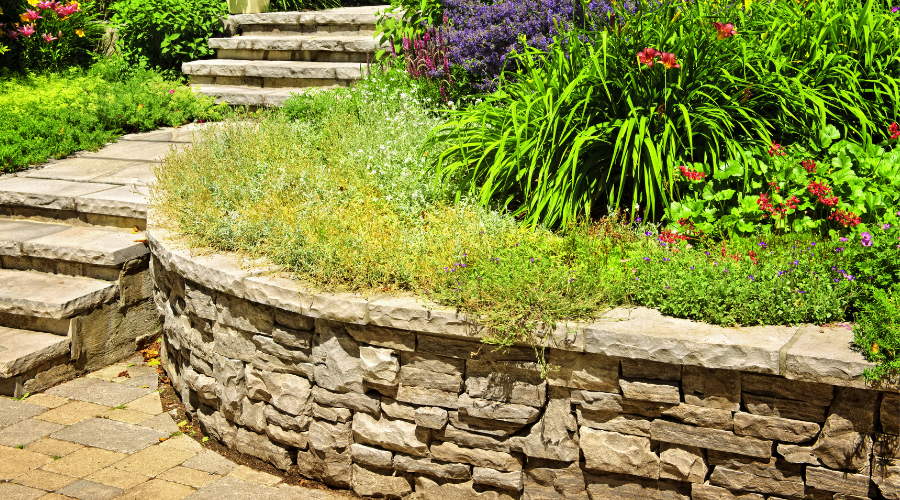
Image credits: Zan via Unsplash
- Shovel/excavator
- Hand compactor/plate compactor
- Base material (gravel)
- Blocks of your choice
- Spirit level
- Brush
- Mortar (if using )
- Capstones (if using)
- Flexible landscape block adhesive (if using capstones)
A Step-By-Step Guide On How To Build Your Own Retaining Wall
Step One: Dig

Image credits: Ricobino via Pixabay
It seems to be that the first step to any substantial project is to dig a hole. You have to go down before you can go up. Nothing changes with a retaining wall.
You need to dig a wide, deep trench where you want your retaining wall to be. It will be your foundation. The width of the trench is determined by the size of the blocks you’re using, plus 8 inches of space behind it.
The depth of the trench is determined by the depth of your frost line. The frost line is the depth to which the ground will freeze in winter. You need to go deeper than this.
Water will find its way under your foundation. If your foundation is not deeper than the frost line, that water will freeze. As the water gets colder, its molecules contract. Until the last few degrees before freezing, when those molecules expand.
This expansion leads to something called frost heave, which is when the ground is pushed outwards by the expanding ice. If this happens under your foundation, your foundation will fail, and your retaining wall will be compromised.
Some people claim that a level base to your trench, followed by a level layer of base material, can reduce the chance of damage from freeze/thaw cycles, but that’s not a chance I would take.
If your ground doesn’t freeze in winter (like me), you don’t have to dig that deep. Make sure there’s enough room for 6-8 inches of base material and one full course of your chosen blocks.
Step Two: Compact

Image credits: VasanthRaj via Pixabay
The next step is to compact the base of the trench. The goal is to prevent settling later on, which would lead to cracks and weaknesses in your wall. It’s also a good idea to get the base of the trench as level as possible.
You don’t have to get this perfect, since you can correct minor inconsistencies later on. However, with construction 1/8th of an inch out of plumb at the foundation leads to a couple of inches out of plumb by the time you get to the roof, so you may as well start strong with a level base to your trench.
Pro Tip: Don’t have a compactor? Make your own! Grab an old paint can fill it with concrete with a large pole/tool handle in the middle. Leave to set, and you now have your very own hand compactor.
Step Three: Lay Your Base Material

Image credits: Nadin Mario via Unsplash
The best base material is the gravel made up of angular stones you find at your hardware store. These angular stones interlock more effectively than round stones and achieve full compaction quickly.
The main purpose of this base layer is to provide drainage underneath your retaining wall. Remember that water under your foundation I mentioned earlier? This course of gravel will give that water somewhere to go away from your wall. If your base layer is below the frost line, any water that makes its way into your foundation will drain to a depth where it won’t freeze and won’t be an issue for your wall.
Fill the trench with base material about half an inch higher than you want the finished level to be. Make a pass with a compactor afterward to compact the gravel to the correct height.
Step Four: Lay The First Course

Image credits: terimakasih0 via Pixabay
You want the first course of your retaining wall to be as close to the center of the trench as possible. Use a spirit level to make sure that each block is level in all directions.
Use a long spirit level to help you keep the whole course level as you move along.
The great thing about gravel is that you can easily move small amounts to get your first-course level but then compacts again easily once you set the blocks.
Use a heavy rubber mallet to set the blocks in place once you’re satisfied with their position.
Step Five: Continue Laying Courses

Image credits: PDPics via Pixabay
How you build up courses will depend on what kind of construction method you’re following. You might need to apply mortar between each layer, or you might be dry stacking the blocks, in which case no mortar is necessary. I prefer dry stacking for this very reason.
Whichever method you choose, always stagger the joints in each course in something called a ‘running bond’. Keep these joints as tight as possible to prevent water sediment or vegetation from making its way through.
Pro Tip: Sweep the blocks below before you start the next course. The smallest pebble or piece of detritus could throw your whole wall out of plumb.
Step Six: Backfill As You Go

Image credits: photovs via Canva
Remember that extra 8 inches that you dug out behind your new retaining wall? That space is reserved for backfilling with more of the gravel that you used in Step Three.
Continue backfilling until about 8-10 inches from the top of the wall to allow for topsoil and turf.
Step Seven: Install Capstones

Image credits: André Bandarra via Unsplash
If you choose to install capstones on your retaining wall, do so with a flexible landscape block adhesive. It will allow your wall and capstones to flex over time without damaging your wall.
It would also be a good place to install specialist blocks to hold all your retaining wall plants as they establish themselves.
Wrap It Up
By following the steps above, you’ll have built your very own retaining wall by now. It’s important to note that a few steps above will change depending on your location and chosen materials. Always follow the manufacturer's instructions and speak to your neighbors about local climatic conditions. And if in doubt, hire a professional.