Key Takeaways
- Composting leaves is a cost-effective way to create nutrient-rich soil amendments for your garden.
- Shredding leaves and adding a nitrogen source are essential steps in the composting process.
- Proper aeration, moisture levels, and monitoring are key to successful composting.
Gardening enriches your life and puts fresh food on your table. To keep your green sanctuary thriving, nourishing your soil is key. Building rich compost doesn't have to break the bank! Compost is like secret plant food, and you can make your own magic batch right in your backyard with simple things like those crunchy fall leaves.
Fallen leaves might not look like much, but with a little help, they'll transform into golden goodness for your plants. Learn how to compost leaves, so you can have a ready stock of compost long before the spring gardening season.
Materials Needed to Start Composting
Essential tools required for composting

Discover the essential tools you’ll need to collect and create your homemade leaf compost.
- Rake or leaf blower
- Leaf shredder, lawn mower, or weed whacker
- Eye protection
- Gardening Gloves
- 3x3-foot plastic bins, chicken wire, or garbage bags
- Sharp object if using garbage bags
- Spade or shovel for stirring compost
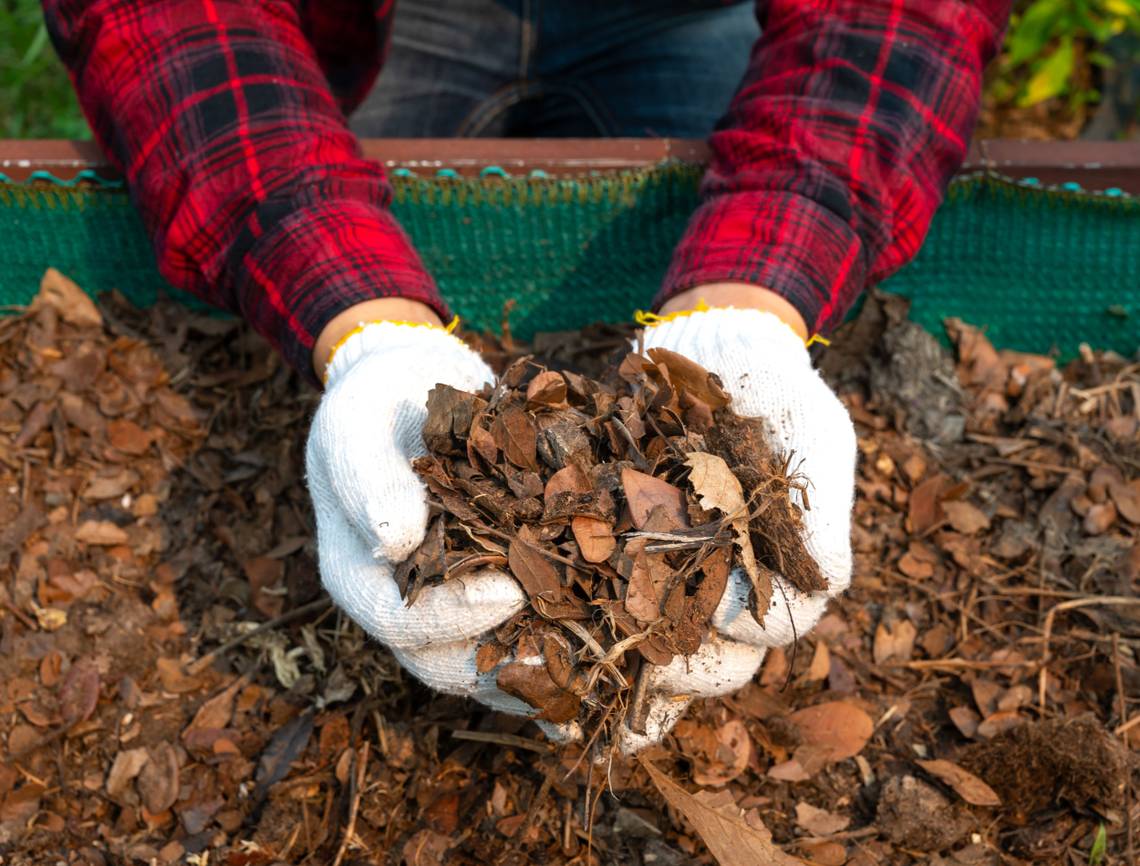
Step 1: Gather and Prepare the Leaves
Use a rake or a leaf blower to gather leaves

Grab a rake or leaf blower and gather as many fallen leaves as possible.
- Creating rows of leaves will make it easier to shred them later.
- Shredding the leaves is an important part of composting, as shredded leaves break down faster, allowing for better airflow in the compost pile.
You can use a leaf shredder, a lawn mower, or a weed whacker to shred the leaves into small pieces. Don't worry if some grass clippings get mixed in with the leaves, as they provide an excellent source of nitrogen, which is essential for composting.
When using leaf blowers, be aware of the direction you're blowing debris to avoid directing it toward people, pets, or property.
Step 2: Find a Nitrogen Source
Nitrogen helps with the decomposition process

Nitrogen is a crucial component for composting as it feeds the bacteria responsible for breaking down the leaves. To provide a nitrogen source for your compost pile, you can use:
- Pesticide-free grass clippings,
- Safe and disease-free weeds like dandelions, quackgrass, and bindweed,
- Kitchen scraps like uneaten food or coffee grounds,
- Well-rotted animal manure.
Ideally, you should aim for a ratio of one part nitrogen source to every five parts of leaves.
Avoid meat, dairy, and eggs, as they can attract unwanted pests and odors. Also, avoid fresh manure, as it can burn your plants.
Step 3: Build the Compost Pile
Layering the foundation for fertile soil

To build your compost pile, you can use 3x3-foot plastic bins, chicken wire, or garbage bags as containers.
|
Plastic bins |
If you use plastic bins, ensure they have lids to keep critters and pests from digging into your compost pile. |
|
Chicken wire |
To use chicken wire, you'll need chicken wire that's about 3 feet wide and 10 feet long. You'll also need two 4-foot-long bamboo canes. Lay the wire on a flat surface, tie bamboo canes 8 inches away from each end of the wire. After securing the canes, hold the wire upright, push the canes firmly into the ground, and create a circular-shaped cage. |
|
Garbage bags |
If you’re using garbage bags, poke a few holes for airflow as oxygen is required to aid decomposition. |
To make your compost, you'll:
- Start by layering one part of your nitrogen source with five parts of shredded leaves in the container.
- It's essential to have a good mix of both components to ensure proper decomposition.
- You can add bulking material like woodchips, sawdust, or straw to increase airflow and absorb excess moisture.
- Remember to keep your compost pile in a shaded area with decent airflow.
Limit the size of your piles to 3x3 feet for easy access and maintenance. You'll also want to keep the piles moist but not soaking wet. Adding about a cup of water per pile once or twice a week should be sufficient.
Layer ingredients in a 5:1 ratio because nitrogen-rich greens fuel the breakdown process while carbon-rich browns provide structure.
Step 4: Aerate and Maintain Moisture
Allows oxygen to reach the depths for proper decomposition

To ensure proper decomposition, it's important to aerate and maintain the moisture levels in your compost pile.
- Every three to four days, or when the pile’s temperature falls below 104 degrees Fahrenheit or above 150 degrees Fahrenheit, turn your compost pile. Give it a good stir to distribute the heat generated by the microbes and improve airflow to speed up compost.
- If you are using garbage bags, shake them gently to mix the contents.
- Moisture is crucial for the composting process. If the mixture feels dry when squeezed, add a cup of water.
- Keep doing this until the compost is brown and crumbles in your hands. Remember, the ideal moisture level is damp but not soaking wet.
Step 5: Monitor and Adjust
Don’t let the pile get too wet or too dry

Once your compost pile is set up, it's important to monitor and adjust it as needed. Keep an eye on the moisture levels and adjust accordingly.
- If the pile becomes too wet, add more dry leaves or bulking material.
- If it becomes too dry, add more water. If your compost is too wet, it may appear slimy or soupy and have an unpleasant odor. If it's too dry, it will appear clumpy and have no odor.
- It's also a good idea to monitor the temperature of the pile. A properly functioning compost pile will generate heat, indicating that the decomposition process is happening.
A properly constructed compost pile will reach temperatures between 104 and 122 degrees Fahrenheit in two to three days.
Step 6: Patience is Key
Use well-aged compost to avoid plant burn

Composting is a natural process that takes time.
- Depending on various factors such as temperature, moisture levels, and the size of your compost pile, the process can take anywhere from a few weeks to several months. Your compost is ready for use when it looks and smells like soil, has a crumbly texture, and is at room temperature.
- Be patient and allow nature to do its work.
- Keep monitoring and adjusting your compost pile as needed, and soon you will have nutrient-rich compost ready to use in your garden.
Opening a young compost pile frequently can release unpleasant odors and delay decomposition.
Step 7: Using Your Finished Compost
Finished compost will look like crumbly topsoil

Once your compost is fully decomposed and has a dark and crumbly texture, you can harvest it and use in your garden.
- Spread a ½-inch layer of compost around your plants to enrich the soil and provide essential nutrients. You can replenish compost in your garden twice a year.
- Compost helps improve soil structure, retain moisture, promote root growth, and support beneficial organisms in the soil.
- If your compost seems a bit dry, mix in some water before spreading it. Remember, happy plants love moist but not soggy soil.
Benefits of Composting Leaves
Turning brown into garden gold with fall leaves

Composting leaves offers numerous benefits for your garden and the environment.
- By composting, you recycle organic waste and reduce the need for chemical fertilizers and pesticides.
- Compost enriches the soil with essential nutrients, improves soil structure, and helps retain moisture.
- It also promotes beneficial organisms that aid in soil aeration and disease suppression.
Moreover, composting fall leaves is a cost-effective way to create nutrient-rich amendments for your garden. Instead of buying compost, you can use the fallen leaves from your own yard to create a valuable resource for plant health. It's an eco-friendly and sustainable practice that can be easily integrated into your gardening routine.
By following the steps, you can turn leaves into a valuable resource that enriches your soil and supports the growth of healthy plants. Share your new found knowledge with friends and family so their garden can thrive come warmer weather!