If you are not a fan of spicy food, you’re probably wondering how in the world can people stand to eat anything made with chilies? Truth is that chilies can be both super spicy and mild, depending on their color and harvest time. Chili peppers are also rich in vitamins, potassium, and copper, and they help with pain relief and weight loss. That being said, raise your hands (or, uhm, keyboard?) if you’re ready to learn how to grow your own chilies.
Chilies FAQ
How Long Do Chili Peppers Take to Grow?

This, of course, depends on the variety of chilies you are trying to grow. There are some varieties that grow within two months from sowing, while others can reach full maturity in 120 days.
Can I Grow Chilies from Fresh Pepper Seeds?
Yes, as long as you follow the correct steps for the germination process. Chilli seeds in this stage need to be subjected to warm and consistent temperatures, but they will also need light compost in order for them to sprout.
Do Chili Plants Need Sun or Shade?
Sun. And plenty of it. It is true that chilies can also grow in partial shade, but they will not develop the same rich flavor, nor will the plant be as productive in such conditions. Finding a nice and sunny spot is mandatory for indoor or outdoor planting (you can use a heat lamp for indoor chili growth).
How to Grow Chili Peppers
Chilies are a wonderful addition to a variety of meals (yes, and they make one very popular pizza topping too), so if you want to venture on this quest to grow your own delicious pizza topping, here is what you have to do:
- The first thing that you should know is that chili peppers require plenty of sun in order to grow properly. This basically means that you will need to find a sunny position if you want to grow them outdoors, but they will also thrive in greenhouses. If you plan on growing really hot chili varieties, know that keeping them under cover will enhance their flavor and their spiciness.
- To start your seeds indoors, you can use a damp paper towel combined with a plastic bag in order to soften up the seeds. This process can take up to five days, so be patient.
- In order to plant the seeds inside containers, you will need seed trays or planting pots. The soil inside the pots needs to be mixed with fertilizer and compost before you put the seeds in. Put in a single seed at a ½-inch depth in the soil.
- Chilies require water on a daily basis, so make sure that you don’t forget to keep the soil moist. Once you’re done plating, just give the seeds a larger amount of water, proceeding with about one teaspoon of water every following day.
- You need to make sure that the pots stay in a location where the plants can get as much sunlight as possible. If you have a heat lamp, then you’re already covered. If not, the best place to position the pots is by a south-facing window (where they can get plenty of sunlight) and next to a radiator (as chilies require a lot of heat to grow). However, if the chilies are in temperatures that are either too high or too low, they might not grow at all.
- The time it takes for chilies to sprout depends on a series of factors (varieties planted, exposure to heat, sunlight, watering, etc.). It can take days or even weeks for them to sprout. You will notice that the plant will show a pair of leaves in the first phase of sprouting but what you’re looking for is the plant to grow its second pair of leaves. That’s how you know it’s time for transplanting.

- There is a gardening concept known as hardening off, which is what you’ll have to do to your chilies before transplanting them. The process is important because seeds that are grown indoors are used to being exposed to very constant environmental conditions, so moving them outside can be a little bit of a shock. In order to harden off chilies, you can put the pots outside gradually, starting with a few hours each day. When the plants are able to stay outside for 24 hours, you can transfer them into the soil. However, we can’t stress this enough: the process is gradual. That means that you need to put the pots outside for two hours per day for about a week, and then add one extra hour.
- Chilies can be moved outside after spring’s last frost. Make sure that you plant them individually to avoid overcrowding. The holes you need to dig should be slightly larger than the root ball (you can use a gardening trowel for that). Make sure that the seeds are placed at least one foot apart (for the most accurate planting distance and depth, you will need to research the exact chili variety that you want to plant).
- The chili plant and seeds are now ready to go into the soil. Make sure that you cover their top with some soil but no thicker than ¼ inches. Since chilies thrive on loose and well-draining soil, don’t over tap or press the soil too hard on top of the seeds.
- Chilies will grow in moist soil, but you need to avoid overwatering. When you transfer the plants into the soil, add extra water to prevent the shock. You can proceed to water them daily in order to make sure that soil stays damp (of course, this again depends on the climate in the region where you live).
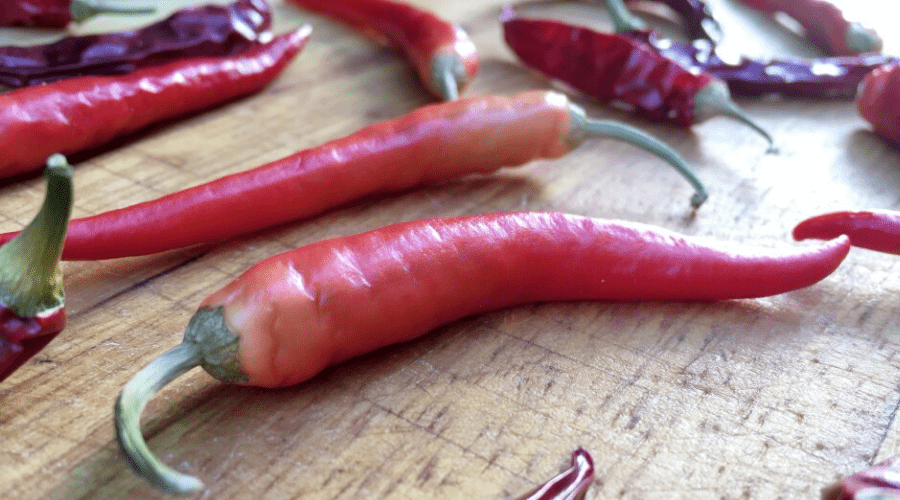
- You can harvest the chilies when they are still green if you want them to have a mild flavor, or you can let them grow red if you want to enjoy the full spiciness. You can use garden scissors or secateurs to snip the top of the stalk. If you harvest them frequently, the plant will focus its energy on making even more fruit.
NOTE: If you want to know how to grow chilies indoors, you will basically have to follow similar steps, only you will be keeping them in properly-sized containers and not transplanting them in outdoor soil.
Tips for Chili Growth
Chilies are delicious if you’re a spicy food lover. When they’re harvested in their green stage, they are milder, but still with a decent amount of flavor that you want to add to your dishes. For the best results in your chili growth endeavors, here are some things that you should know.

Diseases
Chili is actually a plant that is less likely to develop disease and present pest problems (at least when compared to other plants like tomatoes). Aphids are insects that might attack it. So are fruit flies. And that’s about it.
Seeds versus Cuttings
You can grow chilies from seeds, but you can also grow them cuttings. In order to do so, retrieve cuttings from newly-grown tips (early spring).
Natural Help
Seaweed-based liquid products can help your chilies thrive.
Pruning
At the start of a new growing season, you want to prune the plants. That means that you can cut off the tip to make sure the plant grows beautifully. Pruning becomes even more important if you grow your chilies in a shady spot.
Safety
Be careful, because chilies can burn you even if you are not a consumer. When you cut fresh chilies, make sure that you thoroughly wash your hands after. Avoid skin contact before you do so and, whatever you do, do not rub your eyes! Also, if you eventually turn your dried chilies into powder, be really careful not to inhale it. You do not want to feel that level of wrath!
Pollinating
Chilies require pollination to get fruits. You can do so by rubbing your little finger or small paintbrush bristles on the flower heads to make sure that process occurs. This is only required if you grow chilies indoors; those that grow outdoors are likely to benefit from natural pollination, so this measure isn’t required.
Conclusion
Chilies are a wonderful way to spice up your dishes, and they can be dried and preserved for long-term use. There is nothing that adds that extra hint of spiciness to your food like chilling, and it is actually pretty easy to grow your own whether you have a garden or you want to plant them indoors.
