With Halloween just around the corner, pumpkins are about to be in the spotlight again. When everyone is focused on carving the most terrifying decorations out of their pumpkins, what’s inside the pumpkin is often tossed aside and forgotten, or composted.
This year, why not make a delicious and nutritious snack out of those gooey pumpkin guts? The guts themselves aren’t too appetizing, but the seeds hiding in the guts are nutritional powerhouses and an excellent healthy snack on the go. Read all about the health benefits of pumpkin seeds. If you're ready to go all-in, learn how to grow pumpkins.
If you’re curious about how to put those pumpkin seeds to use in your diet, you’re in luck. Read on to find out how to harvest and roast pumpkin seeds.
Things You Need
- Pumpkin
- Large knife
- Large serving spoon or ice cream scoop
- Colander
- Bowl
- Cookie sheet
- Paper towel
- Baking tray
- Cooking oil (I use olive oil)
- Herbs and spices (optional)
- Oven
Step One: Empty The Pumpkin Guts

Image credits: Gerhard G. via Pixabay
Grab your large knife and cut around the top of the pumpkin (the side where the stalk is). Use your biggest serving spoon or an ice cream scoop to remove the innards of the pumpkin. The seeds will be mixed into the pulp of the pumpkin. Remove all of this and put the mixture in a bowl of water.
Step Two: Separate The Seeds From The Pulp

Image credits: Gianni Crestani via Unsplash
This step is the messy part of the whole operation. Placing the gooey pulp and seed mixture into a bowl of water will help with separating the two. It is because the water will begin to break down the stickiness of the pulp. The pulp wants to sink, and the seeds want to float. So this discrepancy also helps with the separation.
The best way to do this step is to get your hands dirty. Use your hands to separate the seeds from the pulp. It feels a bit awkward and gross at first, but you’ll soon get used to it and figure out the best way to separate the pulp from the seeds. Place the seeds in the colander once they’ve been separated from the pulp.
Step Three: Rinse The Seeds

Image credits: Free-Photos via Pixabay
Once all your seeds are in the colander, it’s time to rinse them. Use cool, running water to rinse the seeds in the colander while you use your hands to rub the seeds together and remove any excess pulp. The higher water pressure of a sink sprayer could also help you here.
Pro Tip: The stuff that’s clinging to the seeds adds flavor and nutrition to the final product, so don’t worry too much about getting every last piece off.
Step Four: Allow Seeds To Dry

Image credits: PublicDomainPictures via Pixabay
Once you’ve cleaned the seeds to your liking, spread the seeds out on a cookie sheet or a paper towel. You could also add a piece of paper towel over the top of the seeds to help with the drying. If you’re in a rush, you could put them in the oven on the lowest setting or use a hairdryer. Make sure the seeds are completely dry before you move on to the next step.
Step Five: Prep For Roasting

Image credits: Pimasuro via Pixabay
First, preheat your oven to 275℉. Place the pumpkin seeds on a baking tray. Toss the seeds in your favorite cooking oil. Olive oil works well. If you choose to add herbs and spices, add them now.
Pro Tip: For seasonal pumpkin seeds, why not add Fall seasonings? Think about spices like cinnamon, ginger, nutmeg, and allspice for a tasty Fall inspired snack.
Step Six: Roast The Seeds

Image credits: Engin Akyurt via Unsplash
Put the pumpkin seeds in the oven and roast them until golden brown, about 10-20 minutes. Make sure to check on them regularly and stir them often to avoid scorching.
Be very careful about not burning the seeds. It happens suddenly, and one burnt seed will taint the whole batch. Keep a close eye on your roasting seeds.
Step Seven: Eat The Seeds

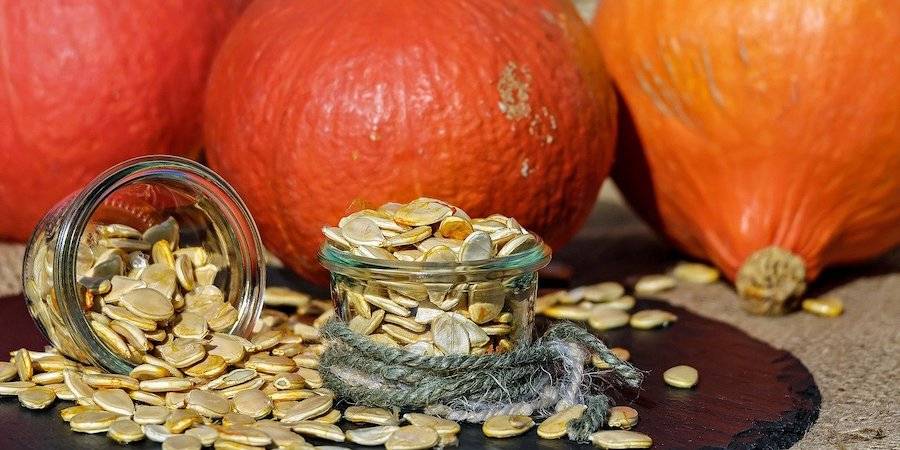
Image credits: Andrea Lightfoot via Unsplash
Store the roasted pumpkin seeds in an airtight container with your other dry goods. They should keep for a few weeks at the very least.
Your seeds are now ready to be eaten. It’s not necessary to remove the shells. You can eat the seeds, shell and all. If you prefer not to eat the shell, treat the seeds like you would sunflower seeds and remove the shells before eating.
Roasted pumpkin seeds can be treated like a highly nutritious, on-the-go snack. It helps that they’re also delicious! Pumpkin seeds are excellent in salads and vegetable bowls, and even in granola. Use them like you would any other seed or nut, and don’t be afraid to experiment.
Wrap Up
By following the guide above, any pumpkin guts you may come across won’t go to waste! Hidden inside that stringy pulp is a tasty, healthy snack that’s easy to prepare. If you know-how, that is.
By following a few pumpkin seed harvesting tips, you can make short work of this task that’s not as messy as it seems.
What do you think? Will you be roasting some pumpkin seeds this season? Comment below and let us know. Or share this post with the best pumpkin carver you know by using one of the buttons below.