Installing your own sprinkler system can be a very rewarding job. No more manual moving around of oscillating or rotary lawn sprinklers! While the process itself is a bit time consuming, the advantages of owning a sprinkler system are numerous. You get to have your lawn watered at all times, your kids and pets will love playing under the water drops on hot summer days, you won’t have to pull out a hose and deal with this chore every day and, as a bonus, you get to brag to everyone about the amazing job you did by using your own two hands.
Disclaimer: No matter how much you love DIY projects, this one won’t be easy. It can be done, but it will require your utmost patience, attention to details and some of your spare time.
Are you up for the challenge? Then let’s get to it!
What You Need
This part is a bit tricky, as some of the materials you need depend on factors such as the size of your yard or its shape. So, aside from the number and type of sprinkler heads needed and the length of the pipes you have to purchase (which you can determine after reading this entire DIY guide), you will need some items that you probably already have lying around the house.
- A diagram of your yard’s layout
- A marker pen for figuring out the pipe layout and placement of the sprinkler heads
- Whatever objects you can place in the yard to better indicate where the sprinkler head will be placed
- A shovel/axe/grubbing hoe
Step-by-step Process
Are you ready to start working on your DIY sprinkler system?
Step One

First of all, you will need a diagram of the entire area you want to sprinkle. If you have a plan of your house, including the outdoor area, you can make a copy of that and work on it. You will need to plan the sprinkler placement and the pipeline routing before you know what materials to purchase.
Step Two

Time to divide the areas into rectangles that measure roughly 1,200 square feet each. This is very important because large areas won’t be covered by the water volume typically obtained for the residential watering system, so you will need special heads.
Step Three

Pop-up Impulse Sprinkler Head

Fixed Pop-up Head
Next, you will have to figure out which type of sprinkler head you need for each particular area. Here are some tips: when you want to cover patched of flowers, shrubs or wide areas covered in grass, gear-driven or pop-up impulse sprinkler heads are the best. For area near the house, walls, fences of paved areas, fixed pop-up heads are recommended.
Step Four

Depending on the straying heads that you choose, you need to mark the location for each of them so that their spraying distance can cover the areas you need them to. You may want to try to avoid overlapping as much as possible, as not to cause water puddles.
Step Five

Time for some math. For this step, you have to count the number of heads required for each zone and then add the gallon per minute for every one of them. This number is variable depending on the type of sprinkler head you choose. After adding the total number of gallons per minute for each zone, you can use this number to identify which pipe size you need. For example, if you have a particular yard zone that needs between 5 and 7 heads, you will need about 12 to 15 gallons per minute that come at a pressure of at least 20 PSI (which is short for pounds per square inch). In this case, you will need a 1-inch main pipe and ¾ or ½ inch branch lines.
Step Six

Now you have to draw the main line starting with the placement of the backflow preventer and control valves.
Step Seven

Time to link the branch lines to the main line so that each sprinkler head will be supplied with water. Draw the lines on your diagrams, while taking into account that a branch line should not supply more than 2 sprinkler heads.
Step Eight

It’s time to consider where you’ll be digging the ditches. Using the layout you’ve created so far, plan the locations for digging ditches.
Step Nine
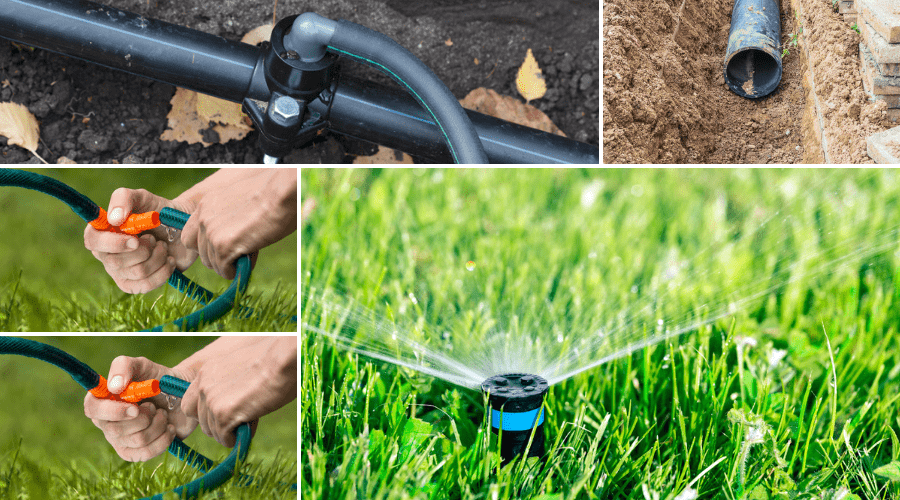
Let’s move on to actually digging the ditches. For this step, you will need a grubbing hoe or an axe, making sure that you set aside the turf, so you can later replace it when all of this is finished. Grab a trenching shovel and dig the ditch at a depth of a minimum 6 inches below your area’s frost level. Ideally, the ditch should have about 12 inches in depths, so the piper can stay protected in any weather conditions.
Step Ten

Once you’re done digging, you can start spreading the pipes along the ditches.
Step Eleven

To supply the main pipe with water, you now have to connect it to the manifold at the control valves. If you want to add a timer to your irrigation system, connect the main line to the timer as well. Please take note that the valve has to match the type of control used.
Step Twelve

For this step, you need to connect the water supply line to the manifold located on the supply side. With the help of a backflow preventer, you can make sure that drinking water is not contaminated, should the system lose any water pressure and start siphoning.
Step Thirteen

Turn on the control valve that supplies your water area, so that water flow may clean dirt or debris potentially located in the pipes. This will help prevent any clogs that may later prevent the sprinkler heads from functioning properly. After you’ve done the test, turn off the water supply valve.
Step Fourteen

Once you’ve made sure that water is flowing swiftly inside the pipes, it’s time to install the sprinkler heads. Grab your diagram and place the heads accordingly. Each sprinkler head has to be buried into the soil enough as to avoid any movement. Once the sprinkler is firmly stuck into the ground, make sure that you pack the soil around it so that it won’t wobble.
Step Fifteen

To test the spray coverage and direction of each sprinkler, you have to turn the water valve back on. Then, you can adjust the rotation of the sprinkler head until you have a satisfying spray pattern. You won’t be able to do this unless you carefully read the user/instruction manual that comes with each type of sprinkler you’ve purchased.
Step Sixteen

Carefully observe the ditches so you can spot any potential water leaks. This step is very important because if you pack the soil back into ditches and cover them before knowing if there’s any leakage, you’ll have to dig the ditches up again and that is both times to consume and messy.
Step Seventeen
Once you’ve checked for water leaks and everything is in order, you can start backfilling your ditches, while carefully packing the soil in.
Step Eighteen

Remember the sod you’ve placed aside at step #9? It’s now time to put it back into place. After having done so, you can use a rake to get rid of potential rocks, roots, etc.
Step Nineteen

You will have to repeat the whole process from top to bottom for each particular watering area.
Conclusion
Of course, the steps of this process may vary depending on the complexity of the sprinkler system you’re looking to install. For example, should you wish to install a smart controller for saving water through your irrigation system, you will need to purchase one separately and then undergo the specific steps towards installing it. There is some research to be done before you actually start digging ditches and measuring yard lengths. It’s important to figure out which type of sprinkler heads you’re going to use (taking into account the local pressure of your water, how much water your lawn actually needs, what kind of climate you live in, etc.) because underwatering/over watering your lawn is a no-go. Was this tutorial helpful to you in installing your own sprinkler system? If so, let us know! Share and comment below!
*You might also like: How Much Do Sprinkler Systems Cost?