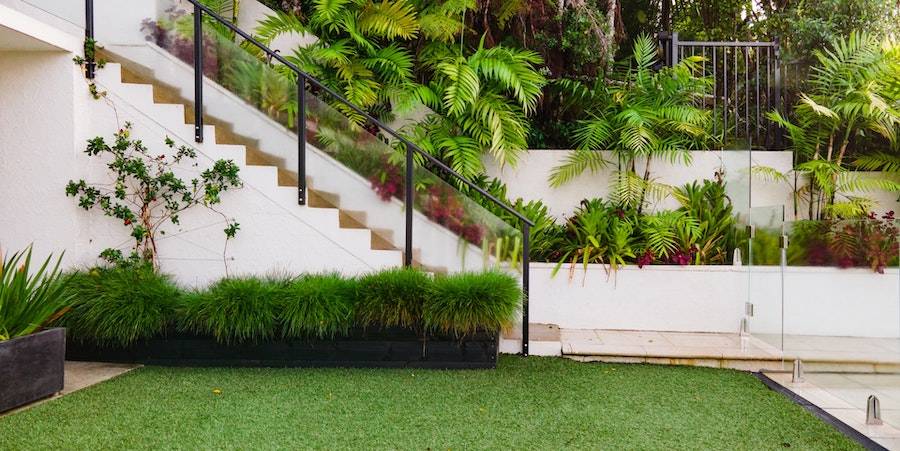
Do you love your lawn but don’t love the upkeep? Or have a high-traffic area where natural grass battles to survive? Maybe it’s time to consider artificial grass and kiss your worries goodbye.
Just imagine it, a perfect lawn without any upkeep. No mowing, no fertilizing, no yellow spots, no edging. None of the cons of a natural grass lawn. If you’re still not sold on the idea, have a look at our comparison between natural and artificial grass to help you make a decision. Now, you’re probably wondering how to install artificial grass.
You’ve come to the right place. Because at Backyard Boss, we have a team of experts on everything related to the backyard. So sit back, relax, and follow this tutorial for installing an artificial lawn.
Things You Need
You need to gather all the tools and equipment below before you can get started on your project.
- Mallet
- Timber and pegs for base perimeter
- Screwdriver and screws
- Stanley knife or box cutter
- Stiff bristled brush to raise the pile
- Turf cutter or shovel to remove existing natural turf
- Rake to spread and level aggregate
- Roller or tamper
- 1 or 2 layers of weed membrane
- Building sand
- Type 1 aggregate, the primary material for sub-base (like in the photo below)
- Artificial grass to cover the area required
- Skip required for removal of natural turf
Step-By-Step Guide
Step one: Dig

Image Credits: Tim Foster via Unsplash
Like most projects, you have to go down before you can go up. Installing artificial grass is no different. You first need to remove the existing turf or topsoil. For this, you want to use the turf cutter or shovel. You’re aiming to remove the top 2 - 4 inches of turf, depending on your drainage.
If your lawn is well-drained, 2 inches should do the trick. If it drains poorly, you’ll have to go the whole 4 inches. If you’re installing the turf on anything other than the ground, skip to the ‘Notes’ section of this article.
Step Two: Build Your Frame

Image Credits: Sabine Löwer from Pixabay
Once all the turf is removed, it’s time to get your timber frame in place. It keeps your aggregate where you need it, gives an edge to your new turf, and provides a great place for you to fasten your artificial grass.
Lie your timber along the edge of where you want your artificial grass to be. Make sure it butts up against the soil and grass behind it. Drive a peg into the earth on the inside of each corner. Screw the timber frame to the peg. You don't need anything fancy here. Just make sure it's solid. The weight of the materials will hold the frame in place.
Lie your first layer of weed membrane inside the frame. Tuck the membrane into the corners and make sure it's snug. This membrane will prevent the next layer from sinking into the soil below. Plus, it's the first line of defense against any weeds that might try to push through.
Pro Tip: Mark 3/8 inch below the top edge of your timber before you build the frame. On the inside. It will make your life much easier in step 4.
Step Three: Lay The Sub Base

https://www.perfectlygreen.co.uk/faqs-guides/artificial-grass-installation-guide/
Now the area is ready for your sub-base. The type 1 aggregate on the list above is your sub-base. It is the same stuff they use underneath tarred roads and even some types of building foundations.
It’s widely available from hardware stores and is relatively inexpensive. You’re not going to see this aggregate for 25 years, and this step is vital to the performance of your new turf, so don’t skimp. The aggregate provides excellent drainage wherever it’s used.
Step Four: Level And Compact The Sub Base

Image Credits: Michal Jarmoluk from Pixabay
Use your timber frame as a guide point. You can use anything with a long, straight edge (a piece of lumber works well for this) to drag across the top of the timber frame, effectively leveling the aggregate within. You then need to grab your tamper or roller and start compacting the aggregate. It prevents any settling of the material later on. You won't even compaction throughout the layer. Aim to compact the gravel by about 10mm, which is just over ⅜ of an inch.
If you followed the pro tip in step 2, you have a nice line on the inside of your frame that will indicate when you've compacted enough.
Top the aggregate with your building sand, and use the same method to level and compact the area. You should now have a sub-base, compact and level, that reaches the top of the timber frame.
Pro Tip: Wet each layer of material with a sprinkle of water from a hose or watering can. Not too much. It will help with the compaction and keep the dust down.
Step Five: Second Layer Of Weed Membrane

https://www.perfectlygreen.co.uk/faqs-guides/artificial-grass-installation-guide/
Secure the second layer of weed membrane to the timber frame with screws or staples. It should lie flat against the sub-base beneath it. Use a Stanley knife or box cutter to cut the membrane to the required size once you’ve laid it out. It will make double sure no weeds or natural grass make their way through your sub-base and mess up your final surface.
Step Six: Time For Some Grass

https://www.perfectlygreen.co.uk/faqs-guides/artificial-grass-installation-guide/
Lay the artificial grass on top of all your hard work. Roll it out and give it some time to settle. It takes a while, depending on the ambient temperature and how long the turf has been rolled up.
Once you’re sure the turf has settled, you can position it where you want it and cut the turf to size. Reports from various manufacturers claim you’ll have to replace your blade after every 10 feet of cutting, so make sure you have enough spare blades.
Step Seven: Secure Grass To Frame

Image Credits: FLY:D on Unsplash
Use screws or staples to fix the turf to your timber frame. Do this every 4 inches. You can use your boxcutter to trim the edges. Also, make sure the turf is flush with the frame below.
The next step is up for debate and depends on your manufacturer's instructions. Some turf requires that you put down layers of infill on top of the turf to add cushioning and keep the blades upright. Another turf is dense enough that this step isn’t required. Check with your manufacturer.
Pro Tip: When fastening the turf to the frame, make sure to open up the piles (the blades of grass) where you put the hardware. It will prevent you from damaging the product and ensure the fasteners aren't protruding out of the piles, becoming a hazard later on.
Step Eight: Brush The Lawn

Image Credits: Brina Blum via Unsplash
Grab your stiff-bristled brush (a regular broom may work in a pinch, the stiffer the bristles, the better) and begin brushing your new turf. Avoid metal bristles. The idea here is to ‘fluff’ up the pile of your turf. It’s been rolled up and compressed for a while, so the pile will most likely be flattened. Brushing with the stiff-bristled brush will bring the piles to life and make your turf look more like grass and less like a green carpet.
It’s also a good idea to water the turf at this point. Unlike a regular lawn, this won’t help the grass grow at all. But it will help the whole arrangement settle into place quicker.
Step Nine: Wait

Image Credits: Lukas Blazek on Unsplash
It’s recommended that you wait 12 hours before using the area. It is to make sure that the turf is settled properly and that the sub-base has been installed correctly. It also gives the piles a chance to settle into their new upright position.
Your new artificial lawn is now ready to go. While most of the regular chores of maintaining a natural grass lawn will be a thing of the past, there are still a few things you need to do regularly to ensure the longevity of the artificial grass. Read on for maintenance tips.
Maintenance

Image Credits: 小谢 via Unsplash
While mowing, fertilizing, and weeding isn't necessary with artificial grass, there are still some simple maintenance tasks that will keep your turf in tip-top shape for 15-25 years.
Remove excessive vegetation or debris that accumulates on your lawn before it gets ground into the turf. You can use a garden rake, leaf blower, or lawn vacuum for this.
Next, give the area a good rinse with the garden hose. It will get rid of most dust, pollen, and any liquid waste your pets may have left behind. Since you did such a great job installing the sub-base, this water will drain away freely and not be a problem.
Brush the piles against the grain. Use the same stiff-bristled brush you used for the installation to fluff the piles up again and prevent matting.
While artificial lawns aren’t maintenance-free, it’s a lot less work than their natural grass counterpart.
Notes
If you’re installing artificial grass on top of a deck, you can skip most of the steps above. Simply fasten your turf to the deck with glue, staples, or screws.
If you’re installing on top of a concrete slab, you may need some professionals to do the job. Consider drainage and the correct method of securing the turf. Every situation is different, so it’s worth getting a professional opinion.
That’s A Wrap
If you followed the above how-to, you now have a patch of low-maintenance artificial grass. Congrats! Did you enjoy the tutorial?
It’s always a good idea to gather the required materials before you start. It ensures that there are no significant bottlenecks in the process due to missing bits and pieces. Unless otherwise stated, it’s a good idea to do the whole process in one go, one step after the next.
If you enjoyed this tutorial, comment below, and let’s start a conversation. Or share this with anybody you think might find this helpful.