Homeownership requires close attention to the maintenance of your house and property. One chore that needs particular attention to on a regular basis is your gutters, especially if you live where there is good tree coverage. Rain and wind knocks lose tree debris and wash it into your gutters, which can result in problematic buildups down the road.
Even if you don’t live where a lot of debris may wash through, at the very least a good annual cleanout of your gutters is required. This can be both timely and a bit dangerous, which is why so many people have a guard. This guide helps to explain how to install gutter guards for the most popular choices for homeowners to consider.
Why a Gutter Guard is a Good Idea

As mentioned above regular gutter maintenance and cleanout is a must for homes with a gutter, which is not only a chore that takes quite a bit of time but can also be dangerous. Although gutter guards do require a bit of maintenance themselves, the time you spend on the roof is drastically reduced due to their use- as is your effort.
When debris washes into a gutter you run the risk of clogs that disrupt the flow of water. Rainwater that backs up put undue strain on your gutter system, weighing them down and creating further stress on the roof. It also can freeze and create ice dams which can back up under your roof and create damage. The debris itself also tends to harbor molds and mildews, creates a breeding ground for insects, provides security for nesting birds and mice, and can even allow fallen seeds to sprout.
Types of Guards and How to Install
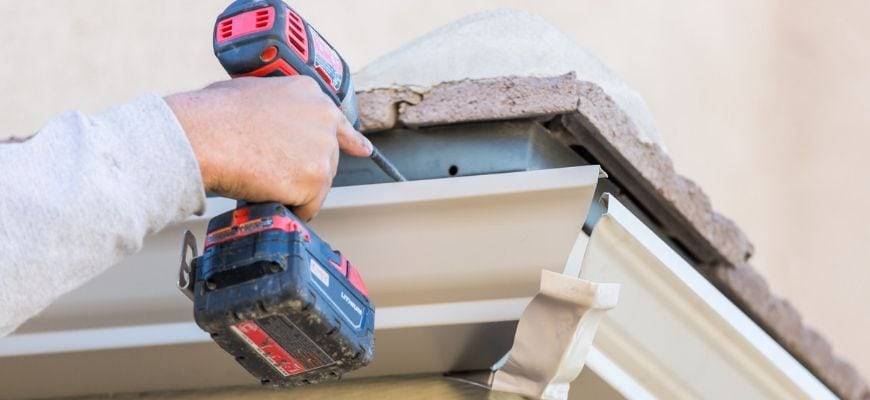
There are five major categories of gutter guards which encompass various designs based on your own needs and preferences. Although many guards can be professionally installed, you can save a lot of upfront cost by purchasing those that are easy to install on your own. Look for brands (such as those from Home Depot and other building supply stores) that come with instruction to do so.

Below are the various types of guards you can choose from and the basic how-to guides for each style to provide you the knowledge of what to expect. These are all designed to work with your existing gutters no matter whether you have a shingled roof, metal roof, or tiled roof.
Before You Get Started
Before you set started with any type of guard installation, you need to take care of a few basic things first. Follow these quick tips for preparation of product purchase and addition of guards.
- Work safely and secure the ladder you are working on with a stabilizer. Also have a spotter to help you keep the ladder secure and to pass materials to, or hand up tools if needed.
- Know your gutter type and measure the width of the opening for proper fit. You also should have an idea of the overall length of your gutter system in order to cover everything properly. Most residential gutters are either 4 or 5 inches wide, but some styles may be 7 to 8 inches.
- Know the difference between the types of guards you are considering so you have an idea of how much work will be expected of you. There are basically two types of installation processes: friction fit and fully adhered. A friction fit is easier to install, but may not last as long. Fully adhered are semi-permanent and require tools and a little elbow grease for a proper fit and security.
- Clean your gutters out well. Remove any debris by hand, take a soft brush to any cleaning mildew or dirt, and run a hose over each to ensure it is flowing as it should at the downspouts and to wash clear any small debris you may have left behind.
- Make any repairs that need to be addressed. Loose gutters may need securing, seal small openings with mastic, and use small pieces of flashing to take care of any other gaps that might be problematic. Make sure gutter attachment points are sturdy.
Brush Guards
Brush guards are a friction fit type product that looks like a giant bottle brush. These are typically made of heavy bristles that are attached to a durable wired center that allows a customized fit. They stop large debris and even snow from entering into the gutter but allow flowing water to pass freely through. They do require some cleanout from time to time but are considered quite efficient and last approximately 5 years with proper care.
What You Need:
- Measuring tape
- Wire cutters
- Sturdy ladder
Installation Guide:
As a friction fit option, this is one of the simplest guards to install.
Step 1: Measure your gutter lengths and apply to the gutter brushes
Step 2: Cut your brushes (some may even fold back on themselves) to fit
Step 3: Climb the ladder and apply! Be sure to push all the way to each end of a gutter to ensure complete coverage.
Foam Guards
Foam guards are made from porous polyurethane foams. They are also a friction fit and cover the top part of the inside of the gutter to stop debris, but allow water to flow through and under. They do require some removal of debris build-up and with proper care last 2 to 3 years. They are a fast and easy solution to gutter debris buildup.
What You Need:
- Measuring tape
- Box cutter
- Sturdy Ladder
Installation Guide:
Step 1: Measure your gutter lengths and apply to the gutter foam guards
Step 2: Cut your guards to fit
Step 3: Climb the ladder and apply! Be sure to push all the way to each end of a gutter to ensure complete coverage. Do not push all the way to the bottom, but allow it to fit snugly just under the rim of the gutter.
Perforated Guards
Perforated guards encompass a series of gutter covers that use vinyl and metal for a more fully adhered fit using hardware or as a snap-in (or over) style. The most secure and well fit are those that require a little bit of permanent adhesion with screws. They typically slide up under your and attach directly to the gutter to allow water to flow easily through the perforations (generally diamond or circular shaped) and into the gutter while stopping debris. They also generally wipe clean of debris very easily and require minimum maintenance to last for many years.
What You Need:
What you need will depend upon the style you purchase. In general, you will need the following:
- Measuring tape
- Tin snips
- Screws (most installation hardware will come with the product)
- Cordless power drill
- Sturdy ladder
Installation Guide:
Step 1: Measure your gutter lengths and apply to the guard
Step 2: Trim to fit (some may allow overlapping for a fit- check your user's guide)
Step 3: Slide edge up under roofline and adhere with screws if required.
Step 4: Snap over gutter or screw to gutter edge depending on style.
Mesh Screen Guards
Gutter guard mesh screens are similar in nature to perforated guards but are simply made from a different material and have a much finer opening for water flow. Because of this, you may have to wipe the screen clear of debris more often to keep these small openings clear for water passage. They also have a fairly long life span when properly cared for.
What You Need:
What you need will depend upon the style you purchase. In general, you will need the following:
- Measuring tape
- Screws (most installation hardware will come with the product)
- Cordless power drill
- Sturdy ladder
Installation Guide:
Step 1: Measure your gutter lengths and apply to the guard. You will not always be able to trim these because of how the screens are framed to tension. Follow the manufacturer's guidelines for overlapping or trimming the product if needed.
Step 2: Slide edge up under the roof line and adhere with screws if required.
Step 3: Snap over gutter or screw to gutter edge depending on style.
Reverse-Curve Guards
Most, but not all, reverse-curve styles are professionally installed. If you are interested in this type of style, look for explicit instructions for installation for a proper fit. This style also fits up under your roof line or attaches to the fascia to allow water to run over it and follow its curve down into the gutter, all while shedding debris. When done correctly they are very efficient, but if not- may not work well at all and will allow water to run off as well as debris- negating the use of your gutter. These typically are very long lasting.
What You Need:
- Measuring tape
- Screws (most installation hardware will come with the product)
- Cordless power drill
- Sturdy ladder
Installation Guide:
Installation of these are very specialized and require the following explicit instructions. In general, this is what to expect:
Step 1: Measure your gutter lengths and apply to the guard. You will not usually be able to trim these because of how they are designed.
Step 2: Slide edge up under roof line or right under it depending on the design and adhere with screws if required.
Conclusion
Obviously with the various designs and styles of gutter guards form which you can choose there is no one set way to install a guard. Of course, you must always read the instructions for each type and model you decide upon, but the basic expectations have been reviewed above to help you understand what sort of work awaits you.
Always choose the gutter guard type that will work best for your existing gutter system and type of debris fall out you expect. And be sure to give your gutters a good cleaning prior to installation. If you have any questions or comments, please let us know below, and please share!