Sod is just grass and soil held together by a root system. It’s used for golf courses and stadiums, but if you’re here, you probably want to learn how to lay sod in your yard for an instant, beautiful lawn. You also want to get it right the first time. Here you will learn about sod, where to get it, what it should cost, how to install it, and some pro tips for making sure your new grass thrives for a long time.
Ideally, you’ll lay sod in the early spring or early fall when you have sunny days and cool, moist nights. You can plant in the summer, but you’ll have to water much more frequently.
The Benefits of Sod vs. Seed

You’ve probably already made the decision (believe me, it’s the right one), but in case you're still on the fence, sod is faster and easier – but much more expensive – than seed. You’re paying for the love and care someone else provided to that grass as it grew through infancy into lush greenness. Instead of waiting weeks or months for seeds to germinate and establish roots while you obsessively water, you can enjoy a sodded yard almost immediately.
Where can you buy sod?
I bought mine from Home Depot, which included free delivery, but you can get it from most local nurseries. It runs about $450 for 500 square feet and is delivered on a pallet with the sod rolled in three or four-foot lengths. You should schedule your delivery on the same day you’re ready to install or at most a couple of days before. If you do order early, don’t let the sod dry out. If you have to water it on the pallet, go ahead and do that-- but don’t oversaturate or you’ll break your back carrying it around your yard.
To estimate how much sod you need, brush off your middle school math. For a regular rectangular yard, just use a tape measure and multiply length x width. If your yard is irregular, try to divide it into several rectangular sections, get the area of each, and then add them up. I added about 10% to that number to get my order size (better safe than sorry) but had a few square feet extra when I finished. Most people will say get 5% extra.
What to do before laying sod
It’s easier to kill weeds prior to putting down sod, so you should use a general weed killer as many times as necessary in the weeks prior to your big install day. I used a big RoundUp spray, but as long as it's a nonselective herbicide, any one should do just fine.
You should also have evened and properly graded your soil, with a slight grade away from any structures for drainage purposes. For small and medium-sized yards, you should be able to do this with your trusty lawn shovel and rake.
Finally, you should get rid of branches, debris, and rocks. This part took me the longest as I have tons of rocks in my soil. It was slow and time-consuming, but I can’t stress enough how important it is to ensure that the sod takes root and lays evenly.
Do I Need a Soil Test?
We wrote a giant guide to soil test kits, and they do provide valuable information, including your soil pH, which should ideally be around 6.5 - 7 depending on where you live. But the real question is what to do with your results once you have them.
The basic answer is if you want to increase acidity (lower pH), add sulfur. If you want to reduce acidity (increase pH), add lime. Your local hardware store will sell soil amendments, and the bags will show you approximately how much you need, but it’s relatively cheap and easy. A 30lb bag of lime that costs $15, for example, will cover up to 5,000 square feet.
Step by Step Guide

In order to properly install your new lawn, you'll need a few important tools: a rototiller, which you can rent, borrow, or buy; a wide metal rake; and a knife for cutting. Any knife will do as long as it’s big and sharp.
Step 1: Add Topsoil
You should ideally put a six-inch layer of new topsoil over your existing soil. Topsoil has organic matter (hence why it’s darker) and nutrients that help the grass grow greener and heartier, reducing your need to use fertilizers later on. New loose topsoil will also allow air and water to permeate, helping with drainage issues.
Pro-tip: You can mix high-quality topsoil with organic compost to create the perfect nutrient-rich environment for new sod.
Step 2: Add fertilizer
If you did a soil test kit, you should know exactly what fertilizer you need to balance the pH of your lawn. Use a broadcast spreader to get even coverage. If you don’t have a broadcast spreader, you can do it by hand-- but you need quality gloves.
Step 3: Till & Rake
You can get a good but small rototiller for under $150. You can also borrow one from your neighbor or rent from your local hardware store. Whatever you decide, make sure to till about four inches of topsoil, which mixes the fertilizer and compost and further loosens the soil, again helping with water drainage and establishment of roots. No need for overkill (or over-till) here. Just do one or two passes over the entire yard.

Use a wide metal rake to smooth the area, breaking up any chunks of soil, then water the entire area. Watering before you sod helps the grass attach properly. Don’t soak the ground or make it muddy.
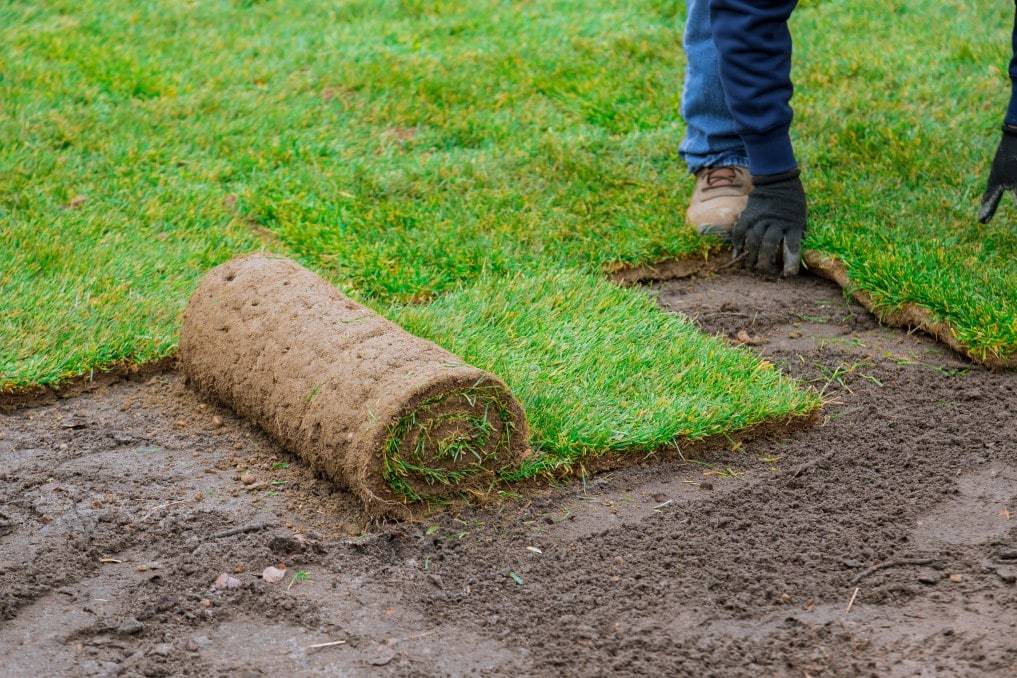
Step 4: Lay Down the Sod
Start at one side of the yard, usually along one long edge, and unroll the sod piece by piece. Don’t overlap the ends, but keep them pressed up against adjacent strips to avoid weeds popping up. For your next row, stagger the sod in a brick-like pattern, like so:

Use your knife to cut where necessary around obstacles or at the ends of your yard.
When you’re all done, ideally you’d go get a sod roller, which is a big heavy barrel-like thing that rolls along the sod to help it make contact with the soil and form roots. Don’t tell anyone but I didn’t have one, so I just slowly and carefully walked my lawn, focusing especially on ensuring the seams in the sod were pressed together and gently pressed into the ground.
Step 5: Water, Water, Water
Just as with grass seed, I can’t possibly overemphasize how important it is to water new sod. You should water every day for at least a week and then less and less over time until you’re on a normal watering schedule for your area.
Conclusion

- St Augustine Sod is a great addition to your home. It can handle both heat and humidity making it perfect for different climates. It can also grow in partial shade allowing your lawn to grow equally regardless of changes in the sun's positions.
|
|
Laying sod is easy. The hard part is the prep. Getting that right is what will lead to a healthy and long-living lush lawn, and that’s why I wrote this guide. If you have any suggestions or questions, let me know in the comments. If this article helped you, please share it. After you've finished, what's next? I wrote an entire guide on when it’s time to mow your lawn, so go ahead and check that out once you've finished laying your lush new lawn.