The fall season brings with it warm robust colors, feathery foliage and plenty of harvest fruits and veggies. What better way to capture the spirit of this crisp season than to adorn your home with a festive fall wreath?
Whether it’s your front door you’d like to decorate, a front gate or even a mailbox, fall wreaths are simple to make and won’t cost you much money, either. They’re the perfect DIY project. You can easily customize your wreath to incorporate all your favorite colors, elements, textures or colors.
Not sure where to begin when it comes to creating your own fall wreath? Fret no more! We’ve got a great tutorial to help guide you on your way to creating the most beautiful fall wreath ever!
What You Will Need

To create your beautiful fall wreath, you’re going to need a few materials. When it comes to decorating your masterpiece, you can be as simple or complex as you’d like. The materials we suggest can be found in any hobby stores. All embellishments and decorative elements are completely up to you.
Wreath Form
Whether you use a twig or spruce wreath is up to you. You can also buy your wreath form at any hobby store or create your own if you have the time, which is what I did for this project. It really saves a lot of time and comes weather-sealed. You’d just need a wreath wire and spruce, twig or any other element you want your wreath base to be. You can also choose from a wide variety of sizes. Any size wreath will work for this tutorial, but remember to purchase your wreath decorations accordingly. More for a larger wreath, less for a smaller one.

Wire or String
You can use floral wire and find it in any hobby store that sells crafts. This will be used to create a loop for hanging your finished product. It also comes in handy when trying to adhere the larger and heavier items to the wreath that glue just won’t hold.

Hot Glue & Glue
Some people prefer not to use hot glue because of the burn risk, but really, it's super great for crafting outdoor décor like this fall wreath. We used about 2 to 3 glue sticks in this tutorial.
Bulk Decor
Your bulk decor is what you are going to put on the actual wreath base. You can choose anything from fall leaves to twigs, long fronds of feathers, other foliage, dried berries and accent pieces such as wisps of leaves, thin pieces of wood, ribbon and plastic or cloth flowers.
Get as colorful as you’d like when making these selections, just remember that since this is a fall wreath, the bulk of the color should be within the spectrum of reds, oranges, browns, yellows and even maybe some purple or green accents.
You can collect natural materials for this project if you would prefer. If you're using leaves and branches from outdoors, be sure to clean them of debris and spray with a gentle household cleaner to remove any lingering insects or mites.
Decorative Accents
These are the little decorative pieces you’ll purchase to add some extra design flair into the wreath. Some of the most popular ones are fake fruit, tiny pumpkins, delicate dried flowers, satin ribbons, rhinestones, pine cones and wispy fronds of dried grass. You can purchase anything that you think will make your wreath pop and there is always so much to choose from within hobby stores.

Step-by-Step Fall Wreath Instructions
Now that you’ve got all your decorative pieces together, you can start to combine everything to create your stunning fall wreath! Once the wreath begins to take shape, you can add as much of the decorative elements as you’d like. If you think you overbought, don’t feel pressured to use everything on one wreath – conserve your wreath pieces and make another one to give away to a friend or loved one!
Step 1: Make a Game Plan

It’s better to shape your wreath out before actually gluing and wiring all the elements together. If you have a pre-made wreath, this part is easy – just start to lay all your decorative pieces down onto the wreath and move them around until it looks right to you. Take a picture with your phone (unless you can remember how you want it) to use as a visual guide as your start to shape your wreath.
Step 2: Adhere Elements to Your Wreath Form

Using your wire or hot glue, you can begin to adhere your elements into your wreath. Some people like to fill in the inner circle of the wreath with decorations, while others like to keep it simple and just decorate one side of the wreath. We will demonstrate how to decorate one side, but the same idea can be uses all the way around the wreath if you so desire.
Using the hot glue, start to set the large elements of the wreath together. Make sure the bigger pieces in your decorations stay on the outside so the smaller elements can fill in the center. Wire bases together and/or use hot glue to press down elements.
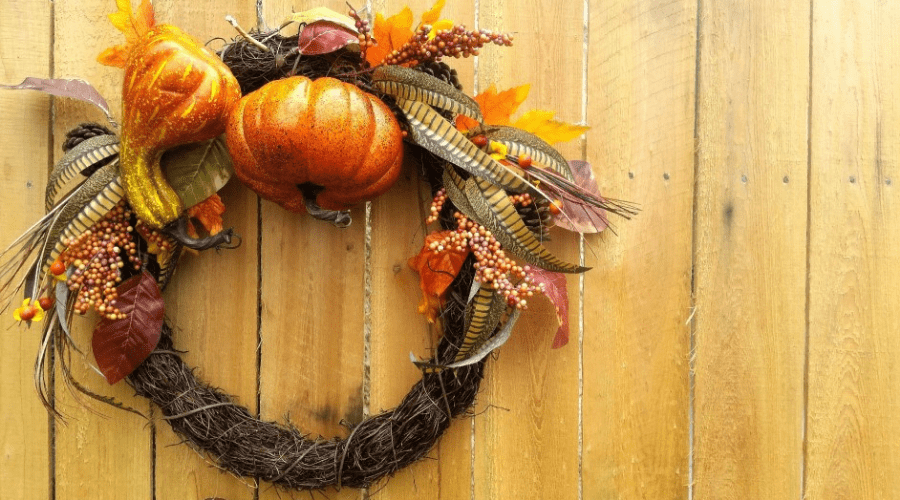
We are using long stemmed decorative berry fronds and leaves, so we set our fronds out in a cascade atop the edges of the top and bottom parts of the wreath. The leaves are broader, so they can be hot glued next toward the center. The idea is to start the base décor then work your way out like a decorative spray.
Make sure your decorations aren’t awkwardly hanging out. For example, if your fronds or feathers are too long, snip the ends to make a shorter spray. You don’t want any awkward ends hanging out, so be sure the décor is being incorporated evenly. Once your base decorations are set, you’re ready to embellish.
Step 3: Fill in with Embellishments

Make sure your base decor is all set and dry before adding embellishments.
The embellishments are typically the smaller elements of the wreath, so we suggest using hot glue to adhere these parts. Add a small dot of hot glue to your leaves, pine cones, fruits, veggies and/or rhinestones to create a spectacular focal piece.
Make sure that you don’t cover your base leaves or fronds too much, as this could take away from that spray wreath feel. Less is more when it comes to embellishments, so don’t overdo the leaf clusters or pine cones. You want your base decor to shine as well, since the base decor typically has the most dominant color.
Step 4: Apply Finish or Clear Coat

Some people like to spray down their wreaths with a clear glue or finish. Before you do so, make sure your wreath is dry completely and all the embellishments are in place. Hold your spray finish about a foot away from the wreath and spray down in an open area. NOTE: To add a bit of a shimmer to your wreath, spray it down with spray glitter instead of just a clear spray!
Let the wreath set for about 30 minutes to an hour before attempting to hang it. Try touching an outer piece of the wreath to make sure everything is dry and safely in place.
Step 5: Hang Your Fall Wreath

Using your wire or ribbon, create a simple loop at the back of the wreath to provide an easy-to-hang element. If your wreath is very heavy and full of decorations, double or triple up on the wire or simply use an old hanger. Old hangers are sturdy enough and can be cut and bent easily to achieve the shape you need.
Once your wire loop is in place, you’re ready to set your wreath up! It should hang easily on a nail on the front door, or you can loop extra wire around it to fit around a gate or post. Whichever method you want to use to hang it, make sure that all pieces are sturdy and the wreath won’t be in an area where it will be damaged by the weather.
Conclusion

So, how did it go? What kinds of elements did you incorporate into your wreath? Again, what’s so great about making your own fall home decor is that you can get as decorative with it as you’d like! It’s so much better than just going out and buying an already made one and it’s much cheaper too.
Have any advice or insight to share about constructing a fall wreath? We’d love to hear from you! Leave your comments and/or advice in the comments section so everyone can get some feedback on the process. Feel free to share design ideas and pictures if you have them. It’s always great to get more ideas and inspiration from others, that’s partly what makes DIY projects like this one so much fun! We hope you enjoyed this article and happy fall to you!
*You might also like: How To Make A Gorgeous Springtime Wreath With Monogram.