A replacement window is a huge investment, and a big chunk of your home improvement budget will be going here if there are many windows that need to be replaced.
Before you can order window replacements, you need their accurate measurements. To do this, you can either hire professional window installers to measure your windows, or you save yourself some money and do it yourself.
Although it's not difficult, it can be time-consuming and needs lots of detailed measurements to be done correctly. If you want to learn how to measure for your replacement windows, keep reading!
What You'll Need To Measure for Replacement Windows
To measure your windows, prepare your materials beforehand for better efficiency. You’ll need a:
- Tape measure - A reliable tape measure that you’re comfortable using. Make sure to choose one with a measurement system you understand, whether it uses the metric or imperial system.
- Pencil - Have a well-sharpened pencil on hand. We recommend pencils over ink pens to make room for erasures, in case you accidentally write the wrong number or fill in the wrong spot. It helps keep things neat for when you’re ordering your replacements.
- Paper - You will use it for logging your measurements. You can use a simple notebook, a blank sheet of paper, or a window measurement worksheet online printable.
- Ladder - This is optional and will only be needed for measuring tall windows from the outside. If you decide to only measure indoors, a step ladder or something similar will help with vertical and diagonal measurements.
How to Measure Your Windows
Once you’ve gathered all your materials, it’s time to find your standard window size and begin your window replacement project. It only takes seven steps, but it’ll be a huge help if you’re as precise as you can be with your measurements.
Step 1: Prepare Your Measurement Worksheet
Before you bring out your tape measure, you first need to prepare where you’ll be writing your measurements. Organizing your worksheet will help lessen confusion while you work and while you finalize your window replacement details. If you don’t want to create your logging system, you can look for a printable window measurement worksheet instead.
Step 2: Check Window Squareness
Image Credit: Paul Hanaoka via Unsplash
Checking if your windows are square refers to inspecting if your window corners have 90º angles. Do this by measuring diagonally from the bottom left corner to the upper right corner and then from the upper left corner to the bottom right corner.
When measured edge to edge, if the two measurements have less than a ¼ inch difference from each other, this means you have a square window unit and can confidently apply for a replacement estimate from a window installer. If their difference is bigger than a fourth of an inch, some adjustments to the window structure will be needed.
Tip: Measure all Your Windows
It’s important to measure each type of window you’ll be replacing for proper measurements. Even if you’re replacing windows that originally used the same dimensions, their sizes may have changed due to humidity, heat, and wear and tear. It requires more effort but will help ensure that each replacement fits well.
Step 3: Measure Depth
Window depth is often overlooked but is important in making sure your windows will not extend over the opening.
Excluding any window pulleys and parting strips, measure the depth of your opening from the interior to the exterior wall. For correct measurements, do this several times, at least thrice on each of the four sides.
For designs that do not open, measure each side of the window from the opening’s edge until the glass. Together with the thickness of the glass pane, the summary of these numbers equals your window’s depth.
Step 4: Measure Width
Image Credit: Paul Hanaoka via Unsplash
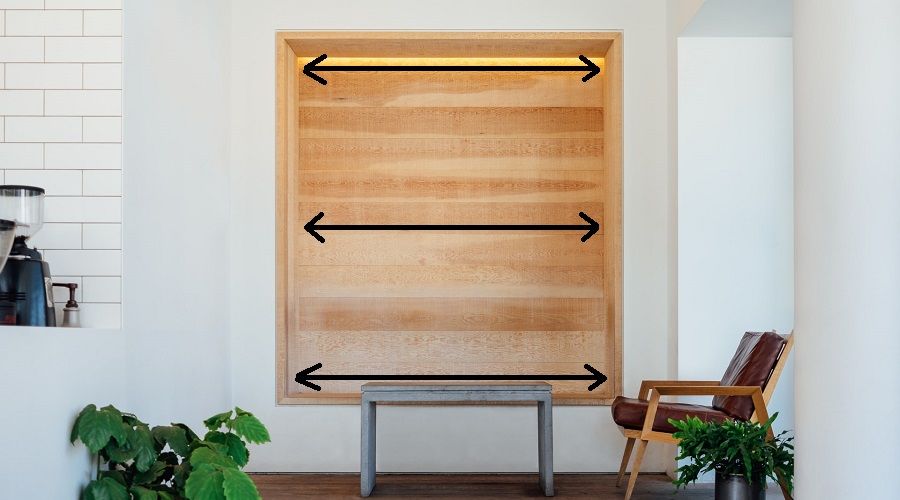
To get its width, measure the window horizontally across from the left and right window frame sides at the widest part you can reach without measuring the trim.
For proper measurements, do this three times by measuring the bottom, center, and top of your window opening. Measuring thrice helps alert you to possible wall warping and lets you adjust your window size appropriately.
Tip: Measure From Outside
You’ll have a much easier time measuring your windows from outside. Measuring your opening from an exterior wall means fewer obstructions could distract you from your task. You’ll use the same process only now you might be standing on a ladder while doing it!
Step 5: Measure Height
Image Credit: Paul Hanaoka via Unsplash
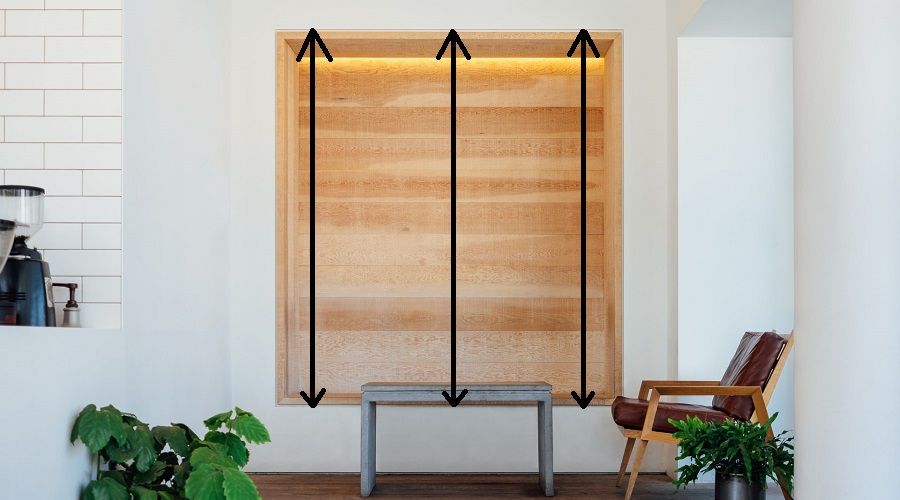
To get the height of windows, measure your opening vertically from the head jamb to the lowest part of the window sill.
For accurate height measurements, measure at least three points from the leftmost side, the center, and the rightmost side. Write down each figure on your worksheet and label them accordingly.
Tip: Double-check From Inside
It’s always good to double-check your measurements, especially if you’re not confident in what you’ve found. If you’ve measured from outside, do your double-checking from indoors. It helps you stay comfortable and will also help reveal any sloping or tilted surfaces in your window openings.
Step 6: Mark the Smallest Measurements
After double-checking everything, start marking the smallest depth, width, and height measurements of each window. Marking them with a circle or asterisk helps you write down the correct dimensions for your window installation order.
Using the smallest number in your orders will help ensure that your replacements will fit even the smallest parts of your window opening.
Tip: Send Your Exact Measurements
It used to be the norm to subtract ⅛ of an inch from your measurement to give your window a helpful allowance. While that used to help, it’s unnecessary now because the window replacement company you choose to work with will automatically subtract ¼ of an inch from each order to make sure it fits. Unless your window replacement company recommends it, avoid rounding down your window dimensions.
In Summary
Measuring your windows personally instead of hiring a window replacement company helps minimize costs, so long as you use the right techniques. Luckily, you just need to carefully follow these seven steps, and you’ll be good to go.
We hope you enjoyed this tutorial and that this helps you avoid any sizing mishaps for your replacement windows. Don’t be afraid to leave any comments, suggestions, or questions you might have down below, we’d love to hear your thoughts!
If you enjoyed reading this, help others who might also need this by sharing this article with your friends!


