It's time to start planning your spring garden. Designing a flower garden is exciting, as flower choices are practically endless! However, if it's your first time, the abundance of information out there might lead to an abundance of questions: What types of flowers should you plant? How do you grow flowers from seeds? When is the best time to plant them?
If you are a beginner gardener or want tips on growing a flower garden, look no further! Learn about everything you need to know about how to plant flowers in your garden.
What You'll Need

Image credits: By jeffwasserman via Canva
Before you get started planting your garden, there are a few tools you'll need.
- Flowers or flower seeds
- Soil
- Soil tester and amendments
- Garden plot, raised beds, or containers
- Gardening fork, gloves, shears, and trowel
Step One - Know Your Location

Image credits: sq lim via Unsplash
Though it’s easy to fall in love with bright colors or unique petals, you must first determine which flowers work for your garden.
Different flowers require varying amounts of sunlight, identified on seed packets and information tabs in planters. Some flowers prefer full sun (like Egyptian star flowers), partial sun/shade (like impatiens), or full shade flowers (like polka dot flowers). Full-sun plants require six or more hours of sunlight each day, partial sun/shade about two to four hours, and full shade two hours or less of sunlight.
To identify which flowers grow best in your location, assess your gardening spot. Look at where you intend to plant them and observe how much sun it receives throughout the day. Is the garden basking in sunlight from dawn until dusk? Are there any looming trees that make it shady most of the day? Consider the amount of sunlight and pick your flowers accordingly.
Step Two - Assess Your Soil

Next, it is time to analyze your soil!
Analyzing your soil helps to identify its pH (acidic, neutral, or alkaline), consistency (clay, loam, or peat), and fertility. Many of these tests are done in the comfort of your own home and are even possible to DIY with various household items!
Once you have a clear idea of what your soil is like, find flowers that thrive in your existing beds. Is your soil lacking nutrients, too dense, or too acidic or alkaline? Another option is to amend your garden to improve growing conditions. Amending the soil means adding more organic nutrients like compost, manure, and even wood ash to improve the pH, consistency, and fertility.
Step Three - Buy Your Seeds or Plants

Image credits: Belmtec SD via Pexels
Once you know which types of flowers work best for your garden lighting, it's time to shop!
There are countless perennial and annual flowers, each offering a different color, height, width, and bloom time. Ways to attain flowers include visiting gardening centers, checking online for seeds, or asking neighbors to propagate their plants.
Local gardening centers are beneficial as they have experts to guide you in selecting the best flowers for your region's climate. On the other hand, purchasing seeds online offers access to unique flowers or cultivars not often found at local stores.
Another fantastic option is asking neighbors, family, or friends to propagate their plants! A common form of propagation is taking a cutting of an existing plant and putting it in your garden to grow an entirely new plant. The benefit of this is that the plant has already proved successful! Your neighbor may even have some care and planting tips for you!
Pro Tip: When and where you begin growing your flowers depends on whether you purchase seeds or have an established plant. (See step four for more information!)
Step Four - Prepare the Garden Bed

Image credits: Kenny Eliason via Unsplash
Flowers will grow in various locations: in the ground, in raised garden beds, or even in containers. As such, even small apartments on upper levels can be home to flower gardens (even sunflowers will grow in containers)!
Whichever planting location you choose to plant your flowers, it is vital to prepare the beds to promote optimal growth. To do this, you must first clean them out. Use a gardening fork to lift the dirt and turn it over. Doing so breaks apart the ground, loosens the soil, and releases leftover plants and roots.
Continue to prepare your beds by adding organic material and gardening soil mixtures. But before you purchase generic flower soil mixtures, it is essential to note that different flowers require different soil consistencies.
Some flowers prefer sandy mixtures (like black-eyed Susans), while others prefer moist, nutrient-dense soils (like Japanese irises). To find out which soil your flowers succeed in, check the seed packet or search online.
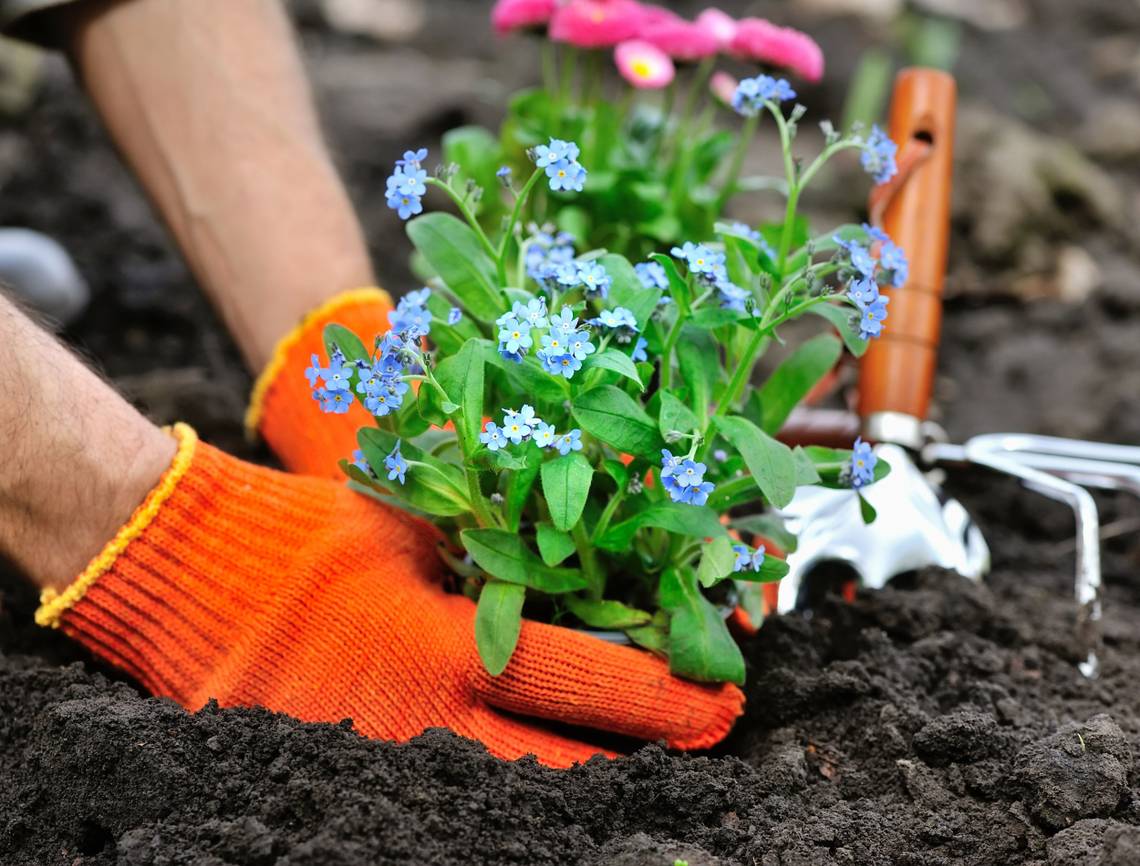
Step Five - Plant Your Flowers

Image credits: Lara Jameson via Pexels
Whether you bought flower seeds or plants, the time you plant your flowers varies.
Planting times are contingent on your hardiness zone, with zones ranging from 1 to 13 (find yours here!). If you live in a warm climate (higher zone numbers), growing seeds or plants occurs earlier in the year. However, those in colder climates (lower zone numbers) must wait until as late as April or May to plant.
Wherever you live, don't plant before the last frost. Once the risk of frost passes, it is time to get out the gardening trowels and gloves and start planting! Don't want to wait that long? Plant your seeds indoors, using a grow light if needed. Then, once the risk of frost passes, put your seedlings in the ground!
If planting seeds, use the spacing and depth measures on the packet to guide you. For example, sow sunflowers are about 1 to 2 inches deep and about 6 inches apart. For those planting established flowers, dig a hole the same width and depth as the pot your flowers came in. Gently remove the plant from the container and insert it into the ground, covering soil over the base.
Always give new plants a good watering once put into the soil. Ta-da! Your flowers are planted and ready to grow!
Step Six - Maintain Your Flowers
Now that you've planted your flowers, it's time to take care of them.
Regular Watering

Image credits: Anastasia Golubeva via Pexels
The best way to boost the growth of your flowers is to water regularly! Always keep in mind the flower type, your soil consistency, and how much sunlight your garden gets. However, as a general rule, a great way to determine if it's time to water is to insert your finger into the soil. Is it wet? No watering required! Is the soil dry? Time to give it some water!
Trim and Weed

Image credits: Mariia Boiko via Shutterstock
Deadheading is one gardening method that encourages your flowers to bloom again. To do this, use your gardening shears or your fingertips to snip the dead flower head off the plant.
It is also good practice to regularly check your garden beds for weeds. Some weeds are invasive and spread quickly, so remove them as soon as possible. Don’t want to weed so often? Use natural mulch in your garden beds to prevent weeds from spreading into your beds.
Get Planting!
Use these above steps to pick the best flowers, plant them, and help them prosper.
Always remember to verify your current growing conditions and plant your flowers accordingly. When flowers have the proper sunlight, soil, and care, they will reward you with bright blooms for months to come.
What are your favorite flowers to grow in your garden beds? Comment below with your recommendations!