A tropical beauty that blooms in all its glory, the peace lily or Spathiphyllum is an absolute addition to every green space. Gardening enthusiasts have always been passionate about this indoor foliage plant that blooms with dazzling white flowers. Peace lilies are also one of the best options for air-purifying indoor plants and are easy to maintain.
Like most plants, peace lilies demand care and maintenance. One of the major aspects to consider when caring for a peace lily is timely repotting. Repotting plays a vital role in ensuring that the plant continues to grow healthy through every season.
Keep reading to learn when and how to repot your peace lily. You are just a few steps away from having a happily repotted plant!
When to Repot your Peace Lily

Image credits: Elena Golovchenko via Pexels
Some plants prefer a little crowding, and the recurrent change can be difficult to adapt to. It is why gardening connoisseurs recommend repotting only when essential.
Repot your peace lily when it begins to show signs that it is necessary. Otherwise, springtime is the best period to repot your plant. If your peace lily is rootbound, you must immediately offer it a new home. When rootbound, the roots begin to grow through the drainage holes of the pot. They may also grow upwards to emerge on the surface of the soil.
A rootbound plant cannot effectively absorb water. Lack of moisture causes the peace lily to wilt, coupled with dramatically slow growth. If the condition prevails, the plant dies.
Materials Required When Repotting your Peace Lily

Image credits: Emmanuel Najera via Pexels
Now that you know if your Peace Lily requires repotting, it is time to get started! You must collect the following things for a successful project.
- Water
- Mister/Spray bottle
- Humidifier
- Fertilizer
- Larger pot
- Gloves
How to Repot your Peace Lily
Step One: Prepare the Right Soil Mix

Image credits: Teona Swift via Pexels
The health of your plant depends on creating a unique soil mixture for it. Combine an organic soil mix that facilitates good drainage with a pH of between 5.5 and 6.5, and add a combination of pumice and organic compost to further enrich your plant's home.
It not only enables you to duplicate the precise conditions your plant requires, but also closely resembles the nursery soil that the peace lily was developed. It makes transplanting much less stressful for the plant.
Step Two: Release your Plant from its Pot

Image credits: Tatiana Foxy via Shutterstock
Take your plant out of its existing pot carefully. If it is growing in a plastic pot, you can squeeze the pot's edge to release the plant. In case it sits in a rigid container, slide a knife around the inside of the pot's perimeter, as it will be easier to move the plant out.
Step Three: Loosen the Root Ball

Image credits: Jaclyn Vernace via Shutterstock
Once your plant is out of the container, loosen the roots on the bottom and slowly work the sides. To slightly loosen the roots, gently twist and separate them. Repotting into a larger pot will help greatly encourage additional root and plant growth.
Loosened roots are more available to adapt to the new potting mix. If the roots are extremely tight, use a sharp knife to make vertical cuts on the surface of the root ball. Do not fret because your plant will recover and grow much healthier after!
Step Four: Pick a Suitable Pot

Image credits: Karolina Grabowska via Pexels
The simple rule of thumb that most gardeners swear by is picking a pot one size up from the current container. For instance, if you have a pot with a 4-inch diameter, your new one should at least have a 6-inch diameter. Also, ensure that the pot has enough drainage holes.
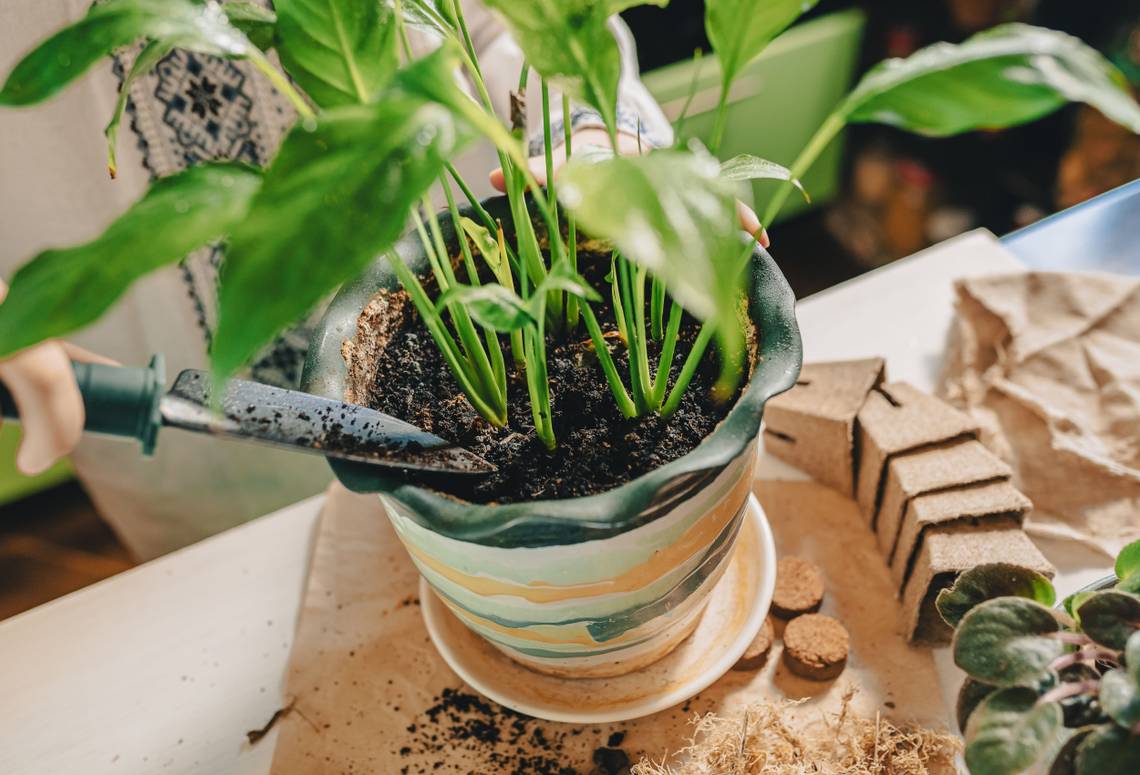
Step Five: Set and Do Not Forget

Image credits: Karolina Grabowska via Pexels
Add enough soil to the bottom of the pot and place the root ball into the mix. Top with more soil to cover the root while staying about one inch below the rim of the pot.
Slightly firm the soil by pressing it down with your fingers. It is now time to water your peace lily. Let the water completely drain before placing the pot back onto its drip saucer.
To Conclude
Repotting can be a stressful period for your plant. It is why you must be well-prepared to do it right! Follow the above-mentioned steps, and your peace lily will stay the focal point of your home garden.
Do you have more tips on ways to help the peace lily thrive? Share in the comments below.