Transplanting a garden plant can be a nerve-racking experience, even for expert gardeners. Whether you are an amateur or very experienced, you have surely needed to move your plants at least once. It is a crucial part of caring for plants. No matter if you are moving it to a different plot outdoors or a new pot, you have to do it right. Otherwise, you risk its wellbeing.
Down below, we have put together a couple of tutorials and lists of items needed to safely transplant your dearest babies.
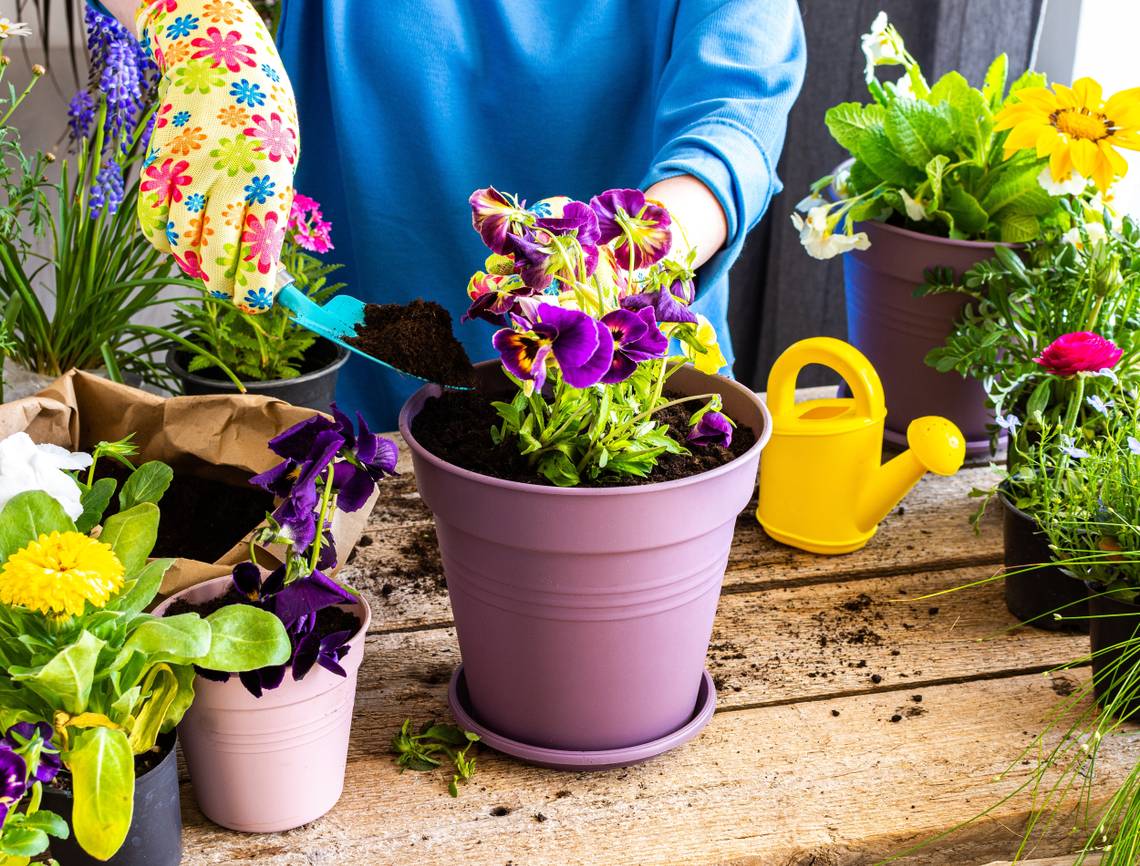
What You Need for Transplanting Plants

Image credit: Iryna Imago via Shutterstock
Depending on whether you are transplanting to a brand new pot or an outdoor area, you will need different items.
Transferring to a New Pot
- Water
- A new pot that is at least one size larger than the old one
- Potting soil
- A knife
- Gardening gloves
Transferring to an Outdoor Plot

Image credit: Olga Gorevan via Shutterstock
1. A Shovel or a Garden Trowel
You should use either depending on the plant size. For bigger plants, use the shovel, however, for smaller flowers you can use the trowel to the same effect.
2. Gardening Soil
Most people prefer store-bought soil because you can be certain it is sterile and free of disease and fungi. But if you decide to go another route and make your own, that is alright too.
A lot of people pick potting soil, but it's not the same as garden soil. Here's a fantastic article that talks about the difference between potting soil and garden soil.
How To Transplant Garden Plants Safely
Image credit: Mariia Boiko via Shutterstock
Depending on the type of plant and whether you are transferring it to a pot or an outdoor area, there are different techniques when it comes to transplanting them.
Transferring to Another Pot
1. Water the Plant a While Before Transplanting

Image credits: MissMessie via Creative Commons
It doesn’t really matter what time of the year it is, you can transplant indoor plants at pretty much any time. However, removing the plant from the pot when the soil is not damp can be quite difficult. Water will help the root ball removal process.
If you want to transfer a seedling, you must wait for it to sprout true leaves. You can recognize them easily - they are hardy and typically a different size or shape, unlike the seed leaves.
2. Choose a Proper Pot

Image credits: fra-NCIS via Creative Commons
Depending on the plant, you should look for the best size pot. Usually, one size bigger is adequate, but on some occasions, a larger pot may be needed. Whichever pot design you choose, just make sure there are drainage holes at the bottom.
Make sure to cover the drainage hole with a coffee filter or some mesh so that soil doesn’t come out. In the case that your pot doesn’t have a hole, you should put a couple of inches of gravel at the bottom to help keep excess water at the bottom. However, this isn't recommended, as excess water can cause root rot. It's always best practice to drill holes in a pot without holes.
3. Fill With Potting Soil

Image credits: Sasha Kim via Pexels
You mustn’t use potting soil and garden soil interchangeably, because garden soil can contain insects, fungi, and diseases, which can cause the demise of your plant. Fill your pot with enough potting soil (about a couple of inches below the rim). Using your hand to make a hole deep enough for your plant's root ball to fit. If you want optimal results, find soil that has a 1:1:1 ratio of loam, perlite, and organic matter. If you'd like us to recommend a couple of potting soils, we have an informative article about the best potting soil for container plants and where you can purchase them.
4. Now Grab Your Plant

Image credits: Tima Miroshnichenko via Pexels
This is where those gardening gloves will come in handy!
Gently tap the pot against a table while holding it upside down. This will help the root ball loosen and make it easier to slide into your hand. Make sure that you cover the top of the pot with your hand so there’s no risk of the plant just falling out. Never pull a plant out by the stem. If the situation is this dire, don't be afraid break the pot.
5. Take the Root Ball Out

Image credits: Teona Swift via Pexels
You will notice that root balls are typically clamped tightly together. However, if the plant has spent a lot of time in the pot, the root ball could take the shape of the planter. In such cases, you will need to carefully loosen the roots with your fingers. Closely inspect the plant and cut away all dead and rotten roots with a clean knife or sharp scissors.
6. Transplant Into a New Pot, Add Soil, Then Water

Image credits: cottonbro via Pexels
Once you have set the root ball into the freshly dug hole in your pot, cover it with potting soil. While you pat down the soil make sure you have at least an inch of free space from the rim.
Next, water your plant, but don't overdo it. This is a step you don't want to miss! Moreover, you should add some fertilizer to the water, so that your plant gets the needed boost to recovery. When it comes to watering, expert gardeners agree that too much water can shock the plant and/or cause root rot.
The best thing to do now is keep it out of direct sunlight for a couple of days. During this time, sprinkle just enough water to moisten the soil. Repeat this twice a day. After a couple of days, when your plant's leaves aren't droopy from the effects of the transplant, move it to a place that receives direct or indirect sunlight, depending on your plant's needs. The idea is to make the change gradually, and this applies to watering schedules too.
Transferring to an Outdoor Plot
1. Stop Fertilizing

Image credits: mmmavocado via openverse
If you are transplanting to a new plot outside, it's a good idea to stop fertilizing about two weeks before the transfer date. Still water the plant, but in much smaller quantities.
2. Fill the Outdoor Planting Bed with Gardening Soil

Image credits: Mikhail Nilov via Pexels
Ensure that the area is good for the type of plant you are transplanting. Is the soil okay? Does the are receive too much or too little sunlight?
Moreover, get garden soil from the store, so that it is pest, fungi, and disease-free. If your garden has clay soil, here's a fantastic article that talks about how to improve clay soil in your yard.
You can also mix compost into your soil for optimal results and an array of nutrients.
3. Dig a Hole for Your Plant

Image credits: Mariakray via Pexels
The optimal size of the hole you can dig should be about the same size as the pot its lived in. This way, you will always have a good fit and your plant will be supported.
4. Take the Root Ball Out

Image Credit: photofarmer via Creative Commons
Carefully turn the pot upside down and remove the root ball gently. As mentioned earlier, never take the plant out by the stem. It would be better to break the pot instead.
If the pot is made out of peat or paper, you should transplant the pot itself into the ground as well. All you’ll have to do is cut the sides, so roots can puncture through and water can reach everywhere.
5. Place the Root Ball Inside the Hole You’ve Dug

Image credits: Greta Hoffman via Pexels
The top part of the root ball should be at the same level as the top of the hole. In case you dug too deep a hole, you should add a few more inches of gardening soil to the bottom.
6. Add More Garden Soil, Push It Down, and Water
Image credits: Greta Hoffman via Pexels
Make sure you add a bit of garden soil on the top so there are no gaps. Pat it down when you are done. Last but not least, water your plant thoroughly depending on what it needs. For optimal results, add some fertilizer into the water while making sure it is appropriate for your plant.
If you're dealing with seedlings, here's a detailed article that shows you how to transplant seedlings into your garden. If you are wondering about the different tricks when it comes to different types of plants, you should look at this article that talks about general transplanting tips and tricks.
Go Grab Your Tools!
Hopefully, this tutorial was helpful to you and inspired you with your garden work. Transplanting garden plants is a part of gardening that is often necessary but, at the same time, tricky. After reading this guide, you should have no problems with it.
What is your experience with transplanting? Make sure to leave a comment down below and share the article if you enjoyed it. Happy Gardening!