Key Takeaways
- Use food coloring and household items to create what you need for fun, easy snow painting activities.
- Dress warmly and gather supplies like paintbrushes and spray bottles before painting snow.
- Play around with different ways to mix your own colors and choose the way you want to paint.
Snow painting is something that can keep kids busy when they are normally stuck indoors. They can enjoy this fun winter activity over and over again, all winter long – at least, any time there’s a fresh coat of snow.
A little food coloring and some other household items come together to create one of the great winter activities for kids. Any time there is snow, you can enjoy this DIY outdoor winter activity that combines fresh air and creativity.
Easy Snow Painting: What You Will Need
Gather the materials for outdoor winter fun

Before you get started with this outdoor winter activity, you’ll want to gather your supplies. Many things you need for snow painting you may already have around the house. But even if you don't, none of the items are expensive or difficult to find.
- Food coloring
- Water
- Clear spray bottles (one for each color, ideally)
- Funnel (optional)
- Paintbrushes (optional)
Making Your DIY Snow Paint
Choose your colors based on your design ideas

Fill up each spray bottle with water until they’re about ¾ full. Use a funnel if you have one. Otherwise, pour carefully and be prepared to clean up some spillage. Luckily, there isn't a lot of cleanup needed with easy snow painting activities.
Old perfume bottles work well for this DIY project, or you can purchase new spray bottles affordably at most dollar stores. Do not use spray bottles that once held cleaning products or bleach, as these materials can be toxic to plants and animals. Remember that the snow is not a shield. Chemicals applied to snow will ultimately sink down into your yard, finding their way into the soil and affecting and upsetting the natural balance.
Add drops of food coloring into each spray bottle. For pale shades, add two to three drops. For darker, richer shades, drip in four to six drops or more.
- After you drop some coloring in, swirl the water and coloring together to test the color opacity.
- If the color isn’t rich enough for your taste, add more food coloring and swirl again. Repeat until the water looks about the right color.
- Screw the tops onto the spray bottles, making sure they’re securely shut.
By design, food coloring is non-toxic and safe for human consumption. It will not cause any harm if food coloring gets on your skin or in your mouth, and it is also safe for pets. Likewise, food coloring will not harm plants or soil. However, if an excessive amount of food coloring finds its way onto your grass or plants during this outdoor winter activity, these items may take on the coloring. If enough of the food coloring gets into the soil, it is entirely possible that the foliage of plants growing from the soil could be slightly tinted, but this effect will be temporary and is ultimately not harmful to the plants.
Painting on Snow: Different Methods
Spray directly on snow or use paintbrushes to get creative outside

You’re ready to go out there and paint! Pick a test spot to try this fun winter activity and find out the range of the squirt bottles and spray each bottle a few times to see how far you need to be to get the right opacity of color on the snow. Then, pick your spot and paint away!
Snow painting is a fun outdoor winter activity for kids and adults. It provides a way to get active, spend a little time outdoors, and flex your creative muscles.
Dress for the weather when you go outdoors in winter! Even if you are doing a lot of moving around, wear warming layers to insulate yourself against the cold.
Spraying the Paint vs Using a Paintbrush
Use the spray bottles to splash color on fresh, white snow to make large-scale artwork. The spray bottles make it possible to stand back and enjoy the snow at a bit of a distance and they make it easier to create really large areas of color.
For finer work, use paintbrushes. Standard art paintbrushes work well with colored water. Simply take off the top of the spray bottle and dip paintbrushes in the water to begin painting away. Remember not to cross-contaminate colors by dipping the paintbrush into more than one color. Get several paintbrushes if you intend to get closer to snow and paint colors this way.
How to Paint Snow: Getting Creative
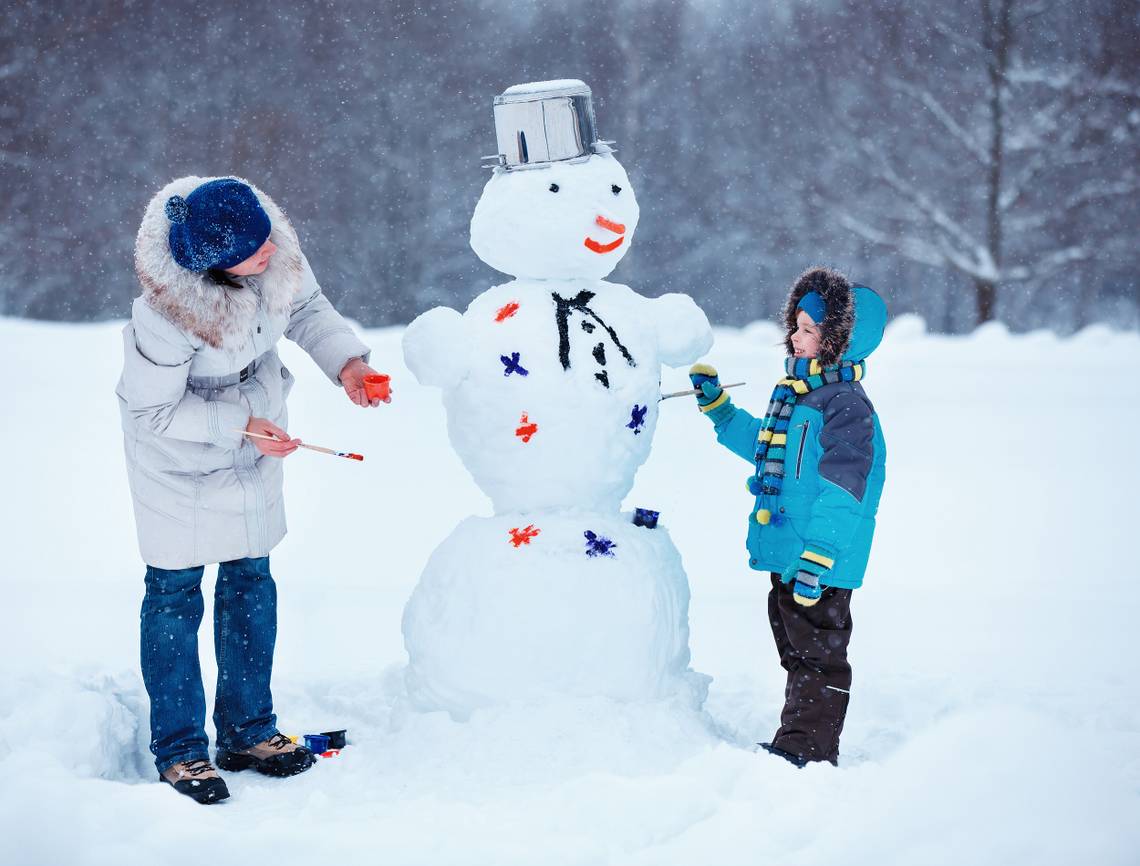
Painting show is about getting creative and getting active. Try painting snow in several different ways. You may choose to find a nice, white blanket of snow on the ground and paint a flat picture or create something against a snow-covered hillside. You might also build a snow person or another snow structure and choose to paint this instead.
The Art of Making Colors
Every shade is made of one to three starter colors

You are not limited in your color palette to the number of spray bottles you have available with this fun winter activity. With the colors red, blue, and yellow, it is possible to make every single color combination the human eye can see. Mixing different colors to make entirely new colors could become a fun art lesson for children during this activity. Play around with different ways to create colors to engage yet another part of your brain while you're snow painting!
|
1 part blue, 1 part yellow |
green |
|
1 part red, 1 part blue |
purple |
|
1 part red, 1 part yellow |
orange |
|
1 part yellow, 1 part blue, 1 part red |
brown |
|
1 to 2 drops of red |
pink |
|
4 parts blue, 1 part yellow |
aqua or blue-green |
|
1 part blue, 4 parts yellow |
lime green |
A Creative Outdoor Winter Activity
Just when you thought fun winter crafts were only an indoor activity, you now have another excuse to get out in the snow. Spending time outdoors is always a good idea and it's better for overall health as long as it's done in moderation and as long as you are dressed warmly. Pay particular attention to feet and fingers, ensuring that these areas are warm and dry at all times.
Play around with easy snow painting ideas and add another outdoor winter activity to your list of things to do while you wait for the warmth of spring!