Nail guns are an incredibly convenient tool to have around whether you are a serious builder, woodworking enthusiast, or weekend project warrior. Although there are many different types from which to choose depending on the job at hand, they all work to provide the same end result: driving a nail into where you need it. No matter which type of gun you have, and what you are using it for, how to use a nail gun is a common question asked after making such a purchase.
How Nail Guns Work
Obviously, to get started you need a nail gun. Your nail gun should be specific to the job you have on hand as there are many different type of nailers available for specific job. There are also many different types of brands, some of which are specific to powerful professional nailing solutions, such as Paslode, and RIDGID. But this doesn’t mean you should grab the most powerful tool - instead, you should choose the type you are comfortable using on the work you need to get done.
A nail gun, or nailer, has two jobs: to concentrate enough force to drive a nail into the material you are working on, whether that be furniture, baseboards, trim, flooring, or a building frame, and reload the next nail. They do this in various ways, including through spring loading, electromagnetic force, Pneumatic pressure with an air compressor, and using combustion similar to how a small gas engine works. To read about how each of these function within a nail gun, click through How to Nail Guns Work? for a more detailed explanation.

Types of Nail Guns
There are two main types of nail gun categories to keep in mind. Electric and pneumatic nailers each have their own unique differences that require you apply different power sources. Although very basic in nature, it is important to know how each is powered as that is your first place to check for safety and general maintenance purposes.
How to Provide Power to an Electric Nailer

Corded electric nailer

Cordless electric nailer
Electric nailers are either corded or cordless. Corded nailers are simple to work with and connect directly to a 110/120 volt power outlet of your choosing via an extension cord. You will need to make sure your extension cord is rated for the amperage being run through the nailer or you risk not having enough power.
Cordless electric nailers require a rechargeable lithium-ion battery to either run the entire tool or help provide a spark for a fuel-powered tool. Lithium-ion batteries connect easily to your nailer after a charge to provide the power needed to fire a nail. If you have a fuel-driven nailer you will need to install the fuel canister and battery. For example, many Paslode Nailer brands have this option to provide cordless power on par with a professional, pneumatic level.
How to Provide Power to a Pneumatic Nailer

Pneumatic nailers are powered from an air compressor. These are some of the most powerful nail guns available, and require the use of the compressor, a power outlet, and an air hose to attach to your nailer. The trigger controls the movement of the inner piston which drives the nail; when the air pressure is high it drives it down, triggering pressure to build and push it back to ready for the next load.
How to Load a Nail Gun
Once you have your gun ready to go, you’ll need to load it up. There are two styles of nails: stripe style and coil style. They do load slightly differently from one another, but the premise is the same. First off, always read your users manual. This is a great place to start to understand the workings of your nailer and review any precautionary warnings related to nail gun safety in black and white.
Loading Strip Style Nailers
A strip style nailer describes exactly how it sounds: a strip of nails connected by paper, wire, or plastic which fit into a magazine in the nailer to be fed through the safety tip of the gun. Be sure to purchase and load the correct strips.
Step 1: Turn Off Nailer
Always make sure your nailer is in the off position, or power is cut off from it when loading to avoid any accidents.
Step 2: Acquire the Correct Nail Clip
Make sure you are using the correct nail length and gauge for the nail gun you are using. You cannot mix and match nails for differing guns, and some guns will only work correctly with their specific nail brand. Be sure to read the manual in advance to avoid accidents or accidental discharge.
Step 3: Position the Nails in the Notch
Position the nails in the magazine notch to line them up correctly. Be sure they are pointed in the correct direction, especially if they are angled, and nothing is in the way of the track.
Step 4: Hold the Gun Upside Down and Press the Spring Button
Let gravity be your friend and rotate the gun upside down and press the spring button. This should let the nails set into the magazine correctly and get them into place to load for firing.
Step 5: Listen for the Click
You should hear a click as you complete step 4. This means you are locked in and ready to use. If for some reason you are unsure if it clicked, you can open the magazine again and make sure everything is where it should be.
Loading a Coil Style Nailer
Nails also come coiled to fit in a coil style nailer. Most of these nailers are for roofing and are made for fast, powerful, job completion. The nails come coiled up and secured with a rubber band, and are attached to one another via a fine wire, or occasionally plastic.
Step 1: Turn Off Nailer
Again, be sure your nailer is turned off or disconnected from the power source to avoid any accidents.
Step 2: Acquire the Correct Nail Coil
Be sure to use the correct lengths and gauges of nails. This is especially true for coiled nails as they can become jammed very easily if they are not the correct brand or size.
Step 3: Unlatch the Compartment Located on the Front or Back
The compartment for coiled nails is rounded and has a latch to keep it securely closed. Unlatch and open this compartment to fit your nails in.
Step 4: Remove the Rubber Band from the Nail Coil
Remove the rubber band from the nails, but keep the nails in a coil.
Step 5: Place the Nails (Still Coiled) in the Nail Storage
Set your coil of nails in the nail storage part of the compartment. Be sure they are setting as they should and are all pointing in the correct direction.
Step 6: Feed the First End of Nails into the Discharge Chamber
Take the first end of your coil and feed it into the discharge chamber. Not all guns are made the same so you may want to double check the manual to make sure you have fed them incorrectly.
Step 7: Relatch the Compartment
Close and latch your compartment securely, and you should be all set to go!
How to Fire a Nail Gun
Not that you have your gun loaded and know how to run power to it, you are ready to get to work. Not all guns fire the same, and they may have firing method choices. None are difficult to use, but it is important to understand these differences in firing methods due to safety reasons.
Contact

Contact, or bump, firing allows you to drive a nail each time you ‘bump’ the safety tip against a surface if you are holding down the trigger.
Single Sequential

A single sequential requires the pressure of the safety tip against a surface, and then the pull of the trigger. However, you also can keep the tip against what you are working on and move as you fire without having to lift it back up.
Actuation

This is very similar to a single sequential but lets you contact fire the first nail and then work as described above with the tip against a surface.
Full Sequential

Full sequential requires the tip to be against a surface before the trigger is pulled, after which it resets itself and you have to go through the same motions for each shot.
Step 1: Set Your Firing Method
If you have choices, be sure to set the firing method that is best for the job you are working on, and that you are most comfortable with. A bump firing system may make your job quicker, but it also means that the nail will discharge against any surface you bump it against- so care must be taken.
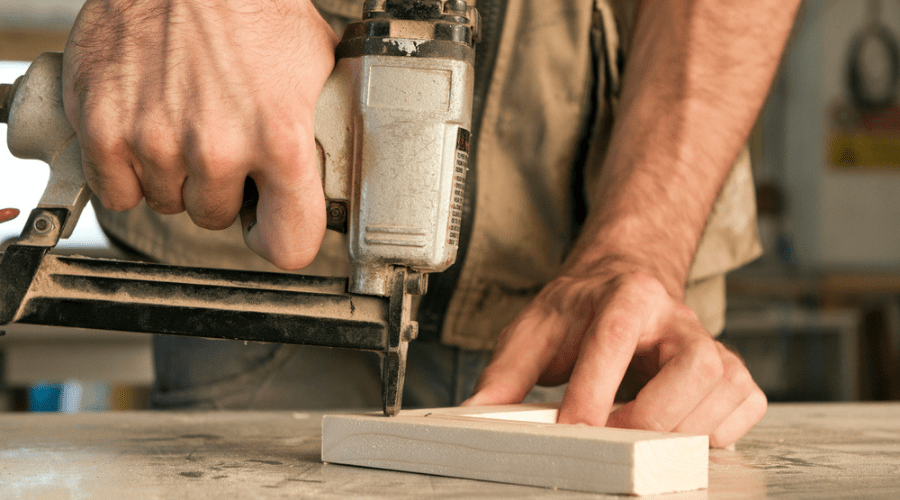
Step 2: Practice Nailing
Never hesitate to fire a few nails into a practice board prior to working on the job. This helps get you a feel of the firing method you are using, and the balance of the gun itself.
Step 3: Extend Your Working Arm and Pull Trigger
Once you are ready to work, make sure you are extending your arms and providing good support each time you pull the trigger. As you may have noticed there is a little bit of kickback when you fire, so you don’t want to have the gun too close to your body. This can become fatiguing as you work, so be sure to take a break when needed.
Conclusion
Using a nail gun is pretty straightforward and simple overall, but does require attention to the make and model you own. Be sure to know how to provide power to your nailer and the correct way to load it before getting started to avoid any issues with jamming or misfires. If you have any questions or comments about the steps described above, please let us know below! And, as always, please share!