Pruning saws are highly valuable garden tools to keep handy, essential for maintaining the health and appearance of trees, saplings, and shrubs in your garden. In addition, pruning regularly helps reduce the risk of diseases and pest infestations, and promotes better foliage and fruit production. Knowing how to use a pruning saw properly is a skill every home gardener will highly benefit from. Learn how to use a pruning saw safely and effectively to keep your garden looking neat and vibrant all season long!
Preparing to Use a Pruning Saw
Before diving into how to use a pruning saw, you’ll need to gather a few necessary items for safe pruning in your garden.
- Pruning saw
- Safety glasses
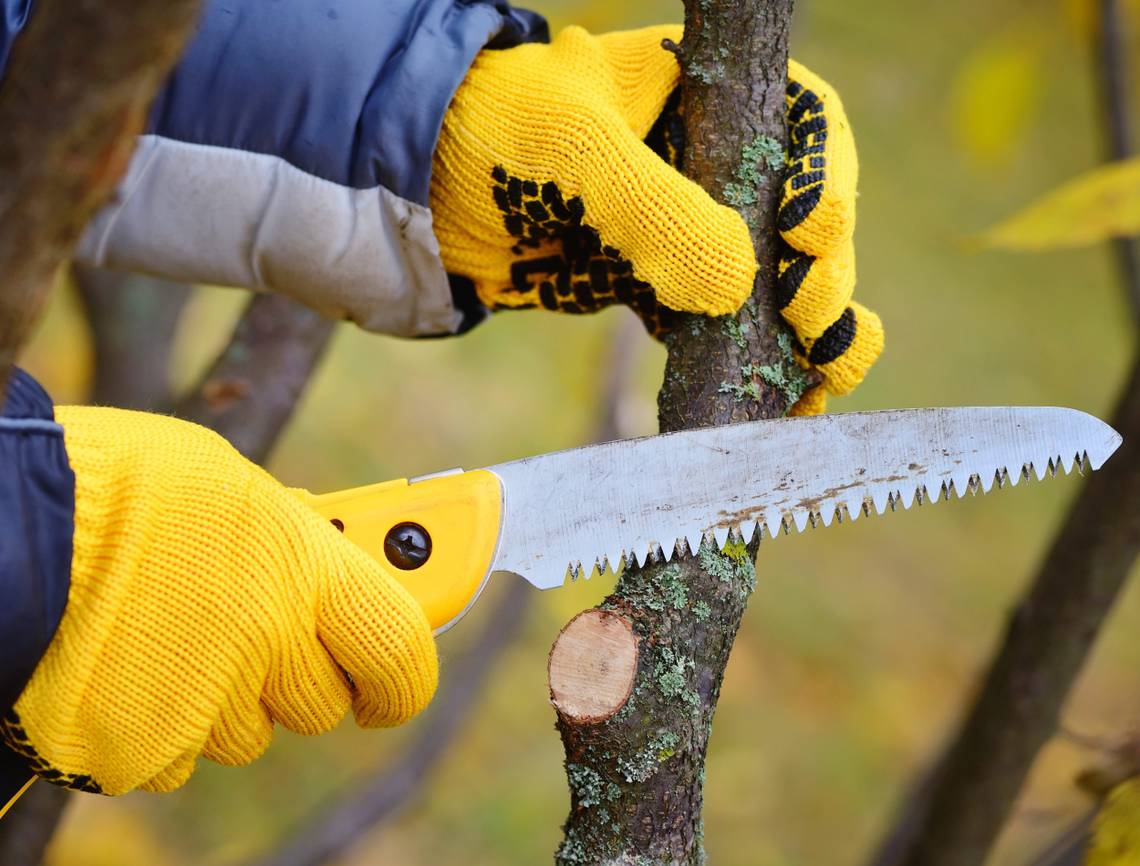
- Thick/layered gardening gloves
- Long-sleeved shirt or jacket
- Full-length pants
- Closed-toed shoes
- Hard hat (if using pruning saw overhead)
- Ladder (if pruning a tall shrub or tree)
How to Use a Pruning Saw
Step 1. Prepare Your Gear

Before beginning any pruning tasks, ensure you are preparing both yourself and your equipment for safe and successful pruning. Make sure you are wearing the proper protective gear and double check that your tools are cleaned, sharpened, and working properly. Confirm that the blade of your pruning saw is securely attached to the handle. This is especially important for folding or rotating blade saws that allow for pivoting as you don’t want to weaken the blade-handle bond.
Step 2. Plan Out Your Cuts

Next up, you’ll want to plan out the cuts to make on your tree or shrub. Conduct a visual scan of the branches to determine where a cut is required. You’ll want to start with any diseased or broken branches and then move on to more developed areas that need a trim.
If there are large branches, thicker than 1 ½ inches in diameter, position yourself to make the cut from above the branch. Since these heavier branches will require more effort and precision, an overhead angle will offer better leverage and control. For any smaller branches, complete cuts at angles that you can reach with ease. Also remember to clear the area around the tree or shrub you are pruning to avoid any potential damages caused by falling branches.
Step 3. Proper Positioning

Now you’ll want to focus on where to make the cut. To select your pruning spot, locate where the branch meets the trunk of the tree or another branch. This area will be characterized by a slightly swollen or rigid appearance and is known as the branch collar.
Avoid making cuts that are directly parallel to the trunk of the tree. Instead, you’ll want to follow the natural direction of the branch collar growth, which is usually on an angle. This will help keep the collar intact without hindering regrowth and healing. Make sure all of your cuts are clean and sharp.
For heavier branches more than 1 ½ inches in diameter, you may even need to make two separate cuts to avoid damaging the bark. The first cut should be made from the bottom of the branch, roughly 15 inches away from the main trunk. Cut about halfway through the branch for this first cut. For the second cut, make the cut on the upper side of the branch about 17 inches away from the tree trunk. This will allow the branch to neatly break off between the two cuts without stripping away any bark. A third cut will be required just above the branch collar to remove the remaining stub. You don’t want to leave the stub sticking out, as it can become prone to disease and pest infestation.
Step 4. Make the Cuts

When you’re ready to make your cuts, hold on to the branch with your free (non-cutting) hand while keeping it clear of the cutting area. Place the teeth of the saw on the branch and slowly move the handle towards you to stabilize or “seat” the saw.
Next, with slow, careful, and smooth movements, draw the blade back and forth, using the full length of the saw. Maintain a steady cutting motion until you reach the end of the cut or if the saw feels stuck at any point. This is when you’ll want to slow down to minimize the risk of injury to either yourself or the tree or shrub you are cutting. For the same reason, don’t let go of the branch until the cut is complete.
Pruning Priorities

There are three different types of pruning your trees and shrubs are likely to require throughout their lifetime. Thinning cuts are intended to offer the plant a chance for better air circulation if it’s become overgrown. Heading cuts are focused on helping the shrub maintain its natural growth pattern, so cuts will only be made on the exterior portion of the plant. Total “renovations” are meant to rejuvenate the entire plant every three to five years by cutting it down to at least 6 inches off the ground.
Different trees and shrubs will also require pruning at different times throughout the year. Shrubs that flower in the spring should be pruned right after their flowering period and shrubs that flower in the summer should be pruned in late winter or early spring. Evergreen shrubs, roses, and fruit-bearing trees should be pruned in early spring. Pruning at the proper time allows your plants to have enough time to recover before the next season.
Pruning Like a Pro
With these four steps, you’re now equipped with the knowledge of how to use a pruning saw safely and effectively. Remember to be cautious every step of the way, as these sharp gardening tools need to be handled with care.
Have any more questions about using pruning tools? Start a conversation with other home gardeners in the comments below!