When it comes to gardening and outdoor design, there’s more involved than just the flowers you plant and the colors you choose. You have to consider the arrangement of the space, as well as the climate. Do you have good soil for growing? And are you able to care for your garden in the winter, or will weather prevent that for you? How much room do you really have in the yard, and will you want additional space, maybe in planters on the porch or patio? These are all questions you should ask yourself as you get ready to design your garden space.
Planters and troughs can be a great alternative, should you not have the best environment for growing or face harsh winters that will kill dormant flowering plants. Unfortunately, purchasing these can be costly, and some of them are quite heavy and clumsy to move around, especially if you have to bring some of them indoors or into a shed of some sort to make it through the heart of the cold season. Making a hypertufa trough is an excellent way to save money and create something beautiful that is also lighter weight and easier to handle. While the process takes time, care, and precision, it’s not difficult. Here, we’ll go over all the things you need to know about how to make hypertufa troughs!
What is a Hypertufa Trough?
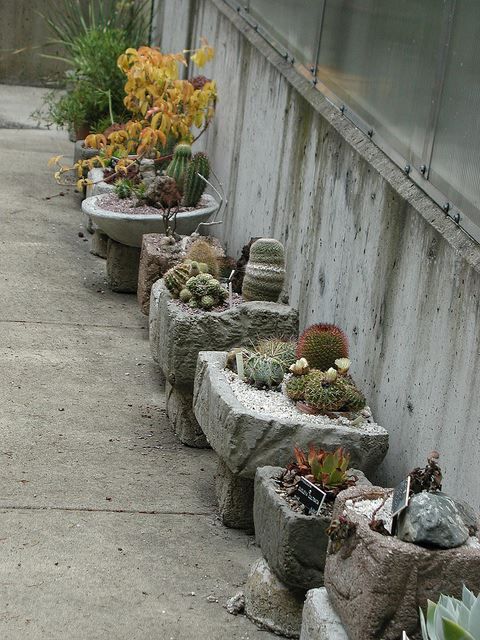
The term ‘hypertufa trough’ refers a modern-day version of the troughs used back in historic England, made out of a stone called tufa. Prior to modern construction, troughs were built and carved out of stone, a very porous type (tufa), for various uses, creating heavy boxes for planting as well as for feeding and watering horses and other livestock. You might see these stone troughs still in existence in gardens at some of the old, quaint cottages across the English countryside, overflowing with herbs and vegetation or overrun with moss. However, they aren’t readily available for the taking.
Today, in fact, those heavy stone troughs aren’t very convenient, even if they are gorgeous and bring that old world feel to the garden space. It’s also difficult to find them, as many have been destroyed over the years and those who have them in their own gardens are pretty loathe to part with them. Even if you came across an authentic limestone trough, it would likely weigh too much and cost too much to obtain and transport to your garden. A hypertufa trough mimics the look and feel of that design but with a lighter weight and a lower cost, as well as the ability to shape the trough any way you like, including in unique designs.
Hypertufa Material
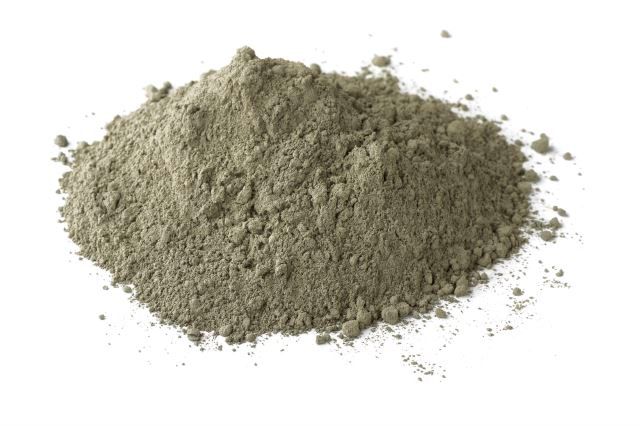
Cement
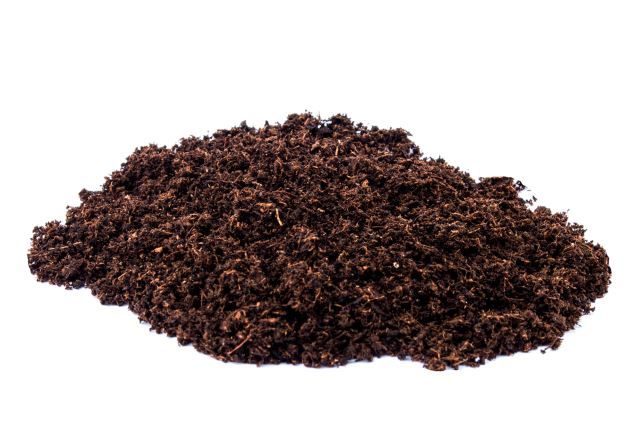
Peat-Moss
Alpine gardeners, who also used tufa in the antique water troughs you find sometimes in England, discovered that the material was becoming increasingly rare and, therefore, too costly to continue using it. As an alternative that was cost-effective and readily in supply, hypertufa was created. This is a cement-based mixture, which mimics the appearance of stone without weighing a ton or being expensive.
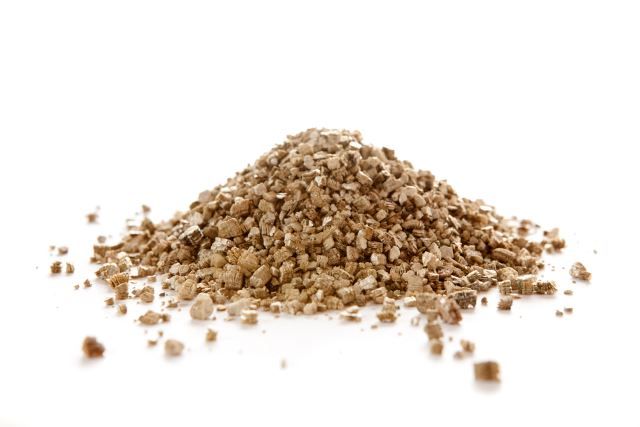
Vermiculite
Hypertufa is a combination of materials that work together to reflect the appearance of the natural stone used in these older troughs. A standard hypertufa recipe is made with three ingredients:
- Portland cement
- Peat moss (or similar organic material, but this works best to mirror the look)
- Sand, vermiculite, or perlite
Additionally, some hypertufa troughs incorporate concrete reinforced fibers (made from fiberglass) when creating an especially large container, since this will assist in strengthening the structure and avoid the risk of it breaking under its own weight and size. The exact quantity of materials needed depends on the size of the trough you want to build – or the number of troughs you want to create – but the formula remains the same: 1-part Portland cement, 1 ½ parts peat moss, and 1 ½ parts perlite or vermiculite.
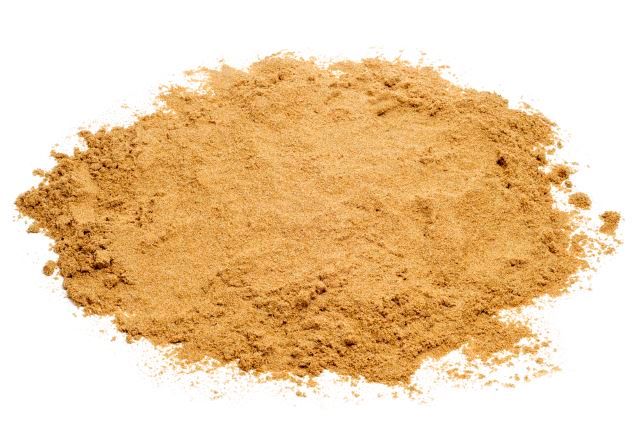
Sand
Assure that you’re only buying straight Portland cement. There are tons of mixed concrete and mortar products on the market, and these won’t suffice for the intentions you have of building a hypertufa trough.
Preparing the Ingredients
The first step to preparing the ingredients for your hypertufa trough is to assure your own personal safety. When working with these products, it’s important to recognize the safety hazards that arise. Portland cement is irritating to the skin, so you should always wear rubber gloves when handling it and mixing your hypertufa. In addition, the dust from perlite can be highly irritating to your nose and lungs, so it’s recommended that you use a dust mask to prevent any complications.
Once you’ve prepared yourself, you need to get a wheelbarrow or other large container for mixing your ingredients. Get a sieve and filter the peat moss. You want to remove any sticks and sift any lumps for a fine consistency.
Before you begin your work, you’ll need a sturdy, smooth surface on which to place the mold and resulting trough. It’s a messy job, and you want to assure you have a flat surface that won’t cause the materials to shift while wet. Also, because the container will have to sit for several days to cure and finish, you should make sure it’s a location you don’t need to use for something else in the meantime.
Using a Mold
You have a number of options for molds when pouring your hypertufa to construct your trough. Consider plastic tubs and cardboard boxes in large sizes, since these give you a distinct shape. You can also use cardboard to fashion a shape that isn’t square if you reinforce it properly at the corners and across the bottom. However, choose a material that is easy to tear or break so that, when the mold is set, it’s easy to remove this exterior. Styrofoam is also a great option, while wood and metal won’t work without being lined with plastic. These materials are also harder to remove since they aren’t as easily broken or shredded.
In addition, you want to make sure that the hypertufa mixture doesn’t adhere or seep into the container. You can line the inside of the mold with a plastic bag – something essential when using some specific materials but not necessarily required for all applications – or spray it with cooking spray, to make the removal of the mold from the hypertufa trough easier and smoother.
Beware of containers that are narrower at the bottom than at the top, since this isn’t an ideal shape for a trough. You want the bottom to be square with the top edges for balance purposes. For example, a typical planting pot won’t work as well as a square plastic bin, creating a cramped space for roots to grow and an overall issue with assuring that the troughs are safe and sturdy from the ground up.
Constructing Your Trough
Mixing your materials is a simple matter of having the right proportions if you’re building a smaller trough. However, larger hypertufa troughs require an additional ingredient – the concrete reinforcing fibers. You’ll only need a handful of this to assure that the final product is strong enough to work for you, so don’t overcompensate, as this could compromise the rest of the mixture.
Prepare the reinforcing material, and mix it with the rest of the ingredients. Be sure you add water slowly, so you don’t end up with a runny consistency. Rather, it should end up like a thick oatmeal and hold together if you ball it into your fist. Note that, while you have some leeway in the consistency of a standard square trough, a freeform trough requires a slightly drier mix. Either way, if you end up with a runny mixture, the strength of your resulting planter will be compromised. You have an additional option of using cement dye to color your trough, mixing in the dye as you create your base mixture. It definitely serves better than attempting to paint later and keeps you from negating that fine stone appearance.
Inside the mold, you want to create a layer that is 2 to 3 inches thick across the bottom. This creates a sturdy base that won’t buckle or break under the weight of soil and plants. When the layer is complete, use a stick of some sort to puncture holes for drainage, similar to those found in planting pots. This keeps water from building up and creating root rot on the plants within the trough.
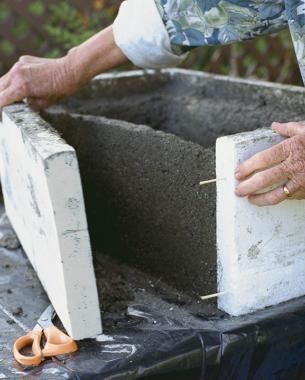
Finally, build up your walls so that they are about 2 inches thick and consistent in thickness all around the sides. It doesn’t have to be perfect; in fact, the idea is that stone is not completely smooth or symmetrical. However, if the design is wholly uneven, you won’t have the strength and appearance of the container you want when it’s done and creating walls that are too thin compromise the sturdiness of the overall structure. Make sure you tamp down your bottom and walls to assure it is solid and not ready to crumble apart. You want a firm, flat surface all the way around to assure strength and performance.
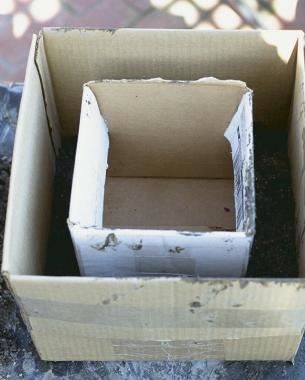
If you have two containers, one about 4 inches narrower in length and width than the other, this could help create the perfect ‘inside’ to your mold, so that you don’t have to worry about packing the mixture tightly against the outside of the mold. However, this could also make you less cautious about the consistency of your mixture. Consider your diligence when determining whether or not to create this ‘shortcut’ for yourself.
Another option you could consider is inverting the box or plastic container and molding your hypertufa around the outside. While this may be a bit messier, it can also assist in assuring evenness over the surfaces. It can also assist in making sure you cover the trough evenly with water during the curing stages and don’t have excess water holding inside the pot, where it could lead to mildew and other unsavory things growing during this time.
You don’t want any rough or jagged edges on your trough that can cause injury while you’re planting or maintaining your vegetation. A stiff wire brush can help smooth these edges and keep you safe while you work in the future. At the same time, you don’t want the surfaces perfectly smooth, since this is supposed to mirror the look of stone, so don’t ‘sand’ the inside of your trough and make it completely smooth. You can use the same wire brush to create the texture on the outside of your trough, which is an easier process when you fashion the mixture around the mold. This will create the ‘stone’ appearance of traditional English troughs.
Curing and Preparation
It takes time for the hypertufa to set and cure, and you’ll need to take steps to make sure this happens properly. It’s not a ‘set it and forget it’ process. In warm summer weather, you’ll need to give your new trough at least a week to set prior to removing the mold. If it’s cooler and you’re building your containers in fall or spring with temperatures closer to 50-60 degrees, you should give the mixture two weeks to fully cure.
In order to set, hypertufa requires ‘watering’, much like a plant. Every day during the curing process, you’ll need to lightly mist the entire trough with water, and be sure to cover it, preferably with a plastic bag or similar non-porous material to help hold in that moisture. Failing to care for the trough appropriately during this time can cause it to crack, either during the curing process, when you remove the mold, or when you decide to plant in it. You’ll know the hypertufa is properly cured when you can scratch the surface with your fingernail and come away clean, leaving no marks behind. If there are marks or material comes off under your nail, the trough will need to set longer.
When this period is over, you’ll have to remove the mold and let it dry. This will take another 5 to 10 days, depending on the weather. You’ll continue to spray it daily to keep it doesn’t hold onto any alkaline that can form in the mixture, which will upset the homeostasis of the soil, leading to poor output when you plant. Another option is to fill the trough with water and let it drain slowly into the ground, refilling every time it’s empty.
Over time, the color will lighten, and the weight will be reduced. If you didn’t make drainage holes during the molding process, or you feel you might not have enough drainage, you can now take a drill and make your holes in the bottom of the trough.
Preparing the Trough for Planting
Before you add soil to the trough, be sure to put a wire mesh or grate over the bottom. This will protect your soil from filtering out of your drainage holes while allowing water to vacate easily. This will also help reduce the incidents of slugs, which can be harmful to a number of potted plants, from entering your hypertufa trough through the bottom. Rather than using straight potting soil, consider using a mix of things that will drain well while still holding enough moisture to provide a proper growing environment for your plants. Try something like peat moss, humus, or compost combined with equal parts sand for excellent results.
Once you’ve planted your seeds, add a thin layer of mulch or pea gravel to the top, which will seal in the moisture and also give it a more garden-fresh appearance. To care for your plants, you’ll want to place your hypertufa trough on top of bricks or another elevated source where it can receive direct sun either in the afternoon or early morning. It’s essential to make sure you water your troughs at least every other day, especially in hot weather, to keep plants healthy. Letting the soil dry out will not only damage plants but also damage the setup of your trough. You should also fertilize (with diluted fertilizer) about once a month.
Note that you should see your trough start to age naturally over time, growing slightly weathered, discolored, and even growing moss. You can speed up this process by taking yogurt and brushing it onto the outside of the container and putting it in a dark, moist place. Moss will develop more quickly under these circumstances and with the ‘food’ of the yogurt.
What to Plant in Your Hypertufa Trough
There are some very specific things that grow well in hypertufa troughs, and these look the most ‘at home’ in such an environment. You might try planting:
Campanula
Viola
Armeria
Alyssum
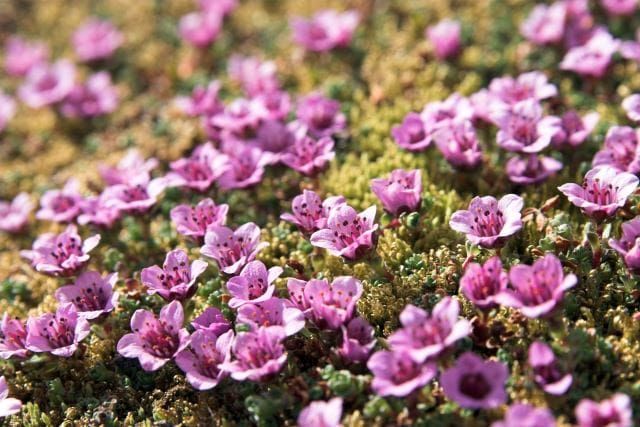
Saxifrage
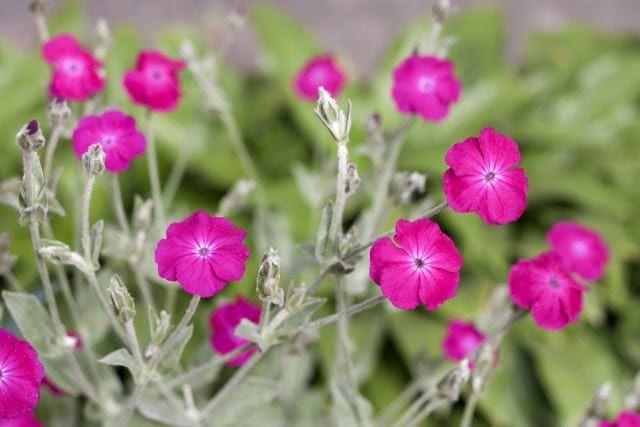
Silene
Sedum
You could also opt for a simple moss to overtake the trough, making it look like it’s older and overgrown. This would turn it into more of a talking piece or a décor item rather than a ‘garden’ but is still living and growing, which is satisfying.
Hypertufa troughs are also great for showcasing specific items. If you have a rock garden, you can show off beautiful greenery backed by the rocks in the troughs. They also make an excellent background for wildflowers or cacti, especially in areas where the soil isn’t conducive to year-round growth. Anything that might disappear in the background of a large, busy landscape design could be incorporated more fully for notice with the use of hypertufa troughs.
You may want to choose a flowering plant that can bloom all year, which will keep your garden fresh and vibrant. Consider Bishop’s Form (Erodium reichardii), or alpine geranium, which has a lovely two-tone color that is soft and charming.
You can also use them for practical purposes. Herbs grow well in troughs, including thyme, basil, and sage. Certain vegetables also do well. Try:
Radishes
Baby Beets
Strawberries
Carrots (round)
Use soil that drains well, since having any sort of pot or holder will make it more crucial that drainage is key. Holding too much water in the soil can lead to rotting in the roots as well as decomposition over time of the trough itself.
Bottom Line: Why Use a Trough?
Troughs are portable, and especially hypertufa with its lightweight construction and sturdiness. You can locate troughs anywhere – as a liner to your garden, a centerpiece to a specific display, or on your porch to display your favorite flowers or grow delicious herbs. If the weather becomes too much, you can relocate the troughs easily into a storage shed or at least out of the pelting rain and harsh elements.
Plus, hardscaping with stone and other elements can really set off your landscape design. Adding tiers to your garden, it gives the area a more three-dimensional appearance, which garners more attention and praise and gives you a more satisfying experience every time you step outside to admire your work. The convenience and improvement of design are definitely worth the effort and patience required to make a few of these containers to stimulate that sense of pride.
Overall, the process might be long, and if you aren’t a patient person, it’ll take some real self-control to get through it! Or start small and use this information to apply when considering how to make hypertufa pots, a smaller easier start to the idea. But the reward is worth the wait, and it’s not like this is a difficult project. Consider dressing up your garden with hypertufa troughs, in many shapes and sizes, and bring the old-world charm home.

