I have a great peach tree that I make a point of taking excellent care of, except this year spring came early, and instead of trimming it back like I normally do, I allowed it to grow as is. That may have been a bit of a mistake as it became so loaded with peaches that the branches were literally touching the ground!

Even after letting my friends take their pick (literally) of the tree, I was still left with A LOT of peaches. Not wanting any to go to waste, I borrowed a favorite recipe of mine for peach cobbler, found here, and created a variation of it to help me use them all up.
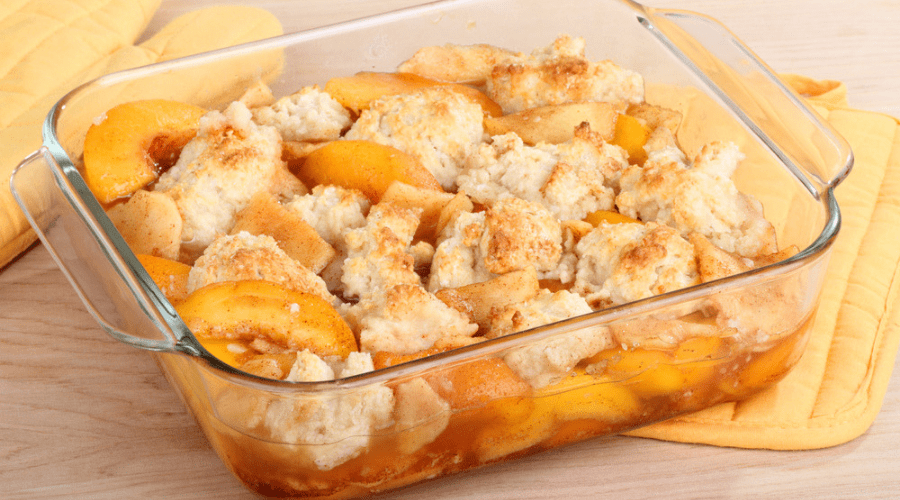
This make ahead peach cobbler uses a biscuit type dough in order to provide a freezable cobbler that you can unthaw and enjoy any time of year! I can’t wait to taste a little bit of sunshine come the winter months!
What You Need:

You need separate ingredients for the fruit mix and biscuit topping. Be sure to keep them mixed in their respective bowls in case you are tempted to put in the wrong amounts in the wrong mix as I did! In my defense I had 4 children trying to help!
Overall Prep Time: 15 - 20 minutes
Cook Time: 45 minutes at 400 degrees
Rewarming Time and Directions: 45 minutes at 400 degrees
For Fruit Mixture:
- 8 cups of fresh (not frozen) fruit
- 2 cups sugar
- ½ cup flour
- 3 Tablespoons lemon juice
- Pinch of salt
OPTIONAL
- If blanching fresh peaches you will also need a large pot of boiling water, as well as a large bowl, or pot, of ice cold water to use as a stop bath.
- Cinnamon and sugar for the top
For Biscuit Cobbler Topping:
Mix together-
- 3 cups flour
- 3 Tablespoons sugar
- 1 ½ Tablespoons baking powder
- Pinch of salt
Cut in -
- 3 Tablespoons shortening
- 3 Tablespoons butter
Mix in-
- ¾ cup whole milk or buttermilk
- 2 large eggs
For my directions I used 13x9 inch pans. This recipe can easily be adjusted for different sized pans, but be sure to change your baking times to make sure it bakes all the way through.
Step 1: Blanch Your Peaches

This recipe does call for fresh (not frozen peaches) due to the nature of the dough. You can use canned, but if you have fresh peaches at hand you will first need to blanch and peel them to more easily remove the skins. This is a quick and easy technique to remove the skin of the peach without losing any of the fruit, as often happens when you peel using a knife.
Simple boil a pot of water and let your peaches sit for 2 to 3 minutes. Remove and place in a stop bath of ice cold water to keep them from cooking any further.
What to remember:
If you cut an x in the bottom of the peach before blanching it may make it easier to remove the skin.
Step 2: Peel and Cut Peaches


Once blanched, the skin of your peach should pull off easily. For a cobbler I find that cutting the peaches into smaller sections helps create more surface area for your yummy topping to adhere too! You’ll want to cut up approximately 8 cups of peaches to make sure you get a good mouthful with every bite.
What to remember:
Make sure your peaches blanch long enough. If the skin doesn’t pull off easily then drop them back in the boiling water for a little bit longer.
Step 3: Pre-Heat Oven and Butter Baking Pan
Now that your peaches are ready to use, go ahead and pre-heat your oven to 400 degrees fahrenheit. Make sure to butter your pans in order to keep your cobbler from sticking to it while it bakes.
What to remember:
You may want to use a cooking spray to coat your pans, but I find that this too easily bakes into the cobbler and may not provide a good enough protective layer to keep everything from sticking.
Step 4: Combine Fruit Mixture and Pour into Pan

In a bowl combine your peaches, salt, sugar, lemon juice and flour. Stir until well blended and then spread along the bottom of your buttered pan. Make sure all your flour is well mixed and not lumpy, or you will get dried flour spots when cooked.
What to remember:
Do not add all of the flour at once. Rather stir it in bit by bit to keep it from getting lumpy. When you do this you also can control how much you add in case you want to leave a little back if you feel it is too thick.
Step 5: Combine Biscuit Ingredients

Blend together the flour, sugar, baking powder, and salt. Be sure to mix well to make it even for the next step. Then add the shortening and butter and cut it in using a fork, knife, or pastry cutter. This is an important step to keep your biscuits light and avoid a dense, bread-like ‘cobble’.

What to remember:
When cutting butter and shortening be sure to not mix it into the dry ingredients. Rather you should simply ‘cut’ it up until it is well covers and creates a ‘crumbly’ like substance. The colder your butter is, the better it will work.
Step 6: Beat Milk and Eggs and Add to Dry Mixture
Beat the eggs and milk together well and then pour into the dry mixture, stirring gently with a fork as you pour. You don’t want to overmix this step either as it will create a dense topping. Simply keep mixing until it is just combined.
Be sure to use whole milk or buttermilk for this step. Anything less and your dough will be more dense.
What to remember:
If you overmix it won’t ruin your cobbler. You simply will have a more dense topping to absorb the fruit juice. Topping your cobbler with ice cream also helps soften a dense cobble!
Step 7: Form Dough Balls and Drop on Top of Fruit

Tear off small pieces of dough and cover your fruit. Don’t pinch too hard or roll into balls. Instead you want to keep your dough loose and crumbly. Keep adding in small pieces until your fruit is covered, or “cobbled”.
What to remember:
Use as much or little of the biscuit mix and you want to taste. Smaller pieces will cook more quickly, and you may want to cover it with foil part way through the cooking process if it begins to brown. Larger pieces may cook a bit more slowly.
Step 8: Sprinkle Top with Cinnamon and Sugar

Sprinkle your top with cinnamon and sugar for a wholly unique and savory sweet taste. This will also slightly caramelize into the fruit juices that may bubble to the top and bake into the entire topping.
What to remember:
Cinnamon is a very nutritious spice to add to your baking and boasts a whole line of benefits for you to take advantage of!
Step 9: Bake and Let Cool

Bake at 400 degrees for about 45 minutes. Check your biscuit dough at this point and make sure it is baking through. If not continue to bake at 10 minute increments until completely baked through. As you can see I went ahead and made a whole bunch of cobblers to freeze for the winter months!
What to remember:
More dense dough may take a bit longer to cook all the way through, but baking for too long can easily overcook your cobbler. If you feel the topping is browning too quickly, simply cover with aluminum foil.
Step 10: Cover and Freeze
Once your cobblers are completely cooled (you may want to wait overnight), cover first with plastic and then with aluminum foil. Place in a deep freeze until you need them!
What to remember:
Be sure not to stack your cobbler until they are completely frozen. Once they are you can stack them upon one another in the freezer.
Feel Free to Make it Your Own

]
There is nothing wrong with adding in variations to your filling! I had some frozen blueberries that made a perfect addition to a few of my cobblers when baked in! I also enjoy throwing in some strawberries for a three fruit cobbler when I have them available.
Enjoy!
This is a great recipe that will provide you with a fresh off the tree taste through the whole year! Once you are ready to bake up and serve a cobbler, simply pull it from the freezer and put it in the oven on 400 for approximately 45 minutes. You will need to check the center for coolness, and if after 40 minutes your cobbler still has a cool center cook for 10 minute increments until done all the way through.
Feel free to cover your cobbler to keep your topping from browning any further if you feel you need it to keep baking.
I hope you enjoy this recipe as much as my friends and family have! Whenever I need a potluck dessert, or want to treat a friend all I have to do is head over to my freezer! Please comment your results below, and, as always, please share!