Fall is a wonderful time for frolicking, but it's also time to get to work making sure your perennials are ready for winter! The colder months bring snow and ice to many regions, so how can you make sure your plants hold up?
Taking a few extra steps in the fall and in early winter can ensure your garden pops back up, and is healthy and ready for the next growing season. without further ado, here's how to prep your perennials for the winter!
What You'll Need

Image credits: stux via Pixabay
In order to get started on your perennial garden there are some winter prep tools to gather first.
- gardening gloves
- spade or shovel
- pruning shears
- water
- soil
- mulch
- burlap (and paper or plastic tree wrap if desired)
- twine
Step 1: Identify Your Perennials and What They'll Each Need

Image credits: JamesDeMers via Pixabay
Every plant is unique and needs a different kind of care so take note of the perennials in your garden. Trees and shrubs are going to need different winterization than woody plants.
Some plants, like common abelia, sweet pepperbush, ninebark, and panicle hydrangea, benefit from one final prune of the season. On the other hand, mophead hydrangea, mountain laurel, and azaleas are among the plants that won't benefit from a late-season trim.
Rose bushes and similar shrubs like to be hidden under mounds of soil and mulch for the winter. Other plants prefer to be wrapped or covered until it's time to wake up from their hibernations.
Step 2: Prune the Plants That Need It

Image credits: Radovan1 via Shutterstock
Not all plants will want to be trimmed this late in the year. But some, like evergreen shrubs, will benefit from a cleanup. Not only does this help maintain the size of your plant and help train it to grow in the direction you want, but it also keeps your plant healthy.
Clear away dead and overgrown branches and stems to ensure your shrubs aren't left vulnerable to winter injury. Getting rid of this extra weight will help prevent diseases from invading your shrubbery.
And if you're feeling extra festive, you can use your evergreens cuttings as holiday decor! Trim perennials that may be prone to disease, like peonies and hollyhock, before the snow arrives. Cutting them down will help prevent mildew from growing and destroying the plant.
Remember not to put the trimmings of disease-prone plants in the compost. Composting them can offer space for the disease to grow and spread to other parts of your garden that you may be using that compost in. After you've trimmed and thinned the garden, you're ready to give everybody a good last soak.
Step 3: Water and Fertilize Your Plants

Photo by David Ballew on Unsplash
Wet soil can hold up to four times the amount of heat through the winter than dry soil can. Watering plants well going into winter helps fend off frost and keep the space around the roots warm.
If you live in an area where winters are typically drier, you can water plants monthly to keep the soil healthy and give your perennials the boost they need. Use a slow-release nitrogen fertilizer on trees and shrubs to help add some extra nutrients into the soil before winter sets in. It will help make sure they are still getting all of the vitamins and minerals they need even if they aren't actively blooming. Even better it can help encourage root growth while the parts of the plant above ground remain dormant.
If you live in a warmer climate where plants may be actively growing through the winter months, you can also fertilize the rest of your garden. Using the right dose for your plants and your climate, as fertilizer can encourage new growth, which can then be damaged by harsher winter conditions.
Step 4: Move Potted Plants

Image credits: aliona zueva via Pexels
Move any potted plants that won't survive the winter conditions inside if possible. For the larger potted plants that won't fit inside, move them to the soil. Soil holds heat better than pavement in the cold, so having your pots on a patch of dirt will help retain some heat around the roots.
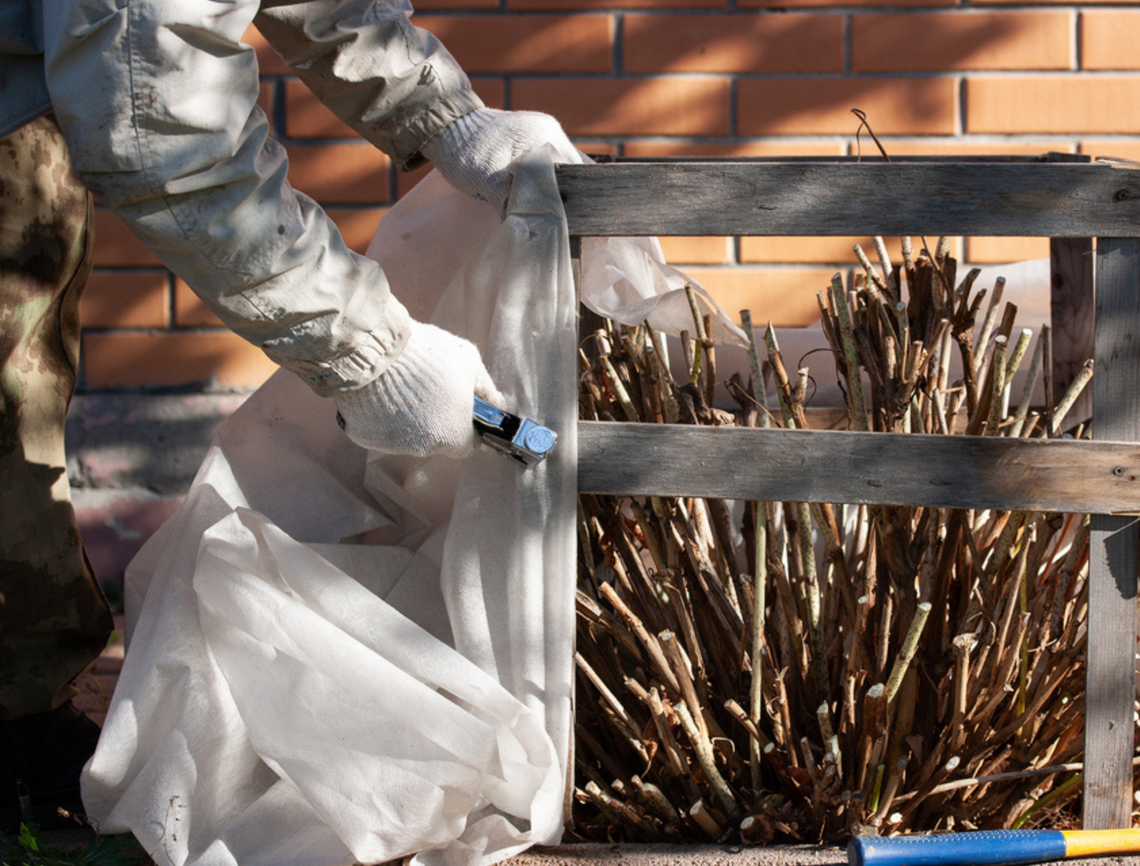
Step 5: Wrap Your Plants

Image credits: Tanja Esser via Shutterstock
Make sure the foliage isn't still wet from step three before covering your plants with burlap. The ground can be wet, but the plant should not be. Burlap is breathable enough that air can adequately flow in and out of the wrapping while offering protection from the elements. A double layer should work for most plants. Although, this isn't the only material you can use.
If you want extra protection for the trunks of young trees or topiaries, you can wrap them in paper or plastic tree wrap. Plastic isn't ideal for the rest of the plant because of its lack of breathability. Make sure to only use plastic during winter, as leaving it on year-round can create a breeding ground for harmful bugs.
Wrap young and newly planted trees together using burlap and twine if possible. Wrapping them together helps distribute the weight of fresh snow, limiting the chances of major damage. You can wrap older trees individually while also wrapping any lower-lying plants near the pavement to shield them from sidewalk salt.
Sidewalk salt is great at assisting in clearing ice from your walkways, but it can be an enemy to plants. The chemicals in the salt can cause browning on leaves and needles, delayed and reduced growth, nutrient deficiencies, and can kill or severely damage buds. As the salt dissolves in melting snow, it can also strip the nutrients in the soil, meaning your plants might not be getting a balanced diet. It might be worth reducing salt use or mixing salt with sand or gravel to improve traction while still melting ice.
You can build or invest in a row cover tunnel or DIY a longer-term solution, like cold frames. Cold frames are mini houses that close around your plants to protect them. Use thermal blankets around and over your potted plants as an added layer of protection. Remove the blanket from your plant in the spring gradually, so it's not shocked by a different temperature.
Step 6: Mound and Mulch

Image credits: zlikovec via Shutterstock
For shrubs like rose bushes, build up a mound of dirt around the base of the plant, making sure the soil in the mound is well-draining. Build a mound about 10 to 12 inches up the plant to protect against massive temperature fluctuations.
Cover the garden bed with mulch after you've built the mounds. Mulches made of organic matter are best, so use wood, straw, leaves, compost, or a combination. Mulch is also most effective when there is still space for airflow, so don't pack the mulch down too much.
You will need to give trees and shrubs recently planted a good layer, about 3 to 4 inches, to protect them from harsher winter conditions. If you live in an area that thaws and freezes repeatedly through the winter, add more.
If you like the look of mulch year-round, feel free to keep it in your garden beds. Just keep in mind that you will eventually need to replace mulch to keep up the health of your plants.
The More You Know!
Trimming, mounding, mulching, wrapping, and moving plants can seem like a big to-do, but putting in the extra effort is worth it. This time of year put your garden in a good position to flourish again after the snow melts.
All that's left to do now is wait until spring when you can clean up the mess winter left and prep for the next growing season.
Do you have any other winterization hacks? Share your tips in the comments.