The life of your poinsettia doesn't have to end with the holiday season! Though poinsettias are commonly grown as Christmas plants, you can enjoy their beautiful foliage year-round and even turn one plant into more by propagating cuttings. It is the perfect way to add to your houseplant collection or share with friends.
Learn how to propagate your poinsettia so you can spread the holiday cheer next year! Plus, you'll be a pro at growing your very own poinsettias, and you won't have to rely on garden centers for your dinner table and holiday décor.
Tools You Need

Image credits: pundapanda via Shutterstock
Like all gardening tasks, there are a few tools you'll need to propagate your poinsettias from cuttings.
- 4-inch plastic pot
- Coarse sand
- Peat moss
- Gardening gloves
- Pruning shears
- Rooting hormone
- Stake
- Propagation dome or plastic bag
- 6-inch pot
- Potting soil
Propagating Poinsettia
With the right tools under your belt, it is time to propagate your poinsettia!
Step 1: Preparation

Image credits: By irynakhabliuk via Canva
Timing and preparation are key when it comes to propagating your poinsettia. Timing-wise, propagate your cuttings in the summer after the plant develops 3 to 5-inch long shoots at the base. Summer is also the active growth period, meaning there is a better chance your cuttings will develop roots.
Knowing it will soon be time to propagate, you can prepare your materials. Start by filling a clean 4-inch container with well-draining potting media, such as half sand and half peat moss. Moisten the medium by watering it. Then, ensure your pruning shears are correctly cleaned and carefully sharpened, and apply protective gardening gloves.
Step 2: Take and Plant a Cutting

Image credits: BearFotos via Shutterstock
Your cuttings should be healthy, with new stems. Choose stems with several small leaves and a few mature leaves at the top, avoiding any that look damaged or malformed. Then, remove one or two leaves closest to the cut end of the stem to reveal the node and apply the rooting hormone. The treatment increases the chance that the cutting will produce roots.
Then, plant the stem cutting in your prepared pot, covering the bottom third of the stem. If the cutting doesn't stand up on its own, add a stake to the side. Place in a bright location and cover with a propagation dome or plastic bag to maintain humidity levels. Keep temperatures around 65 degrees Fahrenheit and water the plant when the top inch of the potting medium is dry.
Pro Tip: Poinsettias ooze a thin latex-like sap that can irritate skin and cause dermatitis for some. Always wear protective gloves when handling the plant.
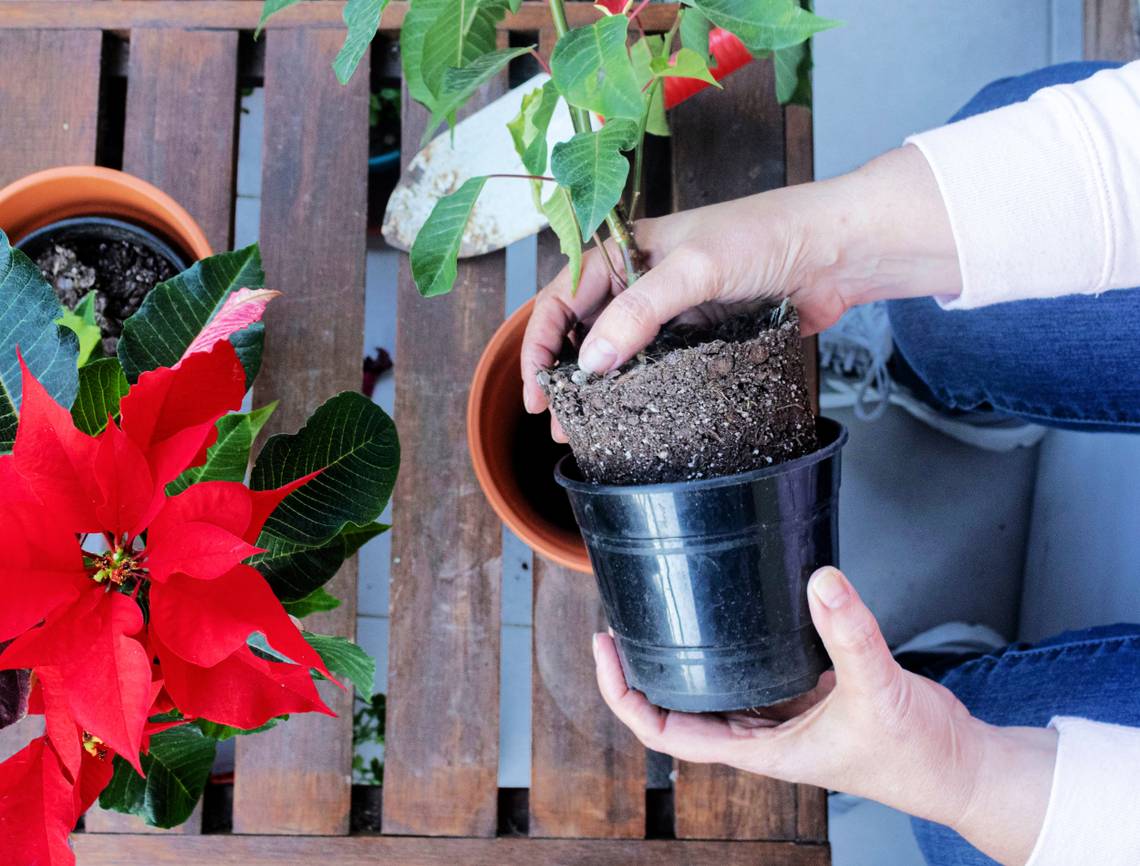
Step 3: Monitor and Transplant

Image credits: pundapanda via Shutterstock
Over the next two to three weeks, continue to water and protect your cutting in its humidity dome. After three weeks, gently tug at the cutting to see if roots have formed. If it feels stuck when you try to pull it, there are roots; if not, the plant isn't established yet and needs a bit more time. You can check again in two to three weeks. If the plant has roots, remove the propagation dome.
Two weeks after the plant has rooted, transplant it into a 6-inch pot and replace the potting medium with well-draining potting soil. You can also transplant it in your garden in the fall if you live in a frost-free zone. Keep in bright light to partial shade and keep the soil moist. Avoid too much shade, as the plant could lose its color.
Planting Poinsettia Seed Pods

Image credits: PinkCoffee Studio via Shuttestock
If your poinsettia doesn't make it through the season and there are no viable stems for propagation, you can plant the seed pods. There is a good chance your seeds will be cross-pollinated with another variety, meaning you'll have a unique poinsettia plant. Collect the seed pods from the center of the flowers once they turn brown.
Then, store them in a bag until they completely dry out. If the seeds pop out of the pods, they are ready for planting. Sow the seeds in 2-inch pots with moist, well-draining potting soil, placing one seed in each container. Keep in a warm, bright area, and you should spot a seedling in two weeks. Repot the poinsettia once it outgrows the small pot.
Prop and Grow!
Keeping your poinsettia plant in a bright, warm location with moist soil will ensure it remains happy and healthy, meaning it will also be an excellent parent plant for propagation. Snipping a few stems and growing them in potting media for a few weeks at the end of summer will help you create new poinsettias, perfect for gifting to family and friends, or decorating your home, for the holiday season.
Do you have any tips for propagating poinsettias? Share in the comments below!