The Monstera definitely tops the list if you're looking for a plant that can accentuate the interiors and your mood. Thanks to its majesty, the plant's big green perforated leaves are featured on many things, including clothing, postage stamps, and sheets.
In ideal conditions, your tropical beauty can grow between 1 and 2 feet per year. To support its rapid growth, you'll need to repot the Monstera plant before it outgrows its current pot. Since the Monstera isn't a beginner-level plant, you must learn when and how to properly repot them.
Note: Monstera plants (leaves, fruit, roots, stems, and seeds) are mildly toxic to humans and toxic to pets. Please keep your Monstera plants away from pets and children to avoid accidental ingestion.
When To Repot Your Monstera Plant

Image credits: Regina Burganova via Shutterstock
Generally, you should repot your plant every two to three years, but if you've missed a couple of years, watch out for these signs to know when it's time to repot your Monstera.
1. Every Two to Three Years
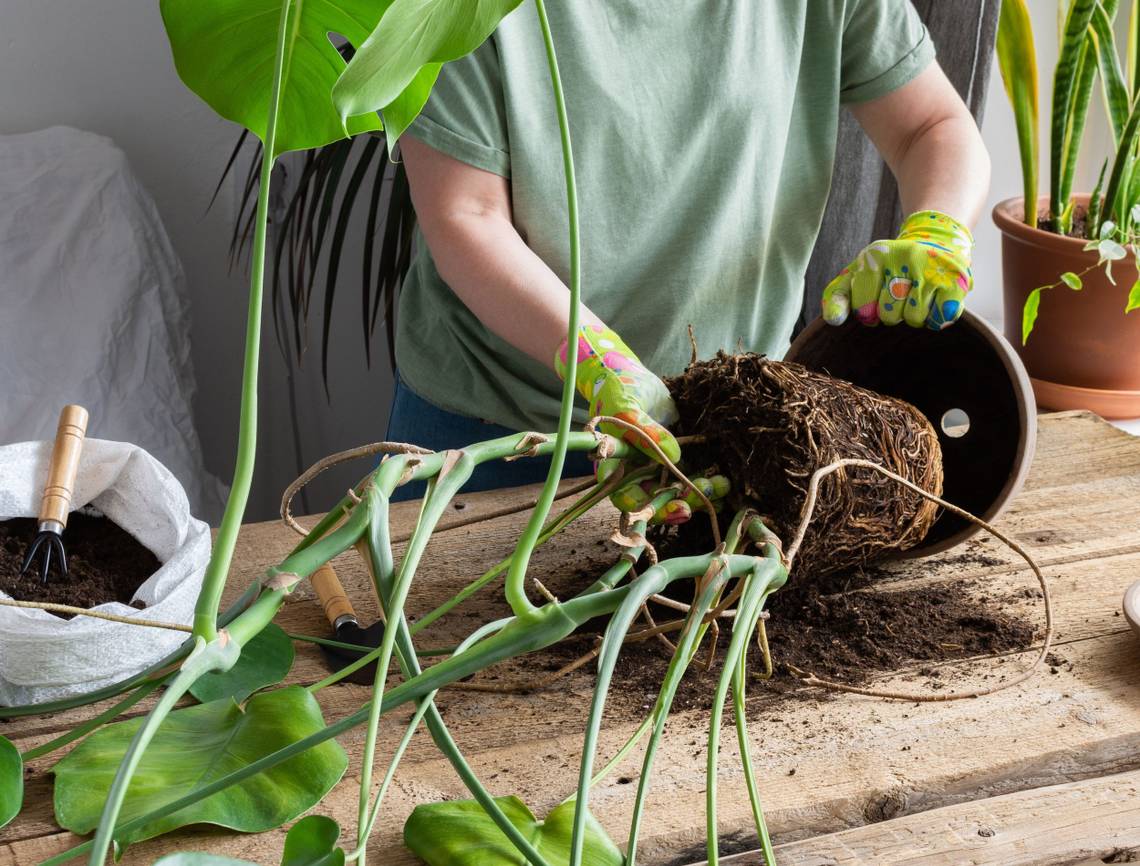
There's a common misconception that Monsteras like to be root bound, but this isn't true. While the roots enjoy snuggling together in small pots, they need space to develop and thrive.
A general rule is to use a pot two to three inches larger then the original. Usually, this will need to be repeated every two or three years in the spring.
2. Roots Poking out of the Drainage Holes
Remember, in ideal conditions, your Monstera can grow 1 to 2 feet yearly. If your Monstera is very happy, its roots may poke through the pot's drainage holes less than a couple of years after you repot it!
In this case, you should repot your plant immediatly instead of waiting another year or two. If you can't repot for various reasons, trim the plant's roots sticking out of the pot's drainage holes. While this is an aggressive step, it may be your only option if you deal with limited space.
3. Poor Soil Structure and Quality
Monstera plants need quick-draining soil to thrive so, if the soil rapidly drains or your plant ends up with wet feet, the soil structure and quality need attention.
It could also mean that your plant has become root bound. If this happens, you'll need to repot your plant and deal with tangled roots.
Gently untangle the roots before repotting the plant so it can absorb nutrients and moisture from the soil for healthy growth. Poor soil quality can cause stunted growth and prevent the plant from producing new leaves. Root-bound plants can also show signs of droopy leaves, stunted growth, or yellowing of leaves. When you see the above signs, it's time to take action and repot your plant.
Keep reading for a great DIY Monstera potting mix!
Monstera Plants Care Guide

Image credits: Sunshower Shots via Shutterstock
While Monsteras are hardy and don't need much care, you should consider a few things before growing one.
1. Fertilizer
Monsteras grow fast, so they don't require frequent fertilizers. However, during spring and summer, fertilize your plant biweekly with a diluted dose (¼ of the recommended dose) of liquid fertilizer or fish emulsion. Don't fertilize Monsteras during winter.
2. Lighting
Monsteras need warmth and medium to high amounts of indirect sunlight to thrive. To ensure your plant grows evenly on all sides, you'll need to rotate it occasionally, so every part of your giant plant receives plenty of indirect sunlight.
Photosynthesis starts when your plants receive those golden rays, but if your monstera leaves have dust, they won't benefit from the light, affecting their photosynthesis process. To help your plant photosynthesize properly, ensure you dust the leaves every two weeks.
3. Pests
When it comes to pests and diseases, Monsteras are usually disease-free if they're growing outdoors. If you live in hot climatic regions, your plants may attract lubber grasshoppers that can destroy the leaves.
In some countries, rats, squirrels, rabbits, monkeys, and other while creatures can wreak havoc on Monsteras. If this is your situation, place wire cages around your plant to protect it from damage. Monsteras growing indoors may struggle from scale insects, thrips, mites, and mealybugs.
4. Watering Schedule
Monsteras are fairly drought-tolerant and don't require frequent watering, especially since they often grow in the shade, away from direct sunlight. When it's too hot, your plant will need a drink, but don't overdo it, as overwatering can cause root rot.
5. Diseases
If you spot yellow leaves, wilting, or branch dieback, your plant suffers from Phytophthora infection. If you see stunted growth, browned tissues, or dying seedlings, your plant is battling Rhizoctonia solani, a lethal pathogenic fungus. After identifying root rot, you can use household items to eliminate it.
DIY Monstera Potting Mix

Image credits: Iryna Imago via Shutterstock
Monsteras require a light, porous mix that you can DIY at home. You will need the following ingredients:
|
2 parts Coco peat |
A sustainable substitute for peat moss. Coco peat has amazing water retention abilities and a neutral pH. There are other alternatives to peat moss in case you can't find coco peat. |
|
1 part Pumice |
Added to mixes to enhance drainage. You can use pumice for long-term planting because it decomposes much slower than perlite. |
|
¼ part Orchid Bark |
Helps greatly with water retention and aeration. |
|
¼ part Activated Charcoal |
Helps soak extra moisture and keeps pests away. |
|
¼ part Lava Rock |
Often used as a soil topper in landscaping. Enhances drainage and aeration when mixed in soil. |
|
¼ part Worm Castings |
Amazing natural slow-release fertilizer. |
Method:
First, add moisture to the coco peat and set aside. Take a big container and mix all the other ingredients together by hand or using a hand trowel. If you use your hands, please wear your gardening gloves. Add the coco peat to the blend and mix again thoroughly.
Now pick your pot, punch some drainage holes and layer your DIY Monstera potting mix. Place your Monstera in the pot and top it off with your DIY potting mix. For a couple of days, water your plant sparingly and keep it away from direct sunlight.
If making your DIY Monstera potting mix isn't possible, you can consider Miracle-Gro's Tropical Potting Mix for your repotting needs.
Repotting Deliciosa!
While Monsteras are hardy plants that require very little maintenance, you'll still need to keep an eye out for signs that it needs repotting. Yellowing leaves, roots poking through the pot's drainage holes, and stunted growth show that your plant needs a bigger pot.
Hopefully, the article was helpful to you! Leave your experiences, thoughts, and questions in the comment section, and share the article if you like it.
Happy Gardening!