The AeroGarden is a lifesaver for anyone who wants to grow veggies indoors and needs a little help with caring properly for the plants. Timers, reminders, and so much more make this a great solution for indoor gardening in a small space.
For Christmas, my mother-in-law purchased one for my husband and me to boost our indoor gardening options. Since we have a cat who has a weird affinity for lettuce and fruiting vegetable plants, we have kept it in our little indoor greenhouse. Since we first started planting the pods, we’ve harvested almost more lettuce than we can eat before it wilts and goes bad. That means, if you’re into getting lots of bang for your buck, you’ve found your winner right here.
What Is an AeroGarden?
The AeroGarden is a hydroponic garden device that’s small enough to be kept indoors in almost any space – even a studio apartment. Hydroponics is the technology of using water (hydro) and a system (ponics) specifically designed for the purpose of growing plants without soil.
There are several different models of the AeroGarden, designed to suit different planting needs and garden sizes.
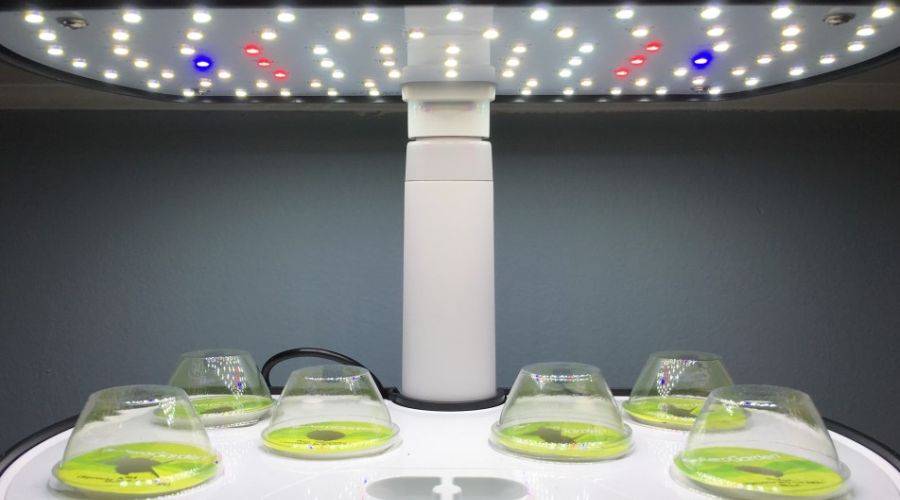
How Does an AeroGarden Work?

Image credits: Claire CJS via Flickr
As mentioned, the AeroGarden is a hydroponics system that uses water, not soil, to grow plants. The concept is based on the needs of plants as water, light, and nutrition. Soil is just a carrier of water and nutrition, so the concept translates into the medium (which is much less messy than soil).
The AeroGarden itself uses a water chamber, over which “pods” of growing medium (with seeds in them) are suspended. Plant food is added to the device every so often (with lettuce, it’s two weeks between feedings, for example), water levels are maintained, and lights are set to keep the plants lit for a designated period.
The AeroGarden also eliminates the need for insecticides, meaning your plants are even healthier for you to eat, as well.
How to Use an AeroGarden
Using an AeroGarden, at least initially, is extremely easy to do. You’ll need to unbox and unwrap everything of course, but then, depending on the model and the plants you’ve chosen to grow, do a few simple things to get things going.
First, you’ll want to unwrap your growing pods and place them into the slots as designated. Keep in mind the type of plants you’re growing. If they spread out, you won’t want to plant something in every single slot but spread them out a bit more for better growth. Add water to the line.
Follow the directions for your specific pods to determine how long to set the lights for each day and how often to add the food (you’ll start off adding some initially).
There are two timers on the AeroGarden – one for the food, and one for time planted. You’ll be able to track how long plants have been growing and when you need to add more plant food with just a few quick button clicks.
What Can You Grow in an AeroGarden?

There are a lot of things you can grow in your AeroGarden. My particular favorite is lettuce, but I might be biased. Both my husband and my cat love the lettuce grown in there and we eat salad two or three times a day.
For those less fond of lettuce, an assortment of other options include:
- Tomatoes
- Celery
- Bush beans
- Okra
- Dwarf peas
- Eggplant
- Peppers
- Strawberries (specific models only)
- Cucumbers
- Watermelon (challenging)
- Herbs, including mint, tarragon, basil, rosemary, chamomile, parsley, thyme, sage, cilantro, oregano, chives, dill, marjoram, basil
- Other leafy greens like mustard greens, swiss chard, bok choi, kale, collard greens
- Flowers like lavender, pansies, wildflowers, petunias, celosias, mountain meadows
Unfortunately, no root vegetables can be grown in the planters.
Germination and Harvest Times

Image credits: a rancid amoeba via Flickr
Plants in the AeroGarden grow up to five times faster than other gardening methods, meaning their germination and harvest times are moved forward rapidly.
Typical germination times:
- Salad greens: 5-8 days
- Flowers: 7-12 days
- Herbs: 5-15 days
- Fruiting vegetables like tomatoes: 7-10 days, then 45 days to blossom, then 1-2 weeks to begin fruiting
Typical harvest times:
- Salad greens: 21 days
- Flowers: N/A
- Herbs: 21 days
- Fruiting vegetables: 100 days
How to Clean an AeroGarden
You can clean your planter with either a white vinegar and water solution (best for those avoiding chemicals or if you have plants in the garden currently) or bleach and water. You can also do spot cleaning or a deep clean, depending on the stage you’re in planting.
For those with plants currently growing, mix some white vinegar and water together and use a paper towel to spot clean around the plants.
For those looking to start their garden or replant with new plants, you might want to consider the soaking method with the bleach and water solution.
Be sure to keep electronic components dry while you clean, but if something does get wet, allow it time to fully dry before attempting to re-engage the garden with an outlet.
If you need a bit more in-depth information on this, review a full tutorial for your deep cleaning needs.
AeroGarden Pruning Tips
- Prune often and prune early, especially with any fast-growing herbs, like basil, or larger bushy plants like tomatoes.
- Prune horizontal growth to prevent the plants from blocking out light for others.
- Only prune at the leaf joint to prevent damaging the herbs.
- Prune no more than a third of the plant at a time.
- If you prune the newest growth on basil, more leaf growth will occur and stem growth will lessen.
- Remove pieces with long stems and few leaves from mint and thyme to keep the plants bushy.
- Rotate your pods as you prune and grow, keeping the fullest side of the plants outward and thinnest sides inward.
- Prune basil, dill, and mint more frequently than other herbs to keep them healthy and growing well.
- Make sure you keep your plants pruned back to at least two inches beneath the grow lights.
- Trim back thicker plants to keep equal lighting available to thinner plants.
Harvesting From Your AeroGarden
The methods for harvesting depend solely on the plants you’re growing.
For lettuce: You may either clip off the top third of the leafy greens with scissors or pinch off the leaves at the base of each, one leaf at a time.
For tomatoes: During weeks 9-12, you’ll notice tiny green tomatoes starting to grow and turn orange. When they hit red and are firm but not hard to the touch, they’re ready to harvest. Simply snip the tomato off and let it drop into your hand.
For herbs: Once there's enough foliage on the plants to support growth, you can start harvesting your herbs. Snip the plants with clean gardening scissors, making sure you leave at least two-thirds of the plant intact. Ideally, harvest the herbs first thing in the morning (or as the lights come on) for the best flavor.
For flowers: Prune or “harvest” flowers that have fully opened – especially edible flowers. Think of these like fruit – you don’t want them to get “overripe.”
AeroGarden Tips

Image credits: Demmer S via Flickr
Some things you may want to keep in mind as you get that AeroGarden going.
- If you accidentally turn off the lights during a light cycle, just lightly brush the light button again. The light should come back on. If not, push the button. The light will keep to its normal schedule.
- Be sure to check the instructions on your pod packing every time you plant new ones. Look for specific days to set things to, change light settings to the right timers, etc., as recommended on the packaging. It’s a nearly fail-proof way to grow those plants with little maintenance.
- If you wish to grow something that doesn’t come in a pre-made kit (such as watermelon), get yourself some “grow anything” pods or make your own.
- Pollination is still important. AeroGarden provides some great tips for how to do this well.
- Blinking lights on your planter means it’s time to add water or plant food.
- Strawberries can’t be grown in all models, so if that’s your goal plant, make sure the one you’re getting works for these luscious red berries. You’ll also need the proper grow bowl for the fruit.
- Tap water is usually fine – just keep an eye out for yellowing or browning leaves. This may be a sign that there’s something in that water that’s not so great for the plants.
- If you notice discoloration of leaves, try using filtered water instead and check the light settings – make sure the right setting is still selected.
- Aim for plants around the same size as each other. The taller ones will block out light for the shorter ones.
- Prune, prune, prune! That pruning keeps the plants healthy and happily absorbing all that glorious light.