Have you started your own backyard compost this year? Are you looking for tips on how to maintain it during the winter? Well, look no further!
Composting is a great and eco-friendly way to replenish your garden with nutrients, discard of kitchen scraps, and rid of fall leaves and grass clippings. It also gives you a change to minimize your carbon footprint. While you may think winter composting is unnecessary, just wait and see what benefits it can bring to your yard! Here is an easy guide to get you started on the process.
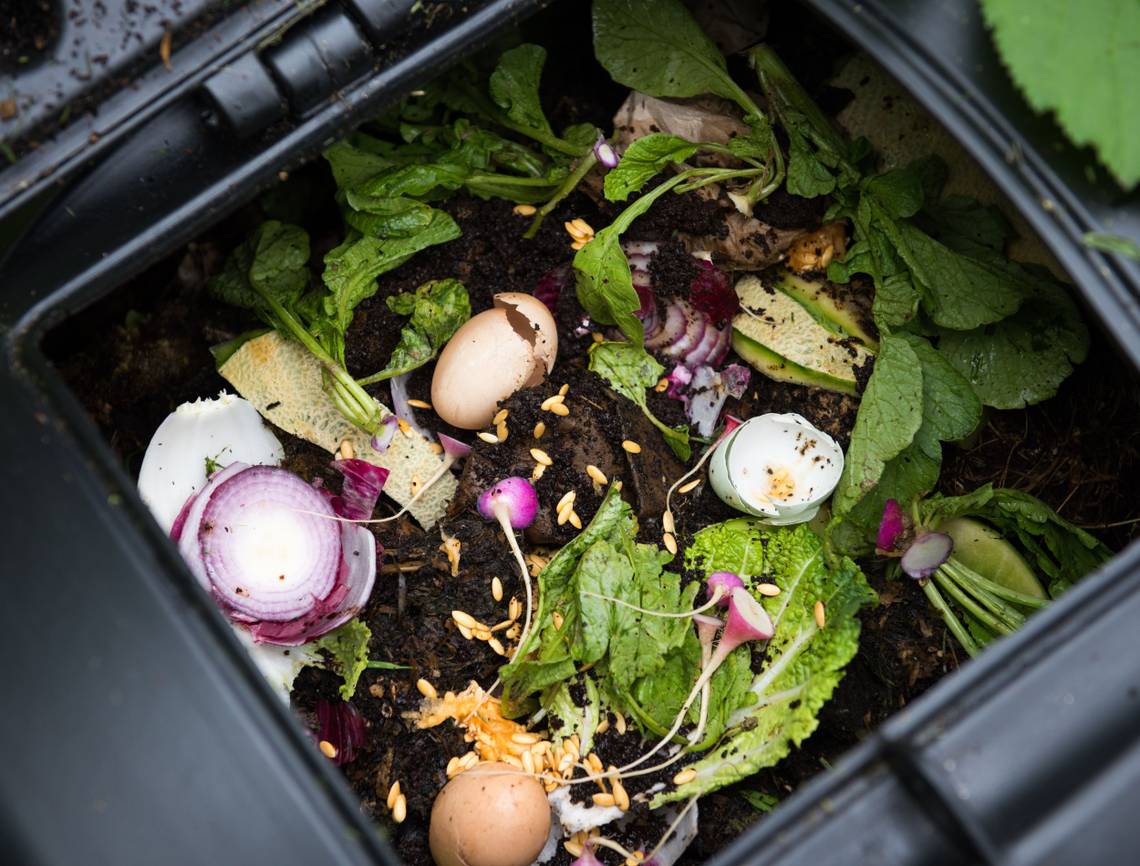
What You Will Need

Image credits: Skorzewiak via Shutterstock
What you'll need to continue composting during the winter months will depend on the style of compost pile you're working with. An outdoor compost pile, or one that is unmovable, will require more work and insulation. Whereas a compost bin that can be lifted or moved, such as a tumblr, have less maintenance.
Here is a list of all the supplies that you may need to carry out the steps below.
- Hay bales
- A utility tarp
- Rope or utility straps to secure your tarp
- Brown materials (fall leaves, paper, twigs, etc.)
- Compost activators (coffee grounds, grass clippings, blood meal, horse manure, etc.)
- Small bucket with a lid
Step One: Empty Out What You Already Have

Image credits: jokevanderleij8 via Pixabay
Before the first signs of winter hit, take the time to remove your finished compost from your composter. Removing the finished material will ensure that you have plenty of room for all your compostable materials throughout the winter season. This can be used to prepare your garden beds, replenishing nutrients and providing protection from the cold.
However, leave a handful behind to mix in with your new waste. By introducing the microorganisms from your existing compost pile to your winter compost, you will give the process a head start.
Step Two: Reposition Your Composter

Image credits: JurateBuiviene via Shutterstock
If you have a compost tumbler or bin that can easily be moved from one spot to another, be strategic with the placement during the winter months.
Look around your property for a location that receives as much sunshine as possible. You also want to offer protection from the winter winds - placing it up against the side of your house is a good spot. This will help to keep your pile warm and prevent freezing, allowing it to continue working its magic despite the cold temperatures. If possible, move your composter into an enclosed porch, shed, or garage space.
If you have an outdoor compost pile that is unable to be moved, then you will need to find a way to insulate your compost and shelter it from the weather. One of the easiest insulation options is to build up walls around the compost pile using hay bales.
Build the walls up high enough that you still have space to add composting material at any time. A tarp or old carpet can then be tied over the top to keep out any rain or snowfall. Make sure to select a darker-colored tarp to help add some additional heat to the space. Be sure to secure your tarp in a way that you can still access the pile easily when adding your kitchen waste in the coming weeks.
Step Three: Add Additional Brown Materials

Image credits: Laura Bartlett via Shutterstock
To create the ideal environment in your compost pile you need to keep the right balance of green materials and brown materials. Green materials provide high levels of nitrogen and protein, encouraging the microorganisms that break down your organic materials to grow and multiply. Some examples of green materials include grass clippings, vegetable and fruit scraps, plant trimmings, and eggshells.
Meanwhile, the brown materials are rich in carbon and carbohydrates, bulking up your compost pile while providing a source of food for these much-needed microbes. Some examples of brown materials include pine needles, fall leaves, twigs, paper, and dryer lint.
By adding extra brown materials to your pile, you can bulk it up and reduce the moisture levels in the pile. This is important as any excess moisture will be more likely to freeze, putting an end to the decomposition process.
Pro Tip: Be aware that materials like twigs can create air pockets within the pile which help to provide additional insulation. Good aeration is crucial for a healthy compost so don't remove them!
Step Four: Add Compost Activators

Image credits: DGLimages via Shutterstock
When you notice the temperatures starting to drop and the cold weather moving in, it’s time to take action. Adding some compost activators to your pile can kick start the process.
Compost activators are high-nitrogen materials including coffee grounds, blood meal, bone meal, grass clippings, horse manure, and chicken droppings. These materials can be harder to come by during the winter months, so it’s always a good idea to keep extra on hand. For example, when you mow your lawn, throw the clippings in your compost!
While you don’t want to include too many of these materials on a normal basis, the colder temperatures can cause your compost to struggle or be sluggish. Whenever you notice this happening, add a little more of the compost activators to encourage more activity once again.
Step Five: Adjust Your Composting Schedule

Image credits: Onfokus via Canva
During the year, it’s not at all uncommon to bring your food scraps out to your compost bin after every meal. Doing this, however, is going to disturb your pile more frequently by allowing cold air to entire the pile. By opening your compost bin or pulling back your tarp covering, you're doing more harm then good.
Instead, store a small bucket with a lid in your kitchen, emptying it into the compost bin once a week or whenever the bucket becomes too full. In addition to changing how often you bring your waste to your winter compost pile, it's also recommend to cut your kitchen scraps into smaller pieces.
The microbial activity in your compost isn’t as active during lower temperatures, making it take longer for the pile to break down. By cutting the scraps up, you're aiding the decomposition process.
Step Six: Avoid Turning Your Compost Pile

Image credits: Permaculture Apartment Images via Canva
When summer composting, it is recommended to turn your compost pile regularly to ensure everything mixes properly. However, this can be disruptive to your compost during the winter.
Each time you turn your compost, you are allowing the heat created by the breakdown of organic matter to escape. For this reason, most gardeners recommend holding off on turning your compost pile until the spring.
This doesn't mean you shouldn't check on your compost. If you do notice that your compost pile has too much moisture and is at risk of freezing, consider adding dry leaves or other brown materials. This will help to absorb the moisture.
Enjoy the Benefits of Winter Composting
Stop avoiding composting! It's not as troublesome as you may think, especially during the colder months. Now, is the perfect time to get started on a compost pile in your backyard.
If you already have a compost, make sure you take the proper measurements to ensure it stays fresh and healthy. Remember to keep it warm, turn it infrequently, resist opening the container, and add those activators! If you also keep an eye on the moisture content its clear you paid attention to this article.
So, is winter composting the right move for you? It's a great way to prepare for spring. Leave a comment below on how your compost is bearing!